Frequently Asked Questions
These are some of the most frequent questions customers ask us when setting up
their new Hammer. For any other questions related to the cutting quality of your
machine, please work through the Basic Machine Check setup process first to find or
eliminate the cause of the issue. Of course, if the answer to your question cannot be
found within this Machine Setup Guide or the Operation Manual, you can always
contact your Hammer Service Department.
Machine Won’t Turn On
Try asking yourself a few basic questions to eliminate some of the possible reasons
for the machine not starting:
¾
Are the emergency stop buttons still depressed? If so, you need to twist them
slightly to make them ‘pop’ back out again.
¾
Are the access doors closed correctly and have you placed the corresponding
switches (where applicable) in the correct place?
¾
Is the main switch on?
¾
Are you pressing the start button for long enough (single phase machines in
particular)?
¾
For full combination machines, is the selector switch engaged correctly and for
the machine unit you are trying to use?
¾
Is there power coming from the mains supply? Are all the trip switches okay?
¾
Is the machine wired up correctly?
Motor
R
otation is
B
ackwards (3 phase
M
achines
O
nly)
Swap two phases of the power supply cord. The electrical compartment may not be
opened without the express instruction of the Hammer service department. This
would otherwise void the warranty.
Saw Burns the Workpiece
The freecut is not setup properly. Which side does it burn on – Rip fence side (when
cutting off the rip fence) or on the crosscut side (when cutting off the crosscut fence)?
See
SS01 Freecut From the Sliding Table
or
SR04 Rip Fence Freecut
for details of
the correct alignment and links to the adjustments.
16.FAQ'
s
Any other questions?
Please feel free to contact the FELDER GROUP service department.
Summary of Contents for Hammer
Page 1: ...Machine Setup Guide InstallVersion1 09...
Page 5: ...15 Completion You re Good To Go 16 FAQ s 17 Links Contact Details Contents 3...
Page 32: ...The rip fence side is complete 11 Assembly...
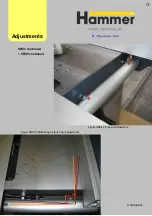
Page 74: ...Figure SS03 2 End position 2 Adjustments Alignme nt Link SS03 continued...
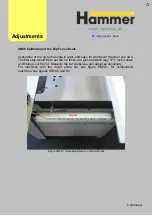
Page 79: ...Figure SS07 3 Crosscut stop and block adjustment Adjustments Alignme nt Link SS07 continued...

