QX1000 Manual II: Administrator's Guide
Administrator’s Menus
QX1000; (SW Version 5.3.x)
58
Upload new call queue welcome message
allows updating the active call queue welcome message for the agents group (played when a caller
joins the agents group call queue), downloading it to the PC, or restoring the default one.
The
Remove call queue welcome message
functional link appears only when the custom call queue welcome message is already uploaded and is
used to remove it and restore the default call queue welcome message.
The
Download call queue welcome message
functional link appears only when the custom call queue welcome message is already uploaded and
is used to download it to PC and opens the file chooser window where the saving location can be specified.
Customize Queue Scenario
settings are used to define a custom scenario for audio files played in the ACD queue. Here you may upload custom
audio files and to define the sequence in which they will be played for the person in the queue. My selecting this option, the default ACD queue
messages will be replaced with the scenario defined below.
Custom Queue Messages
table lists all audio files in the custom queue scenario and allows you to add new field. Each audio file is characterized
by the number of repeats and the timeout when it should start. The audio files may be ordered in the list with
Move Up
and
Move Down
functional
buttons. The custom queue will start with the first audio file in this list and will be played in the loop in the order audio files are listed.
The
Add
functional button opens an
Add Entry
page
where a new audio file can be defined. This page consists
of the manipulation radio buttons selection to allow upload
a new audio file or to select an already uploaded one.
•
Existing File
– this selection is used to choose one
of the already uploaded custom queue messages to
include in the scenario. The same file may appear in
the different instances of the queue music.
•
Upload New File
– used to upload a new audio file.
The uploaded files should to be in PCMU (CCITT u-
law, 8 kHz, 8 bit Mono) wave format, otherwise the
system will prevent uploading it with the “Invalid
audio file, or format is not supported” warning
message.
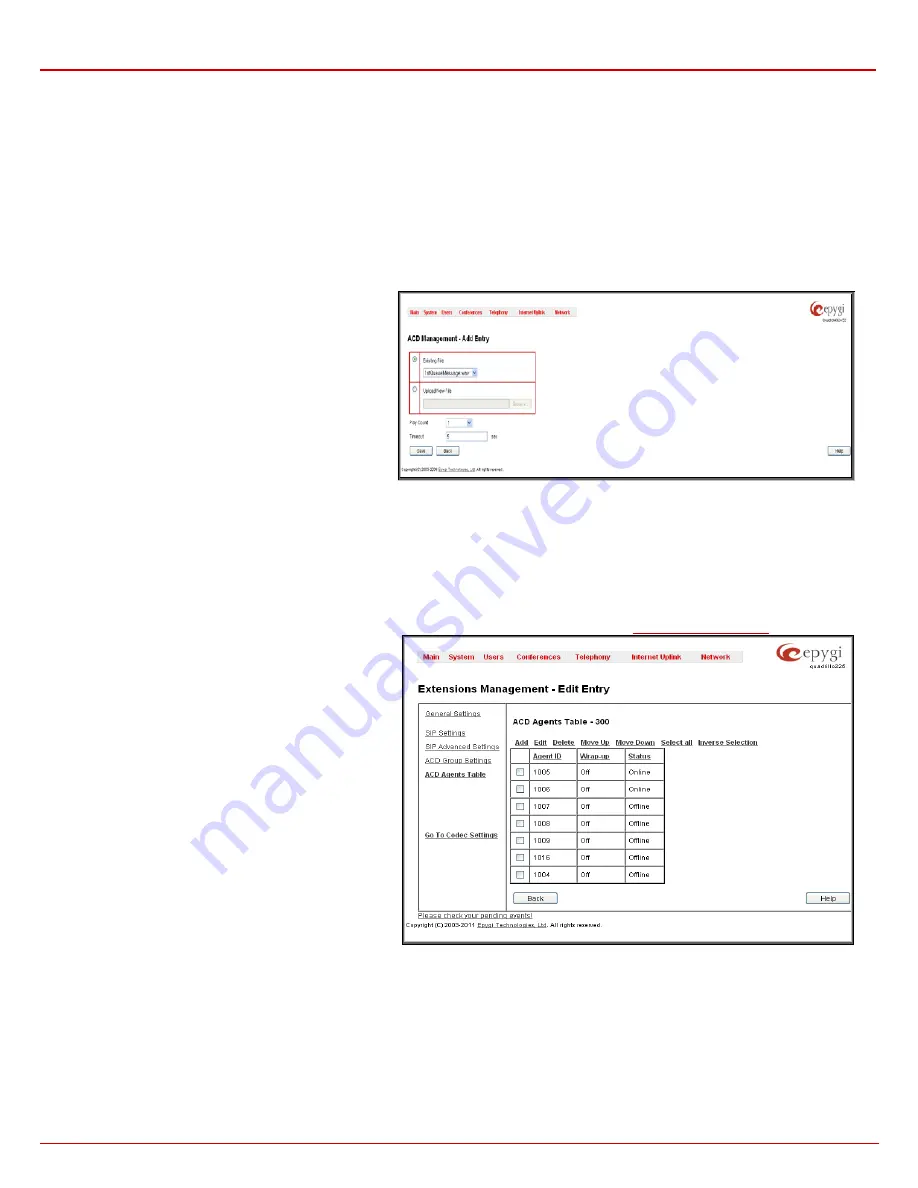
Fig. II-99: Extensions Management - Edit Entry – ACD Group Settings – Add Queue Message page
Attention:
You should have enough memory allocated to the corresponding extension (from General Settings) in order to be able to upload
audio files; otherwise error message prevents uploading new files.
Play Count
indicates the number of times the corresponding audio file will be played continuously in the queue.
Timeout
indicates the timeout (in seconds) between the end of the previous queue audio file in the scenario (if any) and the beginning of the current
audio file. For the first audio file in the list, this timeout indicates the interval between the beginning of the queue and the beginning of the current
audio file’s playback.
Play Background Music
checkbox is used to fill in the timeout intervals between the audio files in the scenario with the background music. This
option requires you to choose a RTP Channel of broadcast streaming. The RTP channels are created from
page.
3.
ACD Agents Table Settings
This group is used to configure agents in the ACD group
and has the following components:
The
ACD Agents Table
lists all agents in the corresponding
ACD group and their statuses.
Add
opens the
Add Entry
page where a new agent may be
added to the group. The
Add Entry
page contains the
following components:
Fig. II-100: Extensions Management - Edit Entry – ACD Agents Table page


