QX1000 Manual II: Administrator's Guide
Administrator’s Menus
QX1000; (SW Version 5.3.x)
64
The
Main menu
page consists of the following components:
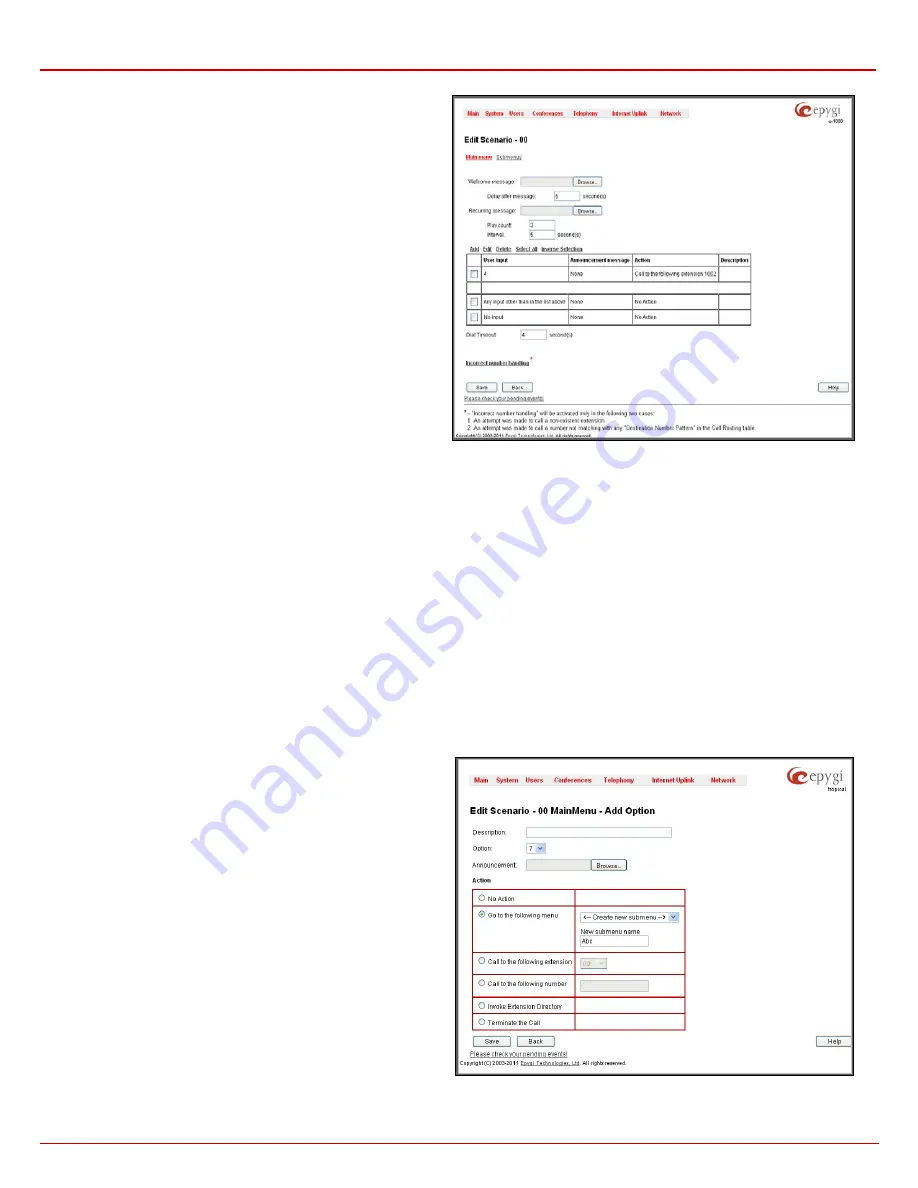
Welcome message
indicates the file name used to upload a new
custom Auto Attendant welcome message. The Auto Attendant
Welcome message
will play only once when callers enter the
Customized Auto Attendant.
Delay after message
requires the delay (in seconds) after which the
Recurring message
will be played.
Recurring message
indicates the file name used to upload a new
custom Auto Attendant recurring message. The Auto Attendant
Recurring message
will play after the Attendant
Welcome message
(if it is uploaded).
Play Count
text field indicates the number of times the corresponding
Recurring message
will be consecutively played to the caller.
Interval
requires the time period (in seconds) between consecutively
played
Recurring messages
.
Browse
opens the file chooser window to browse for a new custom
welcome or recurring message file.
Press the
Save
button to submit the changes or use
Back
to keep the
initial data.
Fig. II-107: Create scenario-Main menu page
Attention:
The uploaded file needs to be in PCMU (CCITT u-law, 8 kHz, 8 bit Mono) wave format, otherwise the system will prevent uploading it
and the “Invalid audio file, or format is not supported” warning message will appear. The system also prevents uploading if there is not enough
memory available for the corresponding extension and the “You do not have enough space” warning message will appear.
The
Download
and
Remove
links appear only if a file has been uploaded previously. The
Download
link is used to download the message file to
the PC and opens the file-chooser window where the saving location may be specified. The
Remove
link is used to restore the default welcome
message.
The
User Input Options
table is for configuring the action to be taken based on one of the following user choices:
•
User Input
•
Any input other than in the list above
•
No input
The user will press one of the following input options on the phone to activate the corresponding action. The option can be selected after reaching
the Auto Attendant Service and after the
Welcome
and/or
Recurring messages
have been played.
The
User Input
table consists of the following functional buttons:
Add
opens the
Add Option
page where the actions for previously unspecified inputs can be configured.
Add
link opens the
Add Option
page where the actions for previously
unspecified inputs can be configured.
Edit
link opens the
Edit Option
page where the actions of previously
configured
User Input
options can be adjusted.
The
Add/Edit Option
page offers the following components:
Description
– text field for an optional description of the option.
Option
is used for choosing the user input for which some
announcement and/or action should be configured. The following
input options are available in the list to configure the
Customized
Scenario
:
•
Digits (in a range from
0
to
9
)
•
Signs (“
*
” and “
#
”)
Announcement
indicates the file name used to upload a new custom
message. When the caller selects the option configured in the
Option
drop down list, this message will be played once before the
Action
will be activated.
Fig. II-108: Upload Custom Voice Messages page


