4.1.5 Black - Color Head Vertical Adjustment
This adjustment calibrates the vertical position between the black head and the color head. Align
the top nozzles (both nozzle #1 on the black head and nozzle #1 on the color head). You can make
this adjustment by using only the linear spacers for the black head. This adjustment is required
when the black head or the color head is replaced or disassembled. The following figure illustrates
this adjustment.
1.
Connect the PC to the target printer, and turn the printer on.
2.
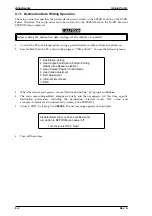
Execute BASIC on the PC and run the program “VERxxx.BAS”.
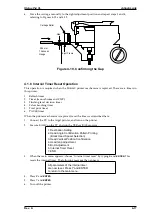
1. Destination Setting
2. Head Angle Confirmation Pattern Printing
(Black Head Spacer Selection)
3. Head Vertical Position Confirmation
4. Head Gap Adjustment
5. Bi-D Adjustment
6. Internal Timer Reset
7. END
3.
When the main menu appears, choose “Head Vertical Position Confirmation” by typing
3
and
ENTER
. (The printer prints the check pattern, along with the sample name.)
WARNING
When replacing the black head, always adjust the black head angle first, because the black-
color head vertical adjustment is based upon the black head angle.
# 1
# 2
# 1 6
# 1
# 2
# 4
# 5
# 6
# 3
# 8
# 9
# 6 1
# 6 2
# 6 3
# 6 4
# 7
Carriage Unit
Adjust
Colo r Head
Blac k Head
Vertical Position
Vertical Position
Ma g en ta C y a n Yellow
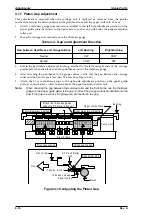
Figure 4-8. Black-Color Head Vertical Adjustment Concept
- 5
- 4
- 3
- 2
- 1
OK (0)
+ 1
+ 2
+ 3
+ 4
+ 5
Magenta
Blac k
2-3 BLA CK HE AD S PA CER S ELE CTIO N
Figure 4-9. Linear Spacer Selection Sample
Stylus Pro XL
Adjustments
Rev. A
4-9
Summary of Contents for Stylus Pro XL
Page 1: ...EPSON COLOR INKJET PRINTER Stylus Pro XL SERVICE MANUAL EPSON 4004677 ...
Page 93: ...Rev A 5 i ...
Page 127: ...EPSON ...

