EPSON Stylus Pro 7500
Revision A
Adjustment
Adjustment Steps
222
5.2.6.3 P THICK Sensor Assembly Adjustment
When removing/replacing the P THICK sensor, verify the sensor operation using the Self-
Diagnostic mode as described below.
1.
Remove the Top Cover as described in Chapter 4.
2.
Press the following buttons and turn on the printer to enter the Self-Diagnostics mode.
[Paper Feed
↓]
+
[Cut/Eject]
+
[Cleaning]
3.
Press the SelecType or Item button until "Check: Test" appears in the LCD, then press
the Enter button to select the Test menu.
4.
Press the SelecType or Item button until "Test: Sensor" appears in the LCD, then press
the Enter button to select the Test Item menu.
5.
Press the SelecType or Item button until "Sen: Paper xxxx" appears.
6.
Push back the Paper Set Lever to the "Release" position, and verify that "Sen: Paper
Thick" appears in the LCD.
7.
Insert a schema gauge (0.6mm/0.7mm) between the set of PF Grid Rollers and Driven
Rollers nearest the HP. Return the Paper Set Lever to the "Set" position. The LCD
message will vary according to the schema gauge as shown in the table below.
8.
If the correct message does not appear or any other message appears, verify the
P_THICK sensor is installed correctly and check the operation again.
9.
Turn the power switch Off, then after disconnecting the power cable, install the H top
cover.
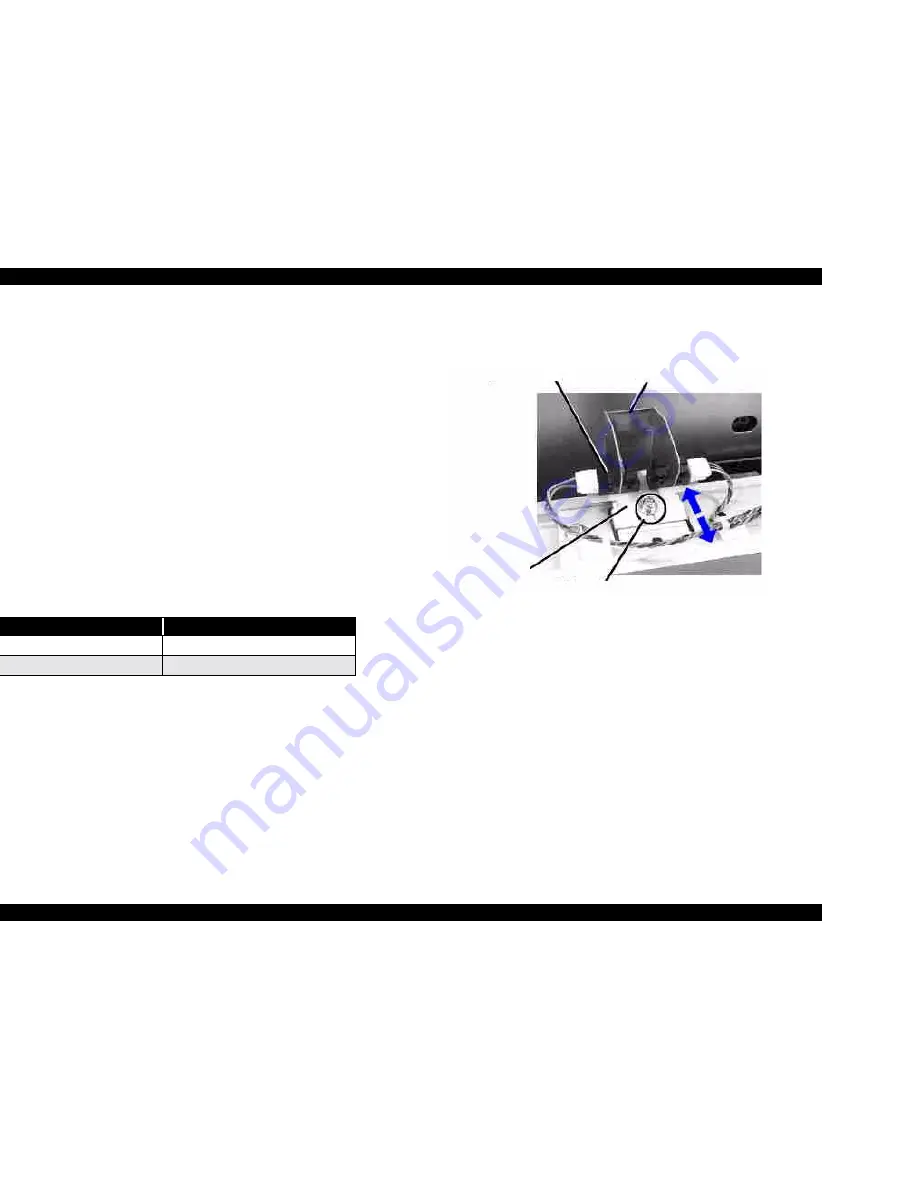
Figure 5-46. P THICK Sensor Position Adjustment
Table 5-20. P THICK Sensor Operation Check
Schema Gauge
LCD Message
0.7mm (thick paper)
Sen: Paper Wide
0.6mm (standard paper)
Sen: Paper Std
Detect arm
P_THICK sensor
screw(M3x6)
sensor mounting board
Summary of Contents for Stylus Pro 7500
Page 1: ...EPSONStylusPRO7500 Color Large Format Inkjet Printer SEIJ00005 SERVICE MANUAL ...
Page 6: ...Revision Status Revision Issued Date Description Rev A August 31 2000 First Release ...
Page 10: ...C H A P T E R PRODUCTDESCRIPTION ...
Page 57: ...C H A P T E R OPERATINGPRINCIPLES ...
Page 75: ...C H A P T E R TROUBLESHOOTING ...
Page 95: ...C H A P T E R DISASSEMBLY ASSEMBLY ...
Page 169: ...C H A P T E R 0 ADJUSTMENT ...
Page 192: ...PSON Stylus Pro 7500 Revision A djustment Adjustment Steps 192 Figure 5 13 Adjustment Menu ...
Page 235: ...C H A P T E R MAINTENANCE ...
Page 241: ...C H A P T E R APPENDIX ...
Page 258: ...PSON Stylus Pro 7500 Revision A ppendix Exploded View Diagram 258 Figure 7 2 Frame Assembly ...
Page 260: ...PSON Stylus Pro 7500 Revision A ppendix Exploded View Diagram 260 Figure 7 4 Head Assembly ...
Page 262: ...PSON Stylus Pro 7500 Revision A ppendix Exploded View Diagram 262 Figure 7 6 Frame Accessory ...
Page 265: ...PSON Stylus Pro 7500 Revision A ppendix Exploded View Diagram 265 Figure 7 9 Cable Guide ...
Page 267: ...PSON Stylus Pro 7500 Revision A ppendix Exploded View Diagram 267 Figure 7 11 Cover Assembly ...
Page 272: ......
Page 273: ......
Page 274: ......


