This chapter explains how to control the printer. It is divided
into these sections:
❑
“Managing Print Jobs” explains how you can use the
EPSON Spool Manager, Despooler, and Status Monitor
(Windows 95 only) to monitor, cancel, or change the order
of print jobs.
❑
“Using the Printer’s Control Panel” covers the printer
functions available through the control panel on the
printer.
❑
“Using the Default Setting Mode” describes how to access
the printer’s Default setting mode. In rare cases, you may
need to use this mode to specify the print direction, use a
different character table, or adjust the paper loading
position.
Managing Print Jobs
The EPSON Spool Manager was automatically copied to your
hard disk drive when you installed the printer software. When
you print a document, the printer uses the EPSON Spool
Manager to send data to the printer. This allows you to
continue working in your software program while printing.
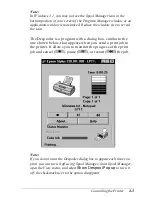
When you send a print job to the printer, the Despooler dialog
box appears on your screen and a Spool Manager icon
(Windows 3.1) or button (Windows 95) appears near the
bottom of your screen. You can also access Spool Manager from
the EPSON program group or folder so you can manage print
queues or perform other operations when you are not sending
a print job. (See Spool Manager’s online help utility for more
information.)
4-2
Controlling the Printer


