125
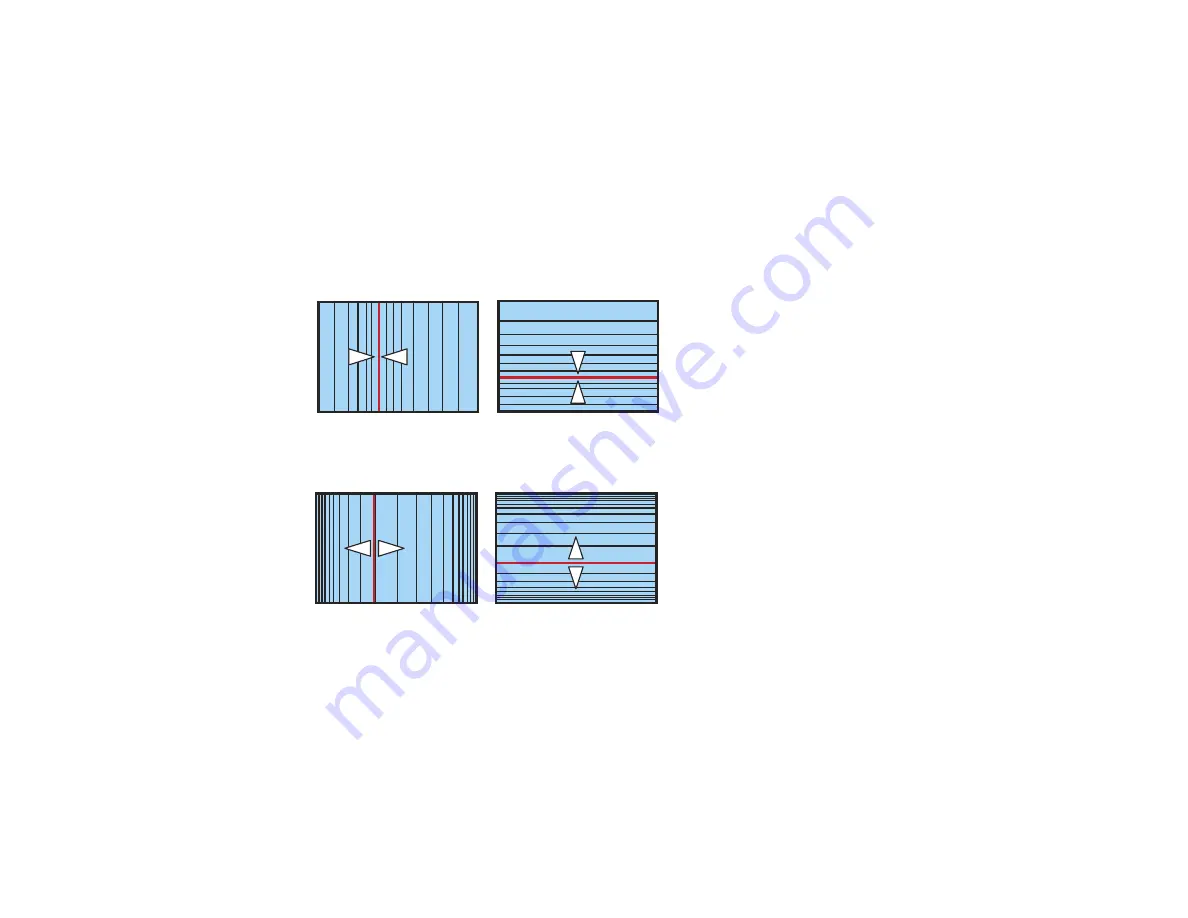
If the image expands or contracts, continue with the next step to adjust the linearity.
12. Select one of the following from the Curved Surface menu screen:
•
Horizontal Linearity
: Adjusts horizontal expansion or contraction.
•
Vertical Linearity
: Adjusts vertical expansion or contraction.
13. Select a displayed line to use as a baseline and press
Enter
.
The selected baseline flashes orange and white.
14. Adjust the linearity by doing one of the following:
• Press the left arrow button to contract the distance between the lines closest to the baseline.
• Press the right arrow button to expand the distance between the lines closest to the baseline.
15. When you are finished, press the
Menu
button.
Note:
If necessary, you can adjust the image tilt using the
Quick Corner
setting, then fine-tune your
adjustments using the
Point Correction
setting.
Parent topic:
Related references
Summary of Contents for Pro L1060U
Page 2: ......
Page 10: ...10 A Note Concerning Responsible Use of Copyrighted Materials 315 Copyright Attribution 315 ...
Page 29: ...29 Rear Front ceiling Rear ceiling ...
Page 49: ...49 3 Pull the lens cover off of the projector 4 Remove the stopper if necessary ...
Page 252: ...252 Parent topic Adjusting the Menu Settings Related tasks Running Light Source Calibration ...


