Graphics and the Reset Code
You may have wondered about the semicolon we had you place
after the B$ in line
40.
If this line were text rather than graphics data,
this semicolon would cause the text and the Reset Code
(CHR$(27)“@“)
in line
80
to be placed in the same text buffer and
consequently the Reset Code would wipe the text out. This doesn’t
happen with the graphics command and its data because the
CHR$(27)“K”
command itself dumps everything from the buffer to
the printer. By the time the Reset Code makes its appearance, both the
command and its data are gone.
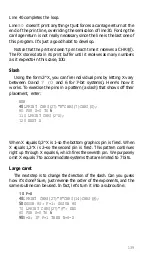
To see this in action, add a line to your program:
50 INPUT A
The INPUT causes the program run to pause for you to see that
the graphics design is printed before the program reaches the Reset
Code in line
80.
To let the program finish, press your carriage-return
key.
There’s an important correlation to note. Anything that was in
the buffer prior to the graphics string remains unscathed, and
anything left behind is erased. To verify this, make these changes in
your program:
35 LPRINT "PROTECTED TEXT";
50 LPRINT "THIS WILL NOT PRINT";
and RUN it once.
In general, you need to remember that the Reset Code doesn’t affect
graphics data, but it may affect companion text.
Graphics and low ASCII codes
Sending the codes between zero and
31
from BASIC can be a prob-
lem when you are printing graphics just as it is when you are printing
text. The problem again is that most computer systems handle some
of these codes in a special way instead of delivering them to the
printer.
For example, one computer system handles form feeds by itself. It
counts lines to keep track of the top of form. If a program sends the
CHR$ command with the number that ASCII designates as the code
144
Summary of Contents for FX-80
Page 1: ......
Page 22: ......
Page 23: ......
Page 26: ......
Page 31: ...Figure 1 1 The FX 80 and FX 100 printers 14 ...
Page 32: ...Figure 1 2 Printer parts 1 5 ...
Page 38: ...Figure 1 8 DIP switch vent 21 ...
Page 42: ...Figure 1 11 Ribbon insertion 25 ...
Page 51: ...Figure 1 20 Paper thickness adjustment 34 ...
Page 85: ......
Page 92: ......
Page 95: ......
Page 97: ...80 ...
Page 109: ......
Page 117: ...Figure 7 3 Staggering STAIR STEPS 100 ...
Page 119: ...Table 7 1 Line spacing commands 102 ...
Page 129: ...112 ...
Page 147: ...130 ...
Page 181: ...Figure 12 4 Corner of the FX 80 design ...
Page 189: ...Figure 12 10 Most distinct version Figure 12 11 Reversed version 172 ...
Page 215: ...198 ...
Page 231: ...214 ...
Page 249: ......
Page 269: ......
Page 272: ...iv ...
Page 283: ......
Page 290: ......
Page 305: ...282 ...
Page 311: ...288 ...
Page 323: ...300 ...
Page 339: ......
Page 343: ...320 ...
Page 349: ...326 ...
Page 353: ...330 ...
Page 354: ...Schematic 331 ...

