149
5.
Right-click the folder you created and select
Properties
.
6.
On the
General
tab, deselect the
Read-only
checkbox to allow users to access the folder over the
network.
7.
Select the
Sharing
tab and click the
Advanced Sharing
button.
Note:
You need to be logged into Windows as an administrator to select the
Advanced Sharing
button.
8.
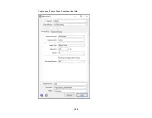
On the Advanced Sharing screen, select the
Share this folder
checkbox.
9.
Click the
Permissions
button and select the following on the Share Permissions tab:
• Select
Everyone
under Group or user names.
• Select the checkbox in the
Allow
column for the
Change
setting.
10. Click
OK
to save the settings, then click
OK
again to close the Advanced Sharing window.
11. Select the
Security
tab and check that the Group or user names list at the top includes the current
computer user and the administrators who can now access the folder.
12. Select the
Sharing
tab again and write down the
Network Path
listed under Network File and Folder
Sharing at the top. This is the path you will register to your product contacts list so you can select it
for network scanning.
13. Click
OK
or
Close
.
Now you can register the path to the folder to your product contacts list.
Parent topic:
Setting Up and Scanning to a Network Folder or FTP Server
Related tasks
Registering Contacts for Email, Network, or FTP Scanning - Control Panel
Registering Contacts for Network Folder or FTP Scanning - Web Config
Scanning to a Network Folder or FTP Server
Registering Contacts for Email, Network, or FTP Scanning - Control Panel
You can register a list of contacts for scanning to email or to a network folder or FTP server.
1.
Press the
home button, if necessary.
2.
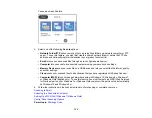
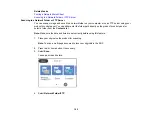
Select
Scan
and do one of the following:
• To create a contact for scanning to email, select
.
• To create a location for scanning to a network folder or FTP, select
Network Folder/FTP
.
Summary of Contents for C11CF74203
Page 1: ...EC 4020 EC 4030 User s Guide ...
Page 2: ......
Page 18: ...18 3 Select General Settings 4 Select Basic Settings 5 Select Date Time Settings ...
Page 29: ...29 Product Parts Inside 1 Document cover 2 Scanner glass 3 Control panel ...
Page 67: ...67 1 Pull out the paper cassette 2 Slide the edge guides outward ...
Page 85: ...85 1 Open the document cover ...
Page 156: ...156 You see an Epson Scan 2 window like this ...
Page 158: ...158 You see an Epson Scan 2 window like this ...
Page 160: ...160 You see this window ...
Page 246: ...246 You see a window like this 4 Click Print ...
Page 255: ...255 Related tasks Loading Paper in the Cassette ...
Page 257: ...257 5 Open the document cover ...
Page 259: ...259 8 Open the ADF cover ...

