142
Related tasks
Entering Characters on the LCD Screen
Registering Contacts for Email, Network, or FTP Scanning - Control Panel
Selecting the Date and Time
Configuring Email Server Settings
Related topics
Placing Originals on the Product
Scanning to a Connected Computer
You can scan an original and save it to a connected computer using your product's control panel. The
computer must be connected using a USB cable or connected to the same network as your product.
You can save the scanned file as a JPEG or PDF file, or attach it to an email. You can also set up
custom scan settings using Event Manager and automatically scan using those settings on your product
control panel.
Note:
Be sure you have installed Epson Scan 2 and Event Manager on your computer before scanning
to your computer.
1.
Place your original on the product for scanning.
Note:
To scan a multi-page document, place all of the pages in the ADF.
2.
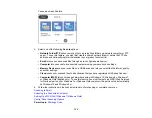
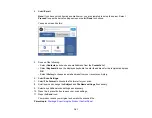
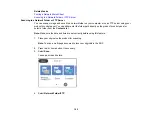
Press the
home button, if necessary.
3.
Select
Scan
.
Summary of Contents for C11CF74203
Page 1: ...EC 4020 EC 4030 User s Guide ...
Page 2: ......
Page 18: ...18 3 Select General Settings 4 Select Basic Settings 5 Select Date Time Settings ...
Page 29: ...29 Product Parts Inside 1 Document cover 2 Scanner glass 3 Control panel ...
Page 67: ...67 1 Pull out the paper cassette 2 Slide the edge guides outward ...
Page 85: ...85 1 Open the document cover ...
Page 156: ...156 You see an Epson Scan 2 window like this ...
Page 158: ...158 You see an Epson Scan 2 window like this ...
Page 160: ...160 You see this window ...
Page 246: ...246 You see a window like this 4 Click Print ...
Page 255: ...255 Related tasks Loading Paper in the Cassette ...
Page 257: ...257 5 Open the document cover ...
Page 259: ...259 8 Open the ADF cover ...

