background image

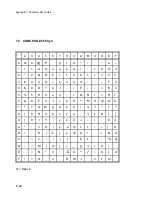
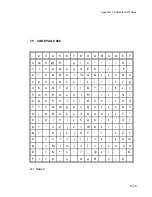
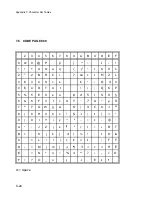
Appendix C Character Set Tables

C-17

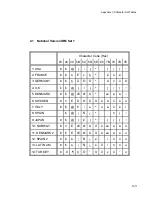
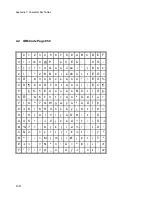
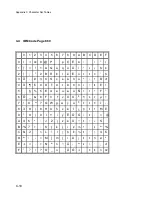
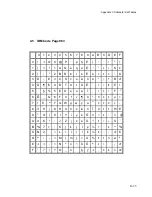
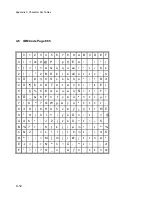
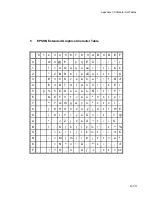
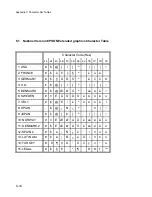
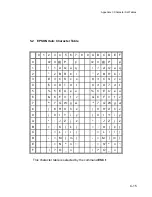
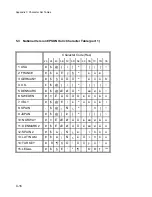
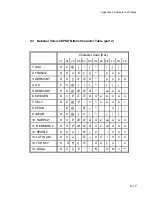
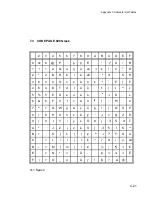
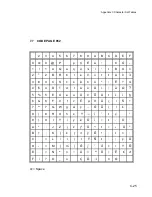
5.3

National Version EPSON Italic Character Table (part 2)

Character Code (Hex)

A3

A4

C0

DB

DC

DD

DE

E0

FB

FC

FD

FE

1: USA

#

$

@

[

\

]

^

`

{

|

}

~

2: FRANCE

#

$

à

E

ç

§

^

`

é

ù

è

¨

3: GERMANY

#

$

§

Ä

Ö

Ü

^

`

ä

ö

ü

ß

4: U.K.

£

$

@

[

\

]

^

`

{

|

}

~

5: DENMARK

#

$

@ Æ

Ø

Å

^

`

æ

ø

å

~

6: SWEDEN

#

¤

É

Ä

Ö

Å

Ü

é

ä

ö

å

ü

7: ITALY

#

$

@

E

\

é

^

ù

à

ò

è

ì

8: SPAIN

.

$

@

¡

Ñ

¿

^

`

¨

ñ

}

~

9: JAPAN

#

$

@

[

¥

]

^

`

{

|

}

~

10: NORWAY

#

¤

É

Æ

Ø

Å

Ü

é

æ

ø

å

ü

11: DENMARK 2

#

$

É

Æ

Ø

Å

Ü

é

æ

ø

å

ü

12: SPAIN 2

#

$

á

¡

Ñ

¿

é

`

í

ñ

ó

ú

13: LATIN AM.

#

$

á

¡

Ñ

¿

é

Ü

í

ñ

ó

ú

14: TURKEY

#

§

¦

Ç

Ö

Ô

Ü

ç

ö

Õ

ü

15: LEGAL

#

$

§

E

'

"

`

©

®

Summary of Contents for C I - 4 0 4

Page 1: ...User s Manual C I 4 0 4 0 C I 4 0 5 0 ...

Page 2: ...t care has been taken to ensure that the information in this handbook is accurate and complete However should any errors or omissions be discovered or should any user wish to make suggestions for improving this handbook please feel encouraged to send us the relevant details The contents of this manual are subject to change without notice Copyright by Output Solutions GmbH All rights strictly reser...

Page 3: ...hich the printer will be placed see next page Operating Environment and chapter 1 During a thunderstorm you should never attempt to connect or disconnect any data transfer cables The power supply should only be opened and checked by authorized personnel Repairs and maintenance beyond the descriptions of chapter 4 Maintenance may only be attempted by authorized personnel as well Repairs done inappr...

Page 4: ...no guarantee that interference will not occur in a particular installation If this equipment does cause harmful interference to radio or television reception it can be determined by turning the equipment off and on The user is encouraged to try to correct the interference by one or more of the following measures S Reorient or relocate the receiving antenna S Increase the separation between the equ...

Page 5: ... Automatic only printer CI 4050 Sheet Feeder ASF 30 to 70 Slots and openings in the printer s housing are provided for ventilation Always ensure that these openings are not obstructed Also ensure that the cables at the rear of the printer do not interfere with the output paper path When processing fanfold paper always place the printer with its front edge slightly off the edge of the table ...

Page 6: ...ransport Lock 1 6 S Re packing information 1 6 1 5 Installing the Personality Module only Printer CI 4050 1 7 1 6 The Power Supply 1 8 S Main Input Voltage Selection 1 8 1 7 Power ON OFF Switch 1 9 1 8 Installing the Black Ribbon Cassette 1 10 1 8 1 Replacing the Ribbon Cassette 1 13 1 9 Tractor 1 14 S Inserting Fanfold Paper for the First Time 1 14 1 10 Manual Sheet Insertion 1 17 1 10 1 Printer ...

Page 7: ...ld Displacement 2 5 2 2 3 Meaning of the Keys in the LOCAL Mode 2 7 S Lower Row Keys 2 7 2 3 Menu Mode 2 8 2 3 1 To Activate the Menu 2 9 2 3 2 To Confirm Selection 2 10 2 3 3 How to Save Settings 2 11 2 3 4 Quick Settings 2 12 3 Configuring the Printer 3 1 3 1 What means Configuration 3 1 3 2 Standard Configuration 3 3 3 2 1 Standard Configuration for Printer CI 4040 3 3 3 2 2 Standard Configurat...

Page 8: ...djustment 3 10 S LEFT MARGIN 3 10 S RIGHT MARGIN 3 11 S TOP MARGIN 3 11 S BOTTOM MARGIN 3 12 S PERFORATION SKIP 3 12 S PAPER SOURCE 3 12 S PAPER EXIT 3 13 S EMULATION 3 13 S CHARACTER SET 3 13 S LINE MODE 3 14 S COMMANDS 3 14 S TEAR OFF MODE 3 14 Main Function INSTALLATION 3 15 Sub Function INTERFACE 3 15 S BUFFER 3 15 S WORD LENGTH 3 15 S I F Type 3 15 S BAUD RATE 3 15 S PARITY BIT 3 15 S PROTOCO...

Page 9: ...RESTORE SET UP 3 19 S RECALL FACTORY 3 19 S MENU ACCESS 3 20 S SELF TESTS 3 21 S HEX DUMP 3 21 Menu Tree Menu 1 4 Maintenance 4 1 S Preferred Materials 4 1 4 1 Cleaning the Platen and Surrounding Areas 4 1 S Print Test 3 4 2 4 2 Cleaning Procedure 4 3 4 3 User Replaceable Parts 4 4 S Replacement of the Print Head 4 4 S Print Head Removal 4 4 S Print Head Installation 4 5 S Replacement of the Plate...

Page 10: ...lour Option only Printer CI 4050 6 1 6 1 Installing the Colour Option 6 1 6 2 Installing the 4 Colour Ribbon 6 4 7 Automatic Sheet Feeder Cassette ASF only Printer CI 4050 7 1 7 1 Checking the Delivery Consignment 7 1 7 1 1 Prepare the ASF Cassettes 7 2 7 1 2 Installing the ASF Cassettes 7 3 7 1 3 Removing theASF Cassette 7 5 7 1 4 Inserting Paper 7 6 7 2 Replacing of the ASF Pick up Rollers 7 8 7...

Page 11: ... Protocols A 3 3 Parallel Centronics Interface A 9 4 Shared Operation A 12 Appendix B Print Samples of Resident Fonts B 1 Appendix C Character Set Tables C 1 Appendix D IBM ProPrinter Quick Reference D 1 Appendix E EPSON LQ Quick Reference E 1 Appendix F Barcode Quick Reference F 1 Appendix G Information for the System Manager G 1 ...

Page 12: ...he following chapters 1 Getting Started This chapter covers the unpacking and setting up of the printer and the installation of the ribbon cassette By the end of this chapter the printer should be fully functional and tested in its primary form It is not yet connected to the host computer system and no options are mounted 2 Operating the Printer This chapter discusses in great detail the operation...

Page 13: ...ic Sheet Feeder Cassettes ASF only for Printer CI 4050 This chapter shows how to handle the ASF Cassettes 8 Technical Data All technical details or data about the printer can be found here Appendix A Interface Description This chapter gives hints about possibilities to connect the printer to the various computer systems and explains particularities depending on the version of the operating system ...

Page 14: ...nce for IBM Proprinter and IBM Proprinter AGM 4207 4208 XL 24 Emulation E Control Codes Quick reference for EPSON LQ 2550 1060 ESC P2 Emulation F Control Codes Quick reference for Barcode programming G Miscellaneous System Manager Information ...

Page 15: ...c Sheet Feeder Cassette for cut sheets and form sets DRAFT Draft Quality EE Eastern European LCD Liquid Crystal Display LED Light Emitting Diode LQ Letter Quality MACRO User defined group 1 bis 4 of stored parameter NLQ Near Letter Quality PH Print Head PM Interface Personality Module Note The following chapters describe the two printers S CI 4040 Fanfold printer S CI 4050 Multi purpose printer Th...

Page 16: ...etailed below Contact your delivery agent immediately if any item is missing or damaged The printer package should contain the following Printer 1 Ribbon cassette 2 Power cord 3 Quick Reference Guide 4 CD ROM 5 Caution Do not connect to the mains until the mains voltage selection has been checked ...

Page 17: ... the printer spend some time familiarizing yourself with the printer Printer 1 Ribbon Cassette 2 Top Cover 3 Tractor for Continuous Paper 4 Paper Supports 5 Front Cover 6 Control Panel 7 Tear Off Edge 8 Serial Parallel Input 9 Power Cord Socket 10 Power Switch 11 Manual Front Insertion Guide 12 Option only ...

Page 18: ...Output Stacker 1 Ribbon cassette 2 Printer 3 Quick Reference Guide 4 Personality Module PM 5 Power Cord 6 CD ROM 7 A separate box contains the Personality Module 5 Caution Do not connect to the mains until the mains voltage selection has been checked and the PM is installed Note Save all packing material and boxes for future transportation of the printer The User s Manual and the printer drivers f...

Page 19: ...inter spend some time familiarizing yourself with the printer Top Cover 1 Tractor for Continuous Paper 7 Ribbon Cassette 2 Output Stacker 8 Printer 3 Power Switch 9 Front Cover 4 Power Cord Socket 10 Manual Front Insertion Guide 5 Tear Off Edge 11 Control Panel 6 Personality Module PM 12 ...

Page 20: ...printer s housing are provided for ventilation always ensure that these openings are not obstructed When processing fanfold paper always place the printer with its front edge slightly off the edge of the table Also ensure that the cables at the rear of the printer do not interfere with the output paper path Power Requirements No special wiring is required A typical office wall outlet is sufficient...

Page 21: ...ve belt Re packing Information Note Save all packing material and boxes for future transportation of the printer To ensure maximum protection when transporting the printer always Remove any installed paper handling option Remove the output stacker and the mains cable Remove the ribbon cassette Reposition the transport locking clip Pack the printer in its original packing material and ship in its o...

Page 22: ...elow shows the standard PM with a serial and parallel interface Note To avoid damage due to electrostatic discharge do not touch the pins or components of the PM Never attempt to install or remove a PM while the printer is switched ON 1 Remove the PM 1 from its packaging 2 Insert the Personality Module 1 with the component side upwards until the connector fully engages Hand tighten the two lock sc...

Page 23: ...elow shows the standard PM with a serial and parallel interface Note To avoid damage due to electrostatic discharge do not touch the pins or components of the PM Never attempt to install or remove a PM while the printer is switched ON 1 Remove the PM 1 from its packaging 2 Insert the Personality Module 1 with the component side upwards until the connector fully engages Hand tighten the two lock sc...

Page 24: ...n the voltage selector 1 corresponds to your mains voltage either 230 V for 180 to 264 V alternating current or 115 V for 90 to 140 V alternating current If it is necessary to change the voltage slide the selector button to the required voltage selection Connect the printer to the mains using the power cord 2 First connect the cable to the power cord socket and then to the mains Note As the power ...

Page 25: ...ON is indicated by a green LED on the operator panel and shows TEST If the message INSTALL RIBBON is shown follow the steps in paragraph 1 8 Installing the Ribbon Cassette After inserting the ribbon press to continue When the internal test has been completed successfully the display shows READY 1 ELQ or BUSY 1 ELQ in case data has already been transmitted Note If the display shows anything differe...

Page 26: ...ully to the right hand stop you could change the way of the paper output Note If the printer is busy message BUSY 1 ELQ always press before opening the top cover 1 Switch the printer ON at the power switch Power LED is lit and wait for the message READY 1 ELQ or INSTALL RIBBON 2 If the printer is busy message BUSY 1 ELQ press 3 Lift the top cover to gain access to the ribbon cassette mountings The...

Page 27: ...ribbon cassette clockwise Move the ribbon feed guide to the position indicated on the plastic cover of the cassette 5 Position the lower mounting pin a on the guide to the right Slide the cassette downward In this position the green ribbon feed guide touches the green plastic clip ...

Page 28: ... audible clicks indicate that the mounting pins have engaged properly click click Note When installed correctly the ribbon cassette has a sloping position 7 Move the print head back and forth to settle the ribbon in the correct position 8 If necessary remove excess ribbon slack by turning the green knob clockwise 9 Close the top cover and press START STOP ...

Page 29: ...ngs The print head will move to the correct position aligned with the cut out in the paper guide plate to facilitate the installation of the ribbon cassette Now swing the lower part of the ribbon to the back In this way the mounting pins loosen from the lower position Then press the upper part of the ribbon to the back The upper mounting pins get free and the ribbon can be taken out Note To instal...

Page 30: ... of the table The cables at the back of the printer should be tucked into the cable clips in order not to block the paper path Note only for printer CI 4040 If the manual front insertion guide 1 Option is in use pull it upwards against the resistance and remove by pulling forward Note only for printer CI 4050 Hold the front of the manual insertion guide 4 on both sides pull upwards against the res...

Page 31: ... tractor lock levers 2 toward you to release the tractors Lock the left tractor 1 at the new position by pressing the green tractor level 2 backward Roughly adjust the right tractor to the paper width and space out the paper supports 3 evenly ...

Page 32: ...per edge of the fanfold paper by slightly pushing the right tractor to the right Make sure not to stress the paper too much Lock the tractors by pushing back the green lock lever again Note The pins of the tractor must be centered in the transport punches of the paper Reapply the manual front insertion guide ...

Page 33: ...he Manual Front Isertion Guide 1 above the tractors and push it down Release the screw 2 of the left hand paper guide 3 Adjust the guide 3 to the position of the left margen and fix it with the screw 2 Note If continuous form paper is in print position on the platen and has not been teared off it will be moved forward and TEAR OFF PAPER will be displayed ...

Page 34: ... on the insertion guide In this setting the margin has the smallest value possible Adjust the right hand paper guide to the width of the paper to be used Note If continuous form paper is in print position on the platen and has not been teared off it will be moved forward and TEAR OFF PAPER will be displayed ...

Page 35: ...utput stacker 5 into one of the two rails in the top cover 2 The meaning of the two Positions for paper with 80 g m or thicker use the steeper position left picture for thinner paper use the less inclined position right picture Check if the manual sheet insertion is installed ...

Page 36: ...klmnopqrstuvwxy yz0123456789 ABCDEFGHIJKLMNOPQRSTUVWXYZabcdefghijklmnopqrstuvwx xyz0123456789 ABCDEFGHIJKLMNOPQRSTUVWXYZabcdefghijklmnopqrstuvw wxyz0123456789 ABCDEFGHIJKLMNOPQRSTUVWXYZabcdefghijklmnopqrstuv vwxyz0123456789 ABCDEFGHIJKLMNOPQRSTUVWXYZabcdefghijklmnopqrstu uvwxyz0123456789 ABCDEFGHIJKLMNOPQRSTUVWXYZabcdefghijklmnopqrst tuvwxyz0123456789 ABCDEFGHIJKLMNOPQRSTUVWXYZabcdefghijklmnopqrs ...

Page 37: ... Bestellung Auftrag DIN 4993 Bestellungsannahme Auftragsbestätigung DIN 4994 Lieferschein Lieferanzeige DIN 4998 Entwurfsblätter für Vordrucke Diese Normen enthalten alle Einzelheiten für den sinnvollen und zweckmäßigen Aufdruck Wenn dazu bei der Beschriftung genormter Vordrucke DIN 5008 Regel für Maschinenschreiben beachtet wird entstehen übersichtliche und werbewirksame Schriftstücke Die beifgef...

Page 38: ...ng operator panel displays KEY Display 2 93 LOCAL 3 94 MACRO SELECT 6 4 INSTALLATION 6 5 Y 7 INTERFACE 6 6 7 SELF TEST 6 7 Y 7 PRINT TEST 1 Use to select PRINT TEST 2 or 3 8 Y 7 PRINT TEST 1 9 93 PRINT TEST 1 The printer starts to print using paper from the defined paper source To stop the print test 1 93 7 PRINT TEST 1 2 Z 7 SELF TEST 6 3 93 READY 1 ELQ ...

Page 39: ...owing parameters CI 4040 CI 4050 8 Kbyte buffer 8 Kbyte buffer 8 bit 8 bit parallel interface type shared interface type 9600 baud 9600 baud parity ignore parity ignore DTR protocol DTR protocol CTS ignore SHARED means that after Power ON both the serial and the parallel interfaces are available for data transfer The port to which data is sent becomes active automatically If the parallel or serial...

Page 40: ...ro 1 to IBM ProPrinter in macro 2 1 Switch the printer ON The display shows READY 1 ELQ 2 MACRO 2 3 Y READY 2 IPP The information READY 2 IPP indicates the selected macro and the emulation of this macro for example 1 ELQ Macro 1 with Epson Emulation 2 IPP Macro 2 with IBM Proprinter Emulation 3 AGM Macro 3 with IBM Proprinter AGM Emulation 4 ELQ Macro 4 with Epson Emulation Note A number of VALUE ...

Page 41: ...the printer If an error occurs e g COVER OPEN the resulting error message overrides any other displayed message When the error condition not longer exists the original status information appears on the display The green Power ON indicator 53 is lit when the printer is supplied with power by setting the power ON OFF switch to ON The yellow STOP indicator 52 is lit when the printer is in the STOP mo...

Page 42: ... is possible to lock the function of the above described keys in the printer operation state READY or BUSY Use the menu function MENU ACCESS with the setting QUICK SET OFF see Page 3 20 If the keys are locked the printer shortly displays LOCKED when pressing one of the keys It is not possible to lock in the printer operation state LOCAL Number Symbol Functionality in LOCAL Mode 90 EJECT FORM 91 92...

Page 43: ...x depending on the selected paper source Printer Operation 2 3 Note After pressing one of the keys or the menu mode is activated Now the keys of the top row can only be used as cursor keys to move within the menu tree right Y left Z up and down 2 2 2 Detail Description of Keys in the printer operation state READY or BUSY Quick Settings only active if not locked in the menu function MENU ACCESS wit...

Page 44: ...plication requires a specific vertical positioning of the printout on a continuous form two possibilities are provided for the READY or BUSY mode vertical position adjustment VERT POS ADJ with key 90 fanfold displacement FANFOLD DIS with key 91 Vertical Position Adjustment VERT POS ADJ 90 This can be set differently for each macro to exactly position the printout in relation to the top edge of the...

Page 45: ...n it is either correctly loaded at the park position or already fed and partly printed The Fanfold Displacement mode can only be called up in the status READY or BUSY Note The key has no effect when in the READY or BUSY mode As soon as the Fanfold Displacement mode is entered by pressing the printer stops printing and changes into the LOCAL mode The display shows the message FANFOLD DIS with the v...

Page 46: ...further pressing of decreases the line counter by decrements of 1 60 inch Holding of or causes the first 20 increments in single steps inch thereafter in multiplier of ten which results in a continuous 1 60 increment or decrement of the offset counter by inch If the reached 1 6 value is too high go backwards by pressing The offset to the current position is shown on the display Dependent on the st...

Page 47: ... Insert Eject key fanfold paper from the park position is fed into the print position and fanfold paper from the print position is fed into the cut tear off position depending on the setting or the printer type Paper that has been retracted into the cut tear off by the Insert Eject key will be moved automatically into the print position once the printer receives a print command Note This key is no...

Page 48: ...trol panel and combined in the printer MENU This feature provides easy handling of configuration interface etc quick parameter changes during an application a SAVE function to make changes permanent until purposely reset facilitating changes in default settings The menu has several levels The first level contains the Main Functions Level 2 contains Sub Functions Level 3 allows to select confirm va...

Page 49: ...he keys have a wrap around function i e after the last value the first value is repeated On the display you will find the following four characteristic types of information This display is only shown if you are in the Main Function To switch to the next level press Y Now you are in a Sub Function Movement in both directions is possible by using the Z key or Y key In the last level labelled select ...

Page 50: ...four macros each with a different summary of VALUE settings The standard macros have the following emulations defined Macro Emulation 1 EPSON LQ 1060 LQ 2550 ESC P2 2 IBM Proprinter XL 24 3 IBM Proprinter XL 24 AGM 4 EPSON LQ 1060 LQ 2550 ESC P2 Macro parameters can be tailored to specific application requirements This feature is highly beneficial in case of frequent changes between applications i...

Page 51: ... is switched off In order to prevent losing your new settings you can save them using the MAIN FUNCTION SAVE KEY Display 1 93 LOCAL 2 94 MACRO SELECT 6 3 SAVE 6 4 Y SAVING NOW display is flashing 4a SAVE 6 5 93 READY 1 ELQ Note The values of the current settings and the macro settings can be printed out on a list using the function PRINT OUT ...

Page 52: ...ts in the menu tree These particular selections can be changed quickly without having to move through the entire menu see fold out of structure diagram As soon as one of the keys in the top row has been activated all four keys can only be used as cursor keys to move within the menu tree up down Y right and Z left ...

Page 53: ...s The most important of those are S protocol S baud rate S data bits S parity You may also need to change some of the printer s other features depending on your hardware and application requirements for example S paper handling S text processing The MENU mode allows you to access the configuration memory All settings of the printer are stored in this memory and can be printed out on a list The pos...

Page 54: ... ON READY 1 ELQ 2 93 LOCAL 3 94 MACRO SELECT 6 4 PRINT OUT 6 5 Y 7 PRINT OUT 6 Y 7 PRINT OUT 7 93 7 PRINT OUT After feeding paper from the defined paper source the printer starts to print When printing is completed the following message will be displayed 8 7 PRINT OUT 9 93 READY 1 ELQ ...

Page 55: ...6 LPI 6 LPI PAGE LENGTH 72 LINES 72 LINES 72 LINES 72 LINES 72 LINES TRACTOR V POS 0 0 0 0 0 MANUAL V POS 0 0 0 0 0 LEFT MARGIN 1 COLUMNS 1 COLUMNS 1 COLUMNS 1 COLUMNS 1 COLUMNS RIGHT MARGIN 136 COLUMNS 136 COLUMNS 136 COLUMNS 136 COLUMNS 136 COLUMNS TOP MARGIN 1 LINES 1 LINES 1 LINES 1 LINES 1 LINES BOTTOM MARGIN 1 LINES 1 LINES 1 LINES 1 LINES 1 LINES PERF SKIP YES YES YES YES YES PAPER SOURCE T...

Page 56: ...0 0 0 0 BIN 2 V POS 0 0 0 0 0 BIN 3 V POS 0 0 0 0 0 LEFT MARGIN 1 COLUMNS 1 COLUMNS 1 COLUMNS 1 COLUMNS 1 COLUMNS RIGHT MARGIN 136 COLUMNS 136 COLUMNS 136 COLUMNS 136 COLUMNS 136 COLUMNS TOP MARGIN 1 LINES 1 LINES 1 LINES 1 LINES 1 LINES BOTTOM MARGIN 1 LINES 1 LINES 1 LINES 1 LINES 1 LINES PERF SKIP YES YES YES YES YES PAPER SOURCE TRACTOR TRACTOR TRACTOR TRACTOR TRACTOR PAPER EXIT BATCH BATCH BA...

Page 57: ...interface type shared interface type 9600 baud 9600 baud parity ignore parity ignore DTR protocol DTR protocol CTS ignore S ADJUSTMENT all parameters are for adjustment of the printer and the paper see also the following pages The last part of the printout is a list with all MACRO settings In this case MACRO 1 is marked with an asterisk which identifies it as the active macro If you make modificat...

Page 58: ...rt it is possible to create a macro for specific application needs For detail information see chapter Function CHANGE MACRO beginning on the next page Note Most parameters can be set via the control panel or via escape sequences from the host computer The changes via escape sequences are visible in the column CURRENT SETTINGS S INSTALLATION In the first sub function named INTERFACE you can manipul...

Page 59: ...RINT OUT Main Function CHANGE MACRO S Font A font is a family of characters with the same style and size The appearance of the font can be varied by using attributes such as size bold italic etc The fonts included in the PM SER PAR are S Data S Roman S San Serif S Courier S Prestige S Script S OCR B S OCR A S Orator C S Orator S DATA LARGE see Appendix B for print samples Note PRINT TEST 3 lists a...

Page 60: ...ualities result in different print speed S Sub Super Font When the SUB SUPER FONT is set to NO sub and superscript text will be raised or lowered a half line but the text size itself will not change When set to YES the text size will be reduced and printed above or below the line Example YES 5 or 5 2 2 NO 5 or 5 2 2 S Pitch Indicates the number of characters printed per inch 10 12 15 17 18 20 or p...

Page 61: ...inch selected in the line setting or defined by the application The following indicates the number of lines for the most common paper sizes Paper length Appropriate setting in inches in no of lines 4 24 4 25 1 6 6 36 8 48 8 51 1 2 11 66 11 70 2 3 12 default setting 72 The page length setting is the basis from which perforation skip TEAR OFF mode and margins operate An incorrect page length therefo...

Page 62: ...variations in paper size and pre printed material Using this function the TOP MARGIN and BOTTOM MARGIN setting are taken into account as well This parameter covers a range of to of an inch where is up 15 240 60 60 the page and is further down the page The following table shows some values in inch and millimetres Attention The set up of VERT POS ADJ will become effective at the next page of the for...

Page 63: ...ations are only correct if the tractors are in the original positions i e the left perforation is aligned with the centre mark on the plastic plate distance between the marks is 1 10 S The top margin indicates the first print line and is always set in steps of 1 6 The position of the first margin is from the top of the paper and indicates 1 6 the baseline of the letter H in upright Data font see i...

Page 64: ...e printer ignored the top and bottom margin and prints from the very first line to the very last That means that on a standard 11 paper 66 lines are available for printing S Paper Source The printer offers three input possibilities S TRACTOR fanfold paper S Manual for printer CI 4040 optional S ASF cassettes optional only for printer CI 4050 they can be accessed either individually or pooled in a ...

Page 65: ...nly feed after a keystroke has been received S Emulation The emulation determines the set of commands available for the printer see Appendix D and E You can activate the following emulations S EPSON LQ S IBM PROPR S IBM PROPR AGM Note The selected Emulation will also be stored in the actual macro With a change of the macro e g key or is pressed it is possible that the emulation will also be change...

Page 66: ...S NO SPECIAL The NO SPECIAL setting is to be used with critical forms which cannot handle the return movement of the paper With the YES setting the printer waits for one ore ten seconds and unless further data is received moves the paper to the first perforation after the text Regardless of this setting whenever changing from fanfold to the manual paper source the printer will request the fanfold ...

Page 67: ...nterfaces The first data received at the port determine which interface port becomes active The other interface port will be closed so that only one interface is active at a time for detailed information see Appendix A Interface Description The factory setting for the interface type are Shared 8 Kbyte Buffer 8 bit word length even parity bit 9600 baud rate DTR protocol and ignore CTS S BAUD RATE O...

Page 68: ...rk position fanfold S after Power On S after the printer has been in the STOP mode S an AGC command has been issued The reference point for the measurement of the paper thickness is the AGC Position of the first print line Default for the horizontal AGC Position is 24 ink ribbon exchange position any position from 4 to 131 at 10 cpi can be selected An adjustment of the AGC Position is only necessa...

Page 69: ...o be initiated after having exchanged the print head or the platen It is essential that the ink ribbon is installed and no paper is in the printer when this procedure is started After activating this procedure the printer displays INSTALL RIBBON If the ribbon is installed press to continue S PAPER IN ADJ Paper In Sensor adjustment This parameter logically adjusts the base position of the Run In Se...

Page 70: ...e value of CUTTING V POS will influence the TEAR OFF Position The range within which variations can be met is to where 15 16 60 60 is up the page and is further down the page The following table shows the possible values in inch and millimetres Note If for some reason it is not desired to cut exactly on the perforation it is very important to cut below the perforation of the printed page If the pa...

Page 71: ...b Items under INSTALLATION S Language The operator panel may display its messages in three languages Select one out of the following ENGLISH DEUTSCH FRANCAIS S RESTORE SET UP With this function all settings of the last SAVE procedure will be restored S RECALL FACTORY All standard settings of the firmware will be restored The contents of Page Counter and the Paper in Adjust will not be changed Use ...

Page 72: ...vated in the READY or BUSY mode After pressing one of these keys the display shows shortly LOCKED see also Chapter 2 S MACROS ONLY Macros can be selected using the Quick Macro Selection keys or The Vertical Positioning Adjustment Mode can be entered The Fanfold Displacement Mode can be entered S NO ACCESS The menu is not accessible at all The menu function PRINT OUT can be activated regardless of ...

Page 73: ...f a closed loop connector data used consists of PRINT TEST 1 S Hex Dump This function makes it possible that the data received by the printer can be analyzed Control codes are no longer carried out instead all data is printed in hexadecimal format and as ASCII characters Any non printable characters such as carriage return are only represented as a single dot in the ASCII list It may happen that t...

Page 74: ... YES 7 PITCH 6 7 10 CPI 7 12 CPI 7 15 CPI 7 17 CPI 7 18 CPI 7 20 CPI 7 PROPORTIONAL 7 LINE 6 7 6 LPI 7 8 LPI 7 12 LPI 7 2 LPI 7 3 LPI 7 4 LPI 7 PAGE LENGTH 6 7 72 LINES tractor only range 5 132 lines 7 VERT POS ADJ 6 7 TRACTOR V POS 6 7 TRACTOR V 0 range 15 240 7 MANUAL V POS 6 7 MANUAL V 0 range 15 16 7 BIN 1 V POS 6 7 BIN 1 V 0 range 15 16 7 BIN 2 V POS 6 7 BIN 2 V 0 range 15 16 7 BIN 3 V POS 6 ...

Page 75: ...U K 7 5 DENMARK 7 6 SWEDEN 7 7 ITALY 7 8 SPAIN 7 9 JAPAN 7 10 NORWAY 7 11 DENMARK 2 7 12 SPAIN 2 7 13 LATIN AM 7 14 TURKEY 7 15 LEGAL 7CODE PAGE EE 6 7 1 CP 437 GK 7 2 CP 851 GK 7 3 CP 928 GK 7 4 CP 855 CYRI 7 5 CP 866 7 6 CP 869 7 7 CP 852 7 8 KAMENICKY 7 9 ISO LATIN 2 7 10 MAZOVIA 7 11 CP 437 HUN 7 12 CP 852 SEE 7 13 CP 866 LAT 7 14 WIN LAT 2 7CODE PAGE EE2 6 7 1 CP 771 7 2 CP 773 7 3 CP 774 7 4...

Page 76: ...PE 6 7 SHARED 7 PARALLEL 7 SERIAL 1 7 BAUD RATE 6 7 600 BPS 7 1200 BPS 7 2400 BPS 7 4800 BPS 7 9600 BPS 7 19200 BPS 1 7 PARITY BIT 6 7 IGNORED 7 ODD 7 NONE 7 EVEN 1 7 PROTOCOL 6 7 DTR 7 XON XOFF 7 XON XOFF DTR CI 4040 1 7 CTS MODE 6 7 CTS IGNORE 7 CTS ACTIVE 1 only indicated if SERIAL is selected 7 ADJUSTMENT 6 7 AGC POSITION 6 7 POSITION 24 range 4 131 7 PLATEN GAP 6 7 PLATEN GAP 0 range 3 4 7 AG...

Page 77: ... 7 YES 7 RECALL FACTORY 6 7 NO 7 YES 7 MENU ACCESS 6 7 ALL FUNCTIONS 7 QUICK SET OFF 7 MACROS ONLY 7 NO ACCESS 7 SELF TEST 6 7 PRINT TEST 1 7 PRINT TEST 2 7 PRINT TEST 3 7 I F TEST only Serial Interface 7 HEX DUMP 6 7 HEX DUMP SAVE 6 7 SAVING NOW PRINT OUT 6 7 PRINT OUT ...

Page 78: ...cleaner 4 1 Cleaning the Platen and Surrounding Areas The user should clean the printer every six months or after 50 000 prints whichever occurs first If you experience paper feed problems or if the print head carriage movement becomes restricted cleaning should be carried out more often Note the Page Counter PGCNT in the PRINT TEST 3 will give you information about actual number of printed pages ...

Page 79: ...T C100 CODE PAGES EE C101 CODE PAGES EE2 C091 BARCODE DATA ROMAN NLQ ROMAN LQ SAN SERIF NLQ SAN SERIF LQ COURIER NLQ COURIER LQ PRESTIGE NLQ PRESTIGE LQ SCRIPT NLQ SCRIPT LQ OCR B LQ OCR A LQ ORATOR C NLQ ORATOR C LQ ORATOR NLQ ORATOR LQ DATA LARGE CHARACTER SET EPSON EXT GCT 3 GERMANY AGC TEST AGC TEST AGC TEST AGC TEST AGC TEST PRINTHEAD NEEDLE 1 2 3 4 5 6 7 8 9 10 11 12 13 14 15 16 17 18 19 20 ...

Page 80: ...ace the paper pressure rollers and the transport rollers using the platen cleaner In order to access the transport rollers loosen the green screws and remove the metal bar with the metal rollers 5 Clean the covers and the operator panel with a damp lint free cloth Do not use cleaning solvents or excessive amounts of water 6 Insert the ribbon cassette see Chapter 1 8 Installing the Black Ribbon Cas...

Page 81: ...eoutput stacker 1 only for printer CI 4050 2 Switch the printer ON lift and remove the top cover 2 The print head will move to the correct position aligned with the cut out in the paper guide plate 3 Switch the printer OFF again 4 Remove the ribbon cassette 3 5 Disconnect the print head cable 4 6 Using the supplied tool 7 loosen the two captive screws 6 retaining the print head 5 Use the enclosed ...

Page 82: ...procedure 2 Fasten the captive screws 6 fasten the right screw to its stop tighten the left screw now tighten the right screw put the enclosed plastic case onto the socket head cap key and first tighten the right and then the left screw 3 Reconnect the print head cable 4 and fasten it 4 Mount and close the top cover 2 and only for printer CI 4050 the output stacker 1 5 Switch the printer ON open t...

Page 83: ... Lift and remove the top cover 3 Remove the ribbon cassette 4 Switch the printer OFF 5 Position the print head to the very right 6 Release the green plastic platen clamp 1 on the left platen mounting 7 Move platen 2 approximately 10 mm to the left lift the left end of the platen free off its mounting and withdraw the platen from the right mounting 8 Lift the platen to the left underneath the print...

Page 84: ...n into the right hand side mounting Be careful not to damage the gear wheel 4 Ensure that the plastic platen clamp 1 is in the upright position push the platen in to its mounting and lock in position by pushing the tag on the clamp to the rear 5 Install the ribbon cassette 6 Fit and close the top cover 7 Fit the output stacker stacker only printer CI 4050 8 Run the MENU function AGC ADJUST with in...

Page 85: ...ription that most closely matches the printer symptom In this example you would look at the symptom Print faint or of poor quality 3 Try the first suggestion under that heading 4 If the suggestion does not cure the problem try the next suggestion 5 If none of the suggestions enable you to continue printing or if the fault is not listed contact your service office Each time the printer is switched ...

Page 86: ...ing the test the following messages may be shown on the display Display That means Cause Action No No power Mains cable not connected information POWER ON indicator not lit green and hang up in reset after Print PSU defective yellow LED power on Print CU DEV defective give light but no reaction Firmware does not PM not inserted work PM not correctly inserted no firmware on PM PROMs not correctly i...

Page 87: ... or missing ROM 2 OK RAM on Memory Memory Card defective Card damaged MC OK Fault on Control Unit Control Unit defective Type mismatch of PM and Control Unit PBC Printer Base Controller on Control Unit damaged SPC Speed Controller on Control Unit damaged Transport lock not removed If all tests have been passed successfully the following message will be displayed Display That means Cause Action REA...

Page 88: ...k CTR CTS or error XON XOFF protocol Repeat data transfer COVER OPEN Displayed when the Close cover top cover is open and the printer is in the READY or BUSY mode FRAMING ERROR Protocol error Check protocol setting of printer and host Repeat data transfer HOR DRIVE ERROR Horizontal drive Horizontal drive blocked without function Paper jam Distance of platen gap too narrow AGC procedure on not work...

Page 89: ...P mode LOAD MANUAL Same as LOAD Insert paper TRACTOR except that the machine does not enter the STOP mode Paper should be fed manually after a short delay the printer will accept paper and starts printing LOAD TRACTOR Displayed when the Load fanfold into the tractor host sends a form and press feed or print command to an empty tractor cassette The printer enters the STOP mode LOCAL Entered when Pr...

Page 90: ... MANUAL feeds fail to move fanfold paper correctly when tractor feed is used PARITY ERROR Protocol error Check protocol setting of printer and host Repeat data transfer REMOVE PAPER This message will Remove paper and press be displayed if the output for cut sheets Bin or Manual is selected to FRONT SIDE KEY for CI 4040 is front side the standard option After printing and moving out at the front si...

Page 91: ...iated from backwards to a park position currently tractor to a so that the newly selected different paper paper source can be used source and the fanfold paper could not retreat into the parking position The operator must tear off the paper along the tear off edge which is located directly above the fanfold paper output paper should be torn off from left to right ...

Page 92: ...fixed at both ends S Make sure that the printer is receiving data from the host computer S Make sure that the correct protocol is enabled Refer to section 3 2 Standard Configuration and Appendix A Interface Description S Make sure that you have selected the correct port if the automatic feature has not been selected S Make sure that paper is loaded S Make sure that the ribbon is installed S Examin...

Page 93: ...e S Readjust the tractor spacing so that the paper lies smoothly but without any tension S Ensure that the paper is horizontally aligned on the pins S Open the printer s top cover If necessary loosen the two green screws and remove the paper guide plate to gain access to the paper Parking paper and resetting top of form S Tear off the paper at the perforation line S Press S Press until the paper i...

Page 94: ...if necessary S Is the ribbon cartridge properly installed Adjust as necessary S Characters do not print evenly or are not uniform in pitch S Examine the paper pathway for dirt or other obstruction that may cause the gap between print head and platen to vary Remove the obstruction S Print lines overlap S Examine the paper pathway for dirt or other obstructions that may prevent the platen from rotat...

Page 95: ...RCE TEST 1 selection Ribbon tension and condition Print head condition Stop SELF TEST and No printing starts Printer ONLINE start external printing READY Interface cable for proper connection Interface selection Some characters not Emulation correct Character set National version Word length Baud rate Parity bit Protocol Font and pitch quality Font fault Pitch Line space Problem still there Call s...

Page 96: ...packing material is removed S Examine the carriage area for obstructions Remove where necessary 5 7 Print Tests There are three different print tests as well as one interface test built into the printer S I F TEST is used to test the serial interface It initiates data to be sent from the printer and be returned by means of a closed loop connector plugged into the serial interface connector The tes...

Page 97: ...is not required it is recommended to use a black ribbon in order to increase the lifetime of the colour ribbon The colour option does not have to be removed when printing with a black ribbon To Install the Colour Option S Switch the printer ON S Lift the top cover 2 as shown in the illustration S Remove the black ink ribbon cassette 1 S Switch the printer OFF Caution The print head may be very hot...

Page 98: ...st done from the rear of the printer S Move the print head to a centre position S Remove the connection plug 40 out of the plastic shaft 39 which is holding down the string of cables leading to the print head S Insert the blue plug 40 into the connector socket 41 of the colour option ...

Page 99: ...he colour option as illustrated below S Mount the colour option on to the print head carriage in such a way that the pointed edge 44 fits into the slot 45 and the hole 42 fits onto the pin 43 Press it firmly in position until the spring clip 46 engages ...

Page 100: ...S Tuck the cable 47 behind the plastic clip 48 and under the plastic fixture 65 to avoid the cable coming in contact with the moving horizontal belt 49 or the mounted ink ribbon cassette S Replace the printer s top cover S Switch the printer ON ...

Page 101: ...ed ON S Remove any excess slack by turning the adjuster 54 clockwise S Align the green ribbon feed guide 53 with the arrow on the left side of the plastic cover of the cartridge S Engage the upper pins 55 of the ink ribbon cartridge in the green guides at the side 56 In this position the ribbon can be swung down ...

Page 102: ...rtridge down until the teeth of the green ribbon feed guide engage in the cog wheel of the colour feature Note If the ribbon is kept constantly taut while being swung into position it is particularly easy to thread it between print head and platen click Note Contrary to the black ribbon cassette the colour ribbon cassette has a straight position ...

Page 103: ...n be operated with up to three ASF cassettes The delivery comprises following parts S Cassette 1 S Paper support 2 Two different types of ASF cassettes are available S Type A for regular paper and form sets S Type B for thick paper types heavy form sets and envelopes A sticker with an envelope indicates the ASF cassette B ...

Page 104: ...Automatic Sheet Feeder Cassettes ASF only for Printer CI 4050 7 2 7 1 2 Prepare the ASF Cassettes S Mount the paper support 2 onto the cassette ...

Page 105: ...e tabs 1 of the cassette into the slots 3 of the printer or of another ASF cassette until they engage Note S Be careful not to damage the contacts 2 of the cassette while installing S Up to three ASF cassettes can be installed at any time to enable processing of different paper types and formats simultaneously ...

Page 106: ...ounted first because the distance between the pick up rollers of the cassette and the push rollers inside the printer is the shortest at position 1 For example if envelopes are to be processed cassette type B needs to be cassette 1 Cassette Position Minimum Paper Length 1 first mounted 104 mm 4 08 2 200 mm 7 87 3 last mounted 290 mm 11 42 Note For detail description see chapter 8 Tecnical Data ...

Page 107: ...Cassette Remove the ASF cassette 1 from the printer by drawing back both release levers 2 Note To remove all AFS cassettes together release only the ASF cassette in position 1 If the ASF cassettes shall be removed individually so start the removal procedure with the last mounted ASF cassette ...

Page 108: ... cassette automatically opens its load position Note for detail see figure next page S lf required pull up and release the locking levers 1 and adjust the paper guides 3 to the width of the paper to be loaded S Align the left hand edge of the paper with the center marker of the alignment scale 4 Note Aligning the edge of the paper with any of the other markers left or right will move the margin ri...

Page 109: ... CI 4050 7 7 S Select paper source BIN 1 2 or 3 see paragraph 3 4 Paper Source Note Change the pressure off the pick up rolls by loosen lever 2 if paper in use is higher or less than 80 g m Move tension lever 5 towards for lighter and or for heavier paper ...

Page 110: ... time of approximately 200 000 pages 7 2 1 To Remove the ASF Pick up Rollers 1 S Remove the ASF cassette see 7 1 4 Removing the ASF Cassette S Remove the small access cover 2 by squeezing it as shown S Pull back the retainers 3 as shown and lift the shaft 4 step 1 S Pull the shaft 4 out of the cassette step 2 and slide the pick up rollers 1 off the shaft 4 ...

Page 111: ... up Rollers S Slide the new pick up rollers 1 onto the shaft 4 S Insert the free end of the shaft 4 into the mounting 6 ensuring that each roller flange 5 is positioned so that they join with the indicated slots S Carefully snap the shaft 4 into its mounting 3 and fit the small access cover 2 ...

Page 112: ...ARGE in Letter Quality LQ and Near Letter Quality NLQ OCR A OCR B only in LQ Character Attributes Bold double strike italic underline double underline overline strike through sub superscript condensed double triple quadruple up to eightfold height and width DATA LARGE up to 999 fold size Character Pitch Standard character pitches are 10 12 15 17 1 18 20 cpi and proportional In addition commands ar...

Page 113: ...er Dr Grauert a Sinlgle Sheet Draft Quality 490 pages h Near Letter Quality 398 pages h Letter Quality 248 pages h b 1 play fanfold Draft Quality 507 pages h Near Letter Quality 398 pages h Letter Quality 251 pages h Character Sets see also Appendix C Character Set Tables S Code Pages EE 437 GK 851 GK 928 GK 855 CYRI 852 866 869 Kamenicky ISO Latin 2 Mazovia 437 HUN 852 SEE 866 LAT WIN LAT 2 S Cod...

Page 114: ...in Draft 60 dpi Print format 136 characters at 10 cpi Line Spacing 2 3 4 6 8 12 n 360 lpi Platen Gap Control The Automatic Gap Control AGC adjusts the distance between print head and platen according to paper thickness and programmable Platen Gap Control PCC Ribbon Black fabric ribbon for 16 million characters and only for printer CI 4050 4 colour ribbon in connection with the colour option for ca...

Page 115: ... 25 4 inch Depth 390 mm 15 6 inch 390 mm 15 6 inch with all three ASF cassettes 415 mm Height 273 mm 10 92 inch 273 mm 10 92 inch without stacker or ASF 400 mm 16 inch with all three ASF cassettes Weight CI 4040 CI 4050 Approximately 20 7 kg 45 5 lb 23 kg 50 lb Rated Voltage 100 120 200 240 V at rated f 50 60 Hz Power Consumption CI 4040 CI 4050 operating 200 W 160 W stand by 30 W 40 W Environment...

Page 116: ...o VDE IEC 950 and CSA 22 2 No 220 M91 UL 478 CSA listing mark for Canada is C UL EMI Approvals Acc to regulation of FTZ FCC class B Printer Stand Provides is the optimum work station convenience CI 4040 CI 4050 width 611 mm 23 8 inch 630 mm 25 inch depth 540 mm 21 4 inch 540 mm 21 4 inch height 750 mm 29 3 inch 730 mm 28 5 inch weight approximately 10 kg 22 lb 16 kg 35 lb Colour Option only printe...

Page 117: ...8 Paper length 76 2 mm 3 558 8 mm 22 Paper weight 1 ply 60g m 16 lb ream 90g m 24 lb ream multiply per sheet 40 g m 10 lb ream 60 g m 16 lb ream total set 350 g m 93 lb ream Total paper form thickness 0 5 mm 0 02 S Manual Insertion Option for printer CI 4040 and standard for CI 4050 Print media suitable for manual insertion and output at front side CI 4040 output to the top output stacker or front...

Page 118: ...mounting position of the cassette as the feeding path of the paper is the longest in the last mounted cassette Paper Length minimum maximum Cassette 1 104 mm 4 09 315 mm 12 4 first mounted Cassette 2 200 mm 7 87 315 mm 12 4 Cassette 3 290 mm 11 42 315 mm 12 4 last mounted Paper weight Cut sheets 70g m 18 lb ream 100g m 26 lb ream Form sets of 260g m 69 lb ream action paper Total thickness of set 0...

Page 119: ...4 Cassette 3 290 mm 315 mm last mounted 11 42 12 4 Paper weight Cut sheets 100g m 150g m 26 lb ream 40 lb ream Appropriate direction of the fibre and flexibility for automatic feeding required Form sets of 300g m action paper 80 lb ream weight of first last page 70 80g m 18 21 lb ream Total thickness of set 0 5mm 0 02 Note The form sets for cassette B must not have a horizontal perforation or carb...

Page 120: ...hared mode with serial RS 232C S parallel interface active in shared mode with serial RS 422 for CI 4050 S serial interface active S parallel interface active S both interfaces active in shared mode The following chapter gives an overview about interface characteristics control signals protocols and cabling Any change to the operation mode PARALLEL PARALL RS232 or PARALL RS422 SERIAL PARALLEL or S...

Page 121: ...G Signal Ground 7 DTR Data Terminal Ready printer is ready to receive see also on the 20 OUTPUT following pages the data communication protocols for detail meaning Signal Description RS 422 only CI 4040 Pin No Direction PG Protective Ground 1 RDA Receive Data from host to printer 3 INPUT SDA Send Data from printer to host 9 OUTPUT SDB Not Send Data from printer to host 10 OUTPUT RDB Not Receive Da...

Page 122: ...mit Data TXD S 3 Receive Data RXD S 5 Clear to Send CTS S 7 Signal Ground SG S 20 Data Terminal Ready DTR Note The signal lines TXD pin 2 and CTS pin 5 are only necessary if the Device Status Report is required The READY BUSY DTR protocol uses the DATA TERMINAL READY DTR line to control the transmission of data from the host to prevent a buffer overflow Note Printer DTR may be connected to host DS...

Page 123: ...a DTR is deactivated when the interface buffer has only space left for 256 more characters Further incoming data will be stored until the interface buffer is full All data sent in addition will get lost DTR is activated again if there is a free interface buffer space of 512 characters DTR is immediately deactivated if local mode is entered It is activated again if local mode is left and a minimum ...

Page 124: ...signal lines S Pin 1 Protective Ground PG S 2 Transmit Data TXD S 3 Receive Data RXD S 4 Request to Send RTS S 5 Clear to Send CTS S 6 Data Set Ready DSR S 7 Signal Ground SG S 20 Data Terminal Ready DTR Standard Connection For local connections RTS with CTS can be connected and likewise DTR with DSR ...

Page 125: ...ace Further incoming data will be stored until the interface buffer is full All data sent in addition will get lost XON is sent when the interface buffer provides space for a minimum of 512 characters XON XOFF can only be sent successfully when CTS is at active state When the CTS Mode is set to CTS ignore CTS is allways in the active state XOFF will be sent immediately if local mode is entered XON...

Page 126: ...tion A 7 1 2 3 Serial Interface with RS 422 only CI 4040 This interface typ requires the signal lines S Pin 1 Protective Ground PG S 3 Receive Data RDA S 9 Send Data SDA S 10 Not Send Data SDB S 18 Not Receive Data RDB Standard Connection Note Protective ground PG connected either to host or printer ...

Page 127: ...printer This 12 Output signal goes high when paper runs out i e load upper or lower tractor paper jam SELECT Control signal from the printer A high level indicates 13 Output that the printer is ON LINE and ready LG Logic Ground 14 not used 15 LG Logic Ground 16 CG Chassis Ground 17 VCC 5 volt 18 SG Signal Ground 19 20 ____ Control signal from the host Does not reset the prin 31 Input INIT ter ____...

Page 128: ... byte is accepted into the interface buffer the printer transmits a BUSY signal and an ACKN pulse The ACKN pulse informs the host that the data has been received and that the printer is ready to receive new data If the interface buffer is full except for the last character the BUSY is not reset in order to stop the data transfer from the host The BUSY signal is only reset if space is available in ...

Page 129: ...Appendix A System Interface Description A 10 2 3 Timing Diagram DATA 1 8 DATA 0 5 Fs STROBE 0 5 Fs 350 ns max BUSY ACKN 0 5 Fs ...

Page 130: ... of the serial interface is set to OFF or XOFF is sent depending on the protocol If the serial interface starts to receive data while the parallel interface is active it is possible to receive 256 bytes of serial data Any additional serial data will be lost When the interface buffer is completely empty of serial data and no new data has been received by the serial interface for more than 10 second...

Page 131: ...B 1 Appendix B Print Samples of Resident Fonts The Printer with the Personality Module PM SER PAR provides the following resident fonts ...

Page 132: ...Appendix B Print Samples of Resident Fonts B 2 ...

Page 133: ...Appendix B Print Samples of Resident Fonts B 3 ...

Page 134: ...Appendix B Print Samples of Resident Fonts B 4 ...

Page 135: ...Appendix B Print Samples of Resident Fonts B 5 ...

Page 136: ...Appendix B Print Samples of Resident Fonts B 6 Character Pitches ...

Page 137: ...Appendix B Print Samples of Resident Fonts B 7 ...

Page 138: ...Appendix B Print Samples of Resident Fonts B 8 ...

Page 139: ...Appendix B Print Samples of Resident Fonts B 9 ...

Page 140: ...Appendix B Print Samples of Resident Fonts B 10 ...

Page 141: ...Appendix B Print Samples of Resident Fonts B 11 ...

Page 142: ... L 2 2 B R b r é Æ ó 0 H 3 Ì 3 C S c s â ô ú F B 4 Ë 4 D T d t ä ö ñ 1 B E 5 Ê 5 E U e u à ò Ñ I 3 F 6 Í _ 6 F V f v å û ª M G C µ 7 0 7 G W g w ç ù º D K O J 8 3 8 8 H X h x ê ÿ 9 P M E 9 9 9 I Y i y ë Ö 1 6 1 A 4 6 J Z j z è Ü 5 S B 7 K k ï 7 C 2 L l î 8 4 6 D M m ì E 4 ø E N n Ä A F O _ o Å ƒ N 1 S P Applicable for Code Table IBM Set 1 and 2 ...

Page 143: ...1 A Q a q DC1 í 2 L 2 DC2 2 B R b r DC2 ó 0 H 3 DC3 3 C S c s DC3 ú F B 4 DC4 4 D T d t DC4 ñ 1 B E 5 5 E U e u Ñ I 3 F 6 6 F V f v ª M G C µ 7 BEL 7 G W g w BEL º D K O J 8 BS CAN 8 H X h x BS CAN 9 P M E 9 HT 9 I Y i y HT 1 6 1 A LF J Z j z LF 5 S B VT ESC K k VT ESC 7 C FF L l FF 8 4 6 D CR M m CR E 4 ø E SO N n SO A F SI O _ o SI N 1 S P ...

Page 144: ... 60 7B 7C 7D 7E 1 USA 2 FRANCE à E ç é ù è 3 GERMANY Ä Ö Ü ä ö ü ß 4 U K 5 DENMARK Æ Ø Å æ ø å 6 SWEDEN É Ä Ö Å Ü é ä ö å ü 7 ITALY E é ù à ò è ì 8 SPAIN Ñ ñ 9 JAPAN 10 NORWAY É Æ Ø Å Ü é æ ø å ü 11 DENMARK 2 É Æ Ø Å Ü é æ ø å ü 12 SPAIN 2 á Ñ é í ñ ó ú 13 LATIN AM á Ñ é Ü í ñ ó ú 14 TURKEY Ç Ö Ô Ü ç ö Õ ü ...

Page 145: ... 2 L 2 DC2 2 B R b r é Æ ó 0 H 3 Ì DC3 3 C S c s â ô ú F B 4 Ë DC4 4 D T d t ä ö ñ 1 B E 5 Ê 5 E U e u à ò Ñ I 3 F 6 Í 6 F V f v å û ª M G C µ 7 BEL 7 G W g w ç ù º D K O J 8 BS CAN 8 H X h x ê ÿ 9 P M E 9 HT 9 I Y i y ë Ö 1 6 1 A LF J Z j z è Ü 5 S B VT ESC K k ï 7 C FF L l î 8 4 6 D CR M m ì E 4 ø E SO N n Ä A F SI O _ o Å ƒ N 1 S P ...

Page 146: ... 24 40 5B 5C 5D 5E 60 7B 7C 7D 7E 9B 9D 1 USA 2 FRANCE à E ç é ù è 3 GERMANY Ä Ö Ü ä ö ü ß 4 U K 5 DENMARK ø Ø 6 SWEDEN É Ä Ö Å Ü é ä ö å ü 7 ITALY E é ù à ò è ì 8 SPAIN Ñ ñ 9 JAPAN 10 NORWAY ø Ø 11 DEMARK 2 ø Ø 12 SPAIN 2 á Ñ é í ñ ó ú 13 LATIN AM á Ñ é Ü í ñ ó ú 14 TURKEY Ç Ö Ô Ü ç ö Õ ü ...

Page 147: ...Page Countries 1 Code Page 437 USA 2 Code Page 850 Germany U K Denmark Sweden Italy Spain Japan Latin Am Turkey 3 Code Page 860 Portugal 4 Code Page 863 France 5 Code Page 865 Norway 6 Code Page 858 Germany U K Denmark Sweden Italy Spain Japan Latin Am Turkey inc Symbol ...

Page 148: ... Q a q ü æ í 2 L 2 2 B R b r é Æ ó 0 H 3 Ì 3 C S c s â ô ú F B 4 Ë 4 D T d t ä ö ñ 1 B E 5 Ê 5 E U e u à ò Ñ I 3 F 6 Í _ 6 F V f v å û ª M G C µ 7 0 7 G W g w ç ù º D K O J 8 3 8 8 H X h x ê ÿ 9 P M E 9 9 9 I Y i y ë Ö 1 6 1 A 4 6 J Z j z è Ü 5 S B 7 K k ï 7 C 2 L l î 8 4 6 D M m ì E 4 ø E N n Ä A F O _ o Å ƒ N 1 S P ...

Page 149: ...A Q a q ü æ í 2 Ð 2 2 B R b r é Æ ó 0 Ê Ô 3 Ì 3 C S c s â ô ú Ë Ò 4 Ë 4 D T d t ä ö ñ 1 È õ 5 Ê 5 E U e u à ò Ñ Á 3 í Õ 6 Í _ 6 F V f v å û ª Â ã Í µ 7 0 7 G W g w ç ù º À Ã Î þ 8 3 8 8 H X h x ê ÿ 9 Ï Þ Ç 9 9 9 I Y i y ë Ö 6 Ú A 4 6 J Z j z è Ü 5 Û B 7 K k ï ø 7 Ù C 2 L l î 8 ý D M m ì Ø 4 Ý E N n Ä ì F O _ o Å ƒ S P ...

Page 150: ...1 A Q a q ü æ í 2 Ð 2 2 B R b r é Æ ó 0 Ê Ô 3 Ì 3 C S c s â ô ú Ë Ò 4 Ë 4 D T d t ä ö ñ 1 È õ 5 Ê 5 E U e u à ò Ñ Á 3 Õ 6 Í _ 6 F V f v å û ª Â ã µ 7 0 7 G W g w ç ù º À Ã Î þ 8 3 8 8 H X h x ê ÿ 9 Ï Þ 4 9 9 9 I Y i y ë Ö 6 Ú A 4 6 J Z j z è Ü 5 Û B 7 K k ï ø 7 Ù C 2 L l î 8 ý D M m ì Ø 4 Ý E N n Ä ì F O _ o Å ƒ S P ...

Page 151: ... Q a q ü À í 2 L 2 2 B R b r é È ó 0 H 3 Ì 3 C S c s â ô ú F B 4 Ë 4 D T d t ã õ ñ 1 B E 5 Ê 5 E U e u à ò Ñ I 3 F 6 Í _ 6 F V f v Á Ú ª M G C µ 7 0 7 G W g w ç ù º D K O J 8 3 8 8 H X h x ê Ì 9 P M E 9 9 9 I Y i y Ê Õ Ò 6 1 A 4 6 J Z j z è Ü 5 S B 7 K k í 7 C 2 L l ô 8 4 6 D M m ì Ù E 4 ø E N n à A F O _ o Â Ó N 1 S P ...

Page 152: ... 1 1 A Q a q ü È 2 L 2 2 B R b r é Ê ó 0 H 3 Ì 3 C S c s â ô ú F B 4 Ë 4 D T d t Â Ë 1 B E 5 Ê 5 E U e u à Ï I 3 F 6 Í _ 6 F V f v û M G C µ 7 0 7 G W g w ç ù D K O J 8 3 8 8 H X h x ê Î 9 P M E 9 9 9 I Y i y ë Ô 1 6 1 A 4 6 J Z j z è Ü 5 S B 7 K k ï 7 C 2 L l î 8 4 6 D M m Ù E 4 ø E N n À Û A F O _ o ƒ N 1 S P ...

Page 153: ...Q a q ü æ í 2 L 2 2 B R b r é Æ ó 0 H 3 Ì 3 C S c s â ô ú F B 4 Ë 4 D T d t ä ö ñ 1 B E 5 Ê 5 E U e u à ò Ñ I 3 F 6 Í _ 6 F V f v å û ª M G C µ 7 0 7 G W g w ç ù º D K O J 8 3 8 8 H X h x ê ÿ 9 P M E 9 9 9 I Y i y ë Ö 1 6 1 A 4 6 J Z j z è Ü 5 S B 7 K k ï ø 7 C 2 L l î 8 4 6 D M m ì Ø E 4 ø E N n Ä A F O _ o Å ƒ N 1 S P ...

Page 154: ...S P 0 P p Ç É á J 1 1 A Q a q ü æ í 2 L 2 2 B R b r é Æ ó 0 H 3 3 C S c s â ô ú F B 4 4 D T d t ä ö ñ 1 B E 5 5 E U e u à ò Ñ I 3 F 6 6 F V f v å û ª M G C µ 7 7 G W g w ç ù º D K O J 8 8 H X h x ê ÿ 9 P M E 9 9 I Y i y ë Ö 1 6 1 A J Z j z è Ü 5 S B K k ï 7 C L l î 8 4 6 D M m ì E 4 ø E N n Ä A F O _ o Å ƒ N 1 S P ...

Page 155: ...B 5C 5D 5E 60 7B 7C 7D 7E 1 USA 2 FRANCE à E ç é ù è 3 GERMANY Ä Ö Ü ä ö ü ß 4 U K 5 DENMARK Æ Ø Å æ ø å 6 SWEDEN É Ä Ö Å Ü é ä ö å ü 7 ITALY E é ù à ò è ì 8 SPAIN Ñ ñ 9 JAPAN 10 NORWAY É Æ Ø Å Ü é æ ø å ü 11 DENMARK 2 É Æ Ø Å Ü é æ ø å ü 12 SPAIN 2 á Ñ é í ñ ó ú 13 LATIN AM á Ñ é Ü í ñ ó ú 14 TURKEY Ç Ö Ô Ü ç ö Õ ü 15 LEGAL E ...

Page 156: ... 1 1 A Q a q 1 A Q a q 2 2 B R b r 2 B R b r 3 3 C S c s 3 C S c s 4 4 D T d t 4 D T d t 5 5 E U e u 5 E U e u 6 6 F V f v 6 F V f v 7 7 G W g w 7 G W g w 8 8 H X h x 8 H X h x 9 9 I Y i y 9 I Y i y A J Z j z J Z j z B K k K k C L l L l D M m M m E N n N n F O _ o O _ o This character table is selected by the command ESC t ...

Page 157: ...5C 5D 5E 60 7B 7C 7D 7E 1 USA 2 FRANCE à E ç é ù è 3 GERMANY Ä Ö Ü ä ö ü ß 4 U K 5 DENMARK Æ Ø Å æ ø å 6 SWEDEN É Ä Ö Å Ü é ä ö å ü 7 ITALY E é ù à ò è ì 8 SPAIN Ñ ñ 9 JAPAN 10 NORWAY É Æ Ø Å Ü é æ ø å ü 11 DENMARK 2 É Æ Ø Å Ü é æ ø å ü 12 SPAIN 2 á Ñ é í ñ ó ú 13 LATIN AM á Ñ é Ü í ñ ó ú 14 TURKEY Ç Ö Ô Ü ç ö Õ ü 15 LEGAL E ...

Page 158: ...DC DD DE E0 FB FC FD FE 1 USA 2 FRANCE à E ç é ù è 3 GERMANY Ä Ö Ü ä ö ü ß 4 U K 5 DENMARK Æ Ø Å æ ø å 6 SWEDEN É Ä Ö Å Ü é ä ö å ü 7 ITALY E é ù à ò è ì 8 SPAIN Ñ ñ 9 JAPAN 10 NORWAY É Æ Ø Å Ü é æ ø å ü 11 DENMARK 2 É Æ Ø Å Ü é æ ø å ü 12 SPAIN 2 á Ñ é í ñ ó ú 13 LATIN AM á Ñ é Ü í ñ ó ú 14 TURKEY Ç Ö Ô Ü ç ö Õ ü 15 LEGAL E ...

Page 159: ...UL DLE SP 0 P p 1 SOH DC1 1 A Q a q 2 STX DC2 2 B R b r 3 ETX DC3 3 C S c s 4 EOT DC4 4 D T d t 5 ENQ NAK 5 E U e u 6 ACK SYN 6 F V f v 7 BEL ETB 7 G W g w 8 BS CAN 8 H X h x 9 HT EM 9 I Y i y A LF SUB J Z j z B VT ESC K k C FF FS L l D CR GR M m E SO RS N n F SI US O R 0 R o ...

Page 160: ... 7 8 9 A B C D E F 0 S P 0 P p C 4 J T S 1 1 A Q a q E 6 2 L 2 2 B R b r I 8 0 H 3 3 C S c s K µ F 4 4 D T d t M 1 B 5 5 E U e u O I 3 Æ 6 6 F V f v Q M G C Ï 7 7 G W g w 1 S B D K O Û 8 8 H X h x 3 D 9 P d E 9 9 I Y i y 5 F 6 é A J Z j z 7 H 5 B K k 9 J 7 C L l L 8 6 D M m n E 4 3 E N n 0 P A F O _ o A 2 R N K S P Space ...

Page 161: ... Ç I 1 1 A Q a q ü Ä 2 K 0 2 2 B R b r é Ï 0 M 2 L 3 3 C S c s â ô Û O 4 n 4 4 D T d t ä ö U 1 Q 6 P 5 5 E U e u à K 5 3 S 8 6 6 F V f v Á û 7 A µ R 7 7 G W g w ç ù 9 C 8 8 H X h x ê S 9 9 9 I Y i y ë Ö 6 A J Z j z è Ü 5 B T B K k ï 7 D Ü C L l î 1 8 F Ý D M m 3 4 H ñ E N n Ä g J F O _ o G r S P Space ...

Page 162: ...É Ä A Ú B 1 1 A Q a q ü æ C D 2 2 B R b r é Æ H 3 3 C S c s â ô E F 4 4 D T d t ä ö t I J 5 5 E U e u à ò K L ˆ 6 6 F V f v å û M n R T 7 7 G W g w ç ù O 0 P 8 8 H X h x ê ÿ 1 Q 2 R 9 9 I Y i y ë Ö 3 S 4 T A J Z j z è Ü 3 5 Ï 6 B K k ï 7 Ÿ 8 d C L l î 9 µ Ï D M m ì Û E N n Ä K é F O _ o Å ƒ S Æ S P Space ...

Page 163: ...0 P p l a 1 1 A Q a q k Š 2 9 D Z 2 2 B R b r f 0 C Y 3 3 C S c s e Ž F 2 4 4 D T d t P 1 E 1 5 5 E U e u O N 3 H T 6 6 F V f v p ƒ M 8 G S 7 7 G W g w o 4 7 J 8 8 H X h x t 3 9 B I 9 9 I Y i y s 6 0 V A J Z j z z L 5 U B K k y K 7 R C L l h 8 Q D M m _ g Å 4 A E N n X Ä b F O _ o W m S P Space ...

Page 164: ...C J D 1 1 A Q a q E 2 L F 2 2 B R b r G 0 H H o 3 3 C S c s I F J p 4 4 D T d t K 1 B L 5 5 E U e u M I 3 N 6 6 F V f v O 0 M C P 7 7 G W g w 1 Q 2 D K O R 8 8 H X h x 3 S 4 9 P T 9 9 I Y i y 5 U 6 6 V A J Z j z 7 W 8 5 B K k 9 Y 7 Z C L l 8 X m D M m E U 2 E N n _ A O F O _ o A a B N b S P Space ...

Page 165: ...S P 0 P p I 1 1 A Q a q Ä 2 K 0 2 2 B R b r Ï 0 M 2 L 3 3 C S c s Û O 4 n 4 4 D T d t 1 Q 6 P 5 5 E U e u K 5 3 S 8 6 6 F V f v U Ÿ 7 A µ R 7 7 G W g w 9 C ˆ 8 8 H X h x S 9 9 9 I Y i y 6 A J Z j z 5 B T R T B K k 7 D u L C L l r 1 8 F Ù D M m 3 U Ç H é E N n J O F O _ o Ê E t S P Space ...

Page 166: ... 1 1 A Q a q ü í 2 Ð ß 1 2 2 B R b r é ó 0 Š ô 3 3 3 C S c s â ô ú Ë 4 4 4 D T d t ä ö 1 5 5 E U e u ç Á 3 À Á 6 6 F V f v ƒ µ ð Â í Š 7 7 G W g w ç Ð ñ Œ î š 8 8 H X h x Ñ Ô 9 Ê 9 9 I Y i y ë Ö 6 Ú A J Z j z Ä Ü 5 Ë B K k Å Ø ï 7 à á C L l î Ù 8 ý Ì D M m î º Õ ò U Ú Ý Í E N n Ä ó æ Û F O _ o O S P Space ...

Page 167: ...1 A Q a q ü ñ í 2 L 2 2 B R b r é ð ó 0 H 3 3 C S c s ô ú F J 4 4 D T d t ä ö Á 1 B 3 5 5 E U e u Š ó À I 3 F 6 6 F V f v Ø ç æ M G C µ 7 7 G W g w Ú ô D K O J 8 8 H X h x ý š 9 P M 9 9 I Y i y Œ Ö Í 6 1 A J Z j z Ü Ë 5 S B K k Í Š Ê 7 C L l µ 8 T 6 D M m Ý E U ø E N n Ä Ì A F O _ o Á t N 1 S P Space ...

Page 168: ... ð 1 1 A Q a q Á á 2 2 B R b r 7 R  À â Á 3 3 C S c s º Ó ó 4 4 D T d t Ä Ô ä ô 5 5 E U e u µ Ä µ Å 6 6 F V f v Ð Ñ Ö ƒ ö 7 7 G W g w 4 Ç x ç 8 8 H X h x S Ì Í 9 9 I Y i y Š š É æ é ç A J Z j z Ô Õ Ú ú B K k Ø Ù Ë à ë á C L l î ï Œ Ü ü D M m 1 Í Ý í ý E N n ð ñ Î Ú î Û F O _ o ò ó Š ß S P Space ...

Page 169: ...1 1 A Q a q ü ò 2 L 2 2 B R b r é ó 0 H 3 3 C S c s â ô Ó F B 4 4 D T d t ä ö 1 B 3 5 5 E U e u à I 3 F 6 6 F V f v û ï M G C µ 7 7 G W g w ç ù ó D K O J 8 8 H X h x ê Ð 9 P M 9 9 I Y i y ë Ö 1 6 1 A J Z j z è Ü 5 S B K k ï zl 7 C L l î º 8 4 6 D M m ƒ Y i E U ø E N n Ä Ñ A F O _ o N 1 ƒ S P Space ...

Page 170: ... J 1 1 A Q a q ü æ í 2 L 2 2 B R b r é Æ ó 0 H 3 3 C S c s â Å ú F B 4 4 D T d t ä ö ñ 1 B 3 5 5 E U e u à ó Ñ I 3 F 6 6 F V f v å á ª M G C µ 7 7 G W g w ç Ú Ä D K O J 8 8 H X h x ê Ü 9 P M 9 9 I Y i y ë Ö 1 6 1 A J Z j z è Ü 5 S B K k ï 7 C L l î 8 4 6 D M m Y i E U ø E N n Ä A F O _ o Á N 1 ƒ S P Space ...

Page 171: ...1 A Q a q ü í 2 Ð ß 1 2 2 B R b r é µ ó 0 Š Ô 3 3 3 C S c s â ô ú Ë 4 4 4 D T d t ä ö 1 4 5 5 E U e u ç Á 3 À Á 6 6 F V f v ƒ µ ð Â Í Š 7 7 G W g w ç Ð ñ Œ Î š 8 8 H X h x Ñ Ô 9 Ê 9 9 I Y i y ë Ö 6 Ú A J Z j z Ä Ü 5 Ë B K Š k š Å Ø ï 7 à á C L Ð l ð î Ù 8 ý Ì D M m ƒ î º Õ ò U Ú Ý Í E N n Ä ó æ Û F O _ o O S P Space ...

Page 172: ... Q a q C 2 L F 2 2 B R b r T 0 H š 3 Ì 3 C S c s j y J 4 Ë 4 D T d t k 1 B L 5 Ê 5 E U e u E X 3 N 6 Í 6 F V f v O 0 M g P 7 0 7 G W g w 1 r 2 Ã K R ñ 8 3 8 8 H X h x 3 S 4 9 T ð 9 9 9 I Y i y 5 U 6 6 V Æ A 4 6 J Z j z 7 W 8 5 X B 7 K k 9 Z 7 Z C 2 L 2 M b 8 N D M m H Ç 4 ã š E N n O _ A â F O _ o A a B N b S P Space ...

Page 173: ...á 2 2 B R b r 7 R  À â Á 3 Ì 3 C S c s º Ó ó 4 Ë 4 D T d t Ä Ô ä ô 5 Ê 5 E U e u ÿ C µ Ä µ Å 6 Í _ 6 F V f v Ö ƒ ö R T 7 0 7 G W g w Ç x ç 8 3 8 8 H X h x S Ì Í 9 9 9 I Y i y É æ é ç A 4 6 J Z j z Š š Ô Õ Ú ú B 7 K k Ë à ë á C 2 L l Ð Ñ º Œ Ü ü D M m Ø 1 Í Ý í ý 4 t E N n ð ñ µ Î Ú î Û F O _ o î ï ò ó Š ß d 4 S P Space ...

Page 174: ...P p P J D 1 1 A Q a q C 2 L F 2 2 B R b r T 0 H H Ž 3 Ì 3 C S c s j y F J 4 Ë 4 D T d t k 1 B L 5 Ê 5 E U e u E X I 3 N 6 Í 6 F V f v O 0 M G C P Š 7 0 7 G W g w 1 r 2 D K O R š 8 3 8 8 H X h x 3 S 4 9 P T ä 9 9 9 I Y i y 5 U 6 6 V å A 4 6 J Z j z 7 W 8 5 X â B 7 K k 9 Z 7 Z ã C 2 L 2 M b 8 ð D M m H E 4 ñ E N n O _ A O F O _ o A a B N b ...

Page 175: ... Ó 1 1 A Q a q ü æ 2 L ß 2 2 B R b r é Æ Ó 0 0 Ö Ž 3 Ì 3 C S c s Ç ò 4 Ë 4 D T d t ä ö ó 1 õ 5 Ê 5 E U e u š î 3 Õ 6 Í 6 F V f v á 1 M µ Š 7 0 7 G W g w ƒ Ö K š 8 3 8 8 H X h x 9 ä 9 9 9 I Y i y Ö 6 å A 4 6 J Z j z Î Ü 5 â B 7 K k Ï ø 7 ã C 2 L 2 8 à ð D M m ò Ø º 4 ñ E N n Ä x  O F O _ o Á N ...

Page 176: ...q ü æ í 2 2 2 B R b r é Æ ó 0 3 Ì 3 C S c s â ô ú A 4 Ë 4 D T d t ä ö û 1 G 5 Ê 5 E U e u à ò ú À 3 š F 6 Í 6 F V f v å û ª ˆ ä å µ 0 7 0 7 G W g w ç ù º â á J 8 3 8 8 H X h x ê ÿ Ž 9 ñ M E 9 9 9 I Y i y ë Ö 1 6 1 A 4 6 J Z j z è Ü 5 S B 7 K k ï 7 4 C 2 L 2 î 8 4 6 D M m ì 4 ø E N n Ä L Š O F O _ o Å ƒ ò 1 ...

Page 177: ...ˆ É Ó 1 1 A Q a q ü æ 2 2 2 B R b r é Æ ó 0 Æ 3 Ì 3 C S c s Ç ò 4 Ë 4 D T d t ä ö ó 1 õ 5 Ê 5 E U e u Ÿ š ï À 3 š Õ 6 Í 6 F V f v å ä å µ 7 0 7 G W g w ƒ Ð â á 8 3 8 8 H X h x Ñ Ž 9 ñ E 9 9 9 I Y i y Ö 6 A 4 6 J Z j z Î Ü 5 B 7 K k Ï ø 7 C 2 L 2 8 Ã D M m ï Ø º 4 E N n Ä x Š Â O F O _ o Å ò ...

Page 178: ...E F 0 i 0 P p E Š š 1 1 A Q a q 6 2 2 B R b r 3 Â Ã 3 Ì 3 C S c s Ó ƒ ó 4 Ë 4 D T d t Ä Æ ä Ç 5 Ê 5 E U e u D Å Õ å õ 6 Í 6 F V f v Ö ö 7 0 7 G W g w x 8 3 8 8 H X h x Ø ø ä å 9 9 9 I Y i y É º é A 4 6 J Z j z Î Ï î Ð ï Ñ B 7 K k Ž â ã C 2 L 2 š à á D M m ò ó E N n ð ñ F O _ o Æ æ ...

Page 179: ...er 4207 4208 XL 24 Emulation commands supported in four Printer types Printer CI 4040 Printer CI 4050 Printer CI 4070 Printer CI 4080 Some commands or parameters may be different for a specific Printer type In those cases it will be indicated by the PINTER NAME to which pinter a command or parameter applies ...

Page 180: ...Emulation commands classified by Hex Code and a Hex Decimal conversion table The following conventions are used in the command listings Table 1 Conventions ESC Escape 1 B introduces an escape sequence Pn Numeric parameter or number of units that specify a distance or quantity pertaining to the escape sequence control function or control string Accepted values are 0 9999 may be preceded by or If th...

Page 181: ...Feed 0 D CR Carriage Return 0 E SO Double Width Printing By Line 0 F SI Condensed Printing 17 1 cpi 1 1 DC1 Select Printer 1 2 DC2 Select Pica 10 cpi 1 3 DC3 Buffer Data Flow Control 1 4 DC4 Cancel Double Width Printing By Line 1 8 CAN Cancel Buffer 1 B ESC Initiate Escape Sequence 2 0 SP Space 7 F DEL Delete 1 B 6 A ESC j Set Printer Off Line 1 B 5 1 2 3 ESC Q Deselect Printer 1 B 5 1 2 4 ESC Q D...

Page 182: ...e to P1 P1 72 60 P1 lpi non AGM P1 72 P1 lpi AGM P1 0 1 5 5 P1 60 Note Default or 6 lpi 12 72 ESC B NUL Clear all Vertical Tabs ESC B P1 P2 P64 NUL Set Vertical Tabs Pn 0 1 F F ESC C P1 Set Form Length in Lines P1 0 1 7 F ESC C NUL P1 Set Form Length in Inch P1 0 1 1 6 ESC N P1 Set Automatic Perforation Skip P1 is the number of lines from bottom of paper to skip P1 0 0 F F ESC O Cancel Automatic P...

Page 183: ... may be skipped see following alternative command sequences Insert Form ESC P1 s SPS Paper Source Native Command P1 0 Manual Feed P1 1 ASF Bin 1 P1 2 ASF Bin 2 P1 3 ASF Bin 3 P1 6 upper Tractor P1 7 Tractor Feed lower Tractor P1 8 ASF Bins 1 or 2 P1 9 ASF Bins 2 or 3 P1 1 0 ASF Bins 1 or 2 or 3 P1 1 5 upper and lower tractor ESC P2 s AGC PCC Procedure Native Command P2 0 Automatic Gap Control P2 1...

Page 184: ...ion ESC P3 s Paper Exit Native Command P3 0 Paper Exit Stacker P3 1 Paper Exit Front Side confirmed by Start Stop key P3 2 Paper Exit Front Side not confirmed by Start Stop key controlled by application P3 3 Batch output rear side ESC P4 s Cut Mode On Off Native Command P4 0 Cut Mode Off P4 1 Cut Mode On P4 2 Cut on actual position cutting edge is approximate 4 mm above the base of the actual line...

Page 185: ...trols character width P1 0 x line spacing unchanged P1 1 x single line space P1 2 x double line space P1 3 x triple line space P1 4 x quadruple line space P1 x 0 charcter height unchanged P1 x 1 single charcter height P1 x 2 double character height P1 x 3 triple character height P1 x 4 quadruple character height P2 0 0 character width unchanged P2 0 1 single character width P2 0 2 double character...

Page 186: ... 1 Draft Proportional P1 0 2 Courier 10 cpi P1 0 3 Courier Proportional P1 0 8 Draft 12 cpi P1 0 A Courier 12 cpi P1 1 0 Draft 17 cpi P1 1 2 Courier 17 cpi ESC P P1 Cancel Select Proportional Printing P1 0 0 or 0 cancel Proportional P1 0 1 or 1 select Proportional ESC R Restore Horizontal Tabs to Default ESC S P1 Select Superscript Subscript P1 0 0 or 0 select Superscript P1 0 1 or 1 select Subscr...

Page 187: ...Width P1 0 0 or 0 cancel Double Width P1 0 1 or 1 select Double Width ESC X P1 P2 Set Left and Right Margins P1 Left Margin P2 Right Margin Pn 0 0 F F ESC d P1 P2 Set Relative Horizontal Dot Position P1 P2 x 256 120 Pn 0 0 F F ESC Home Position of Printhead left margin ESC Set Left Margin at Current Position ESC P1 SP r SPQ Select Print Quality LQ NLQ Native Command P1 0 LQ P1 1 NLQ ...

Page 188: ...sequences ESC P1 x P1 selects the font possible format of P1 0 or missing Font is unchanged Native Command CPL P1 1 Data P1 2 Roman P1 3 San Serif P1 4 Courier P1 5 Prestige P1 6 Script P1 7 OCR B P1 8 OCR A P1 9 Orator C P1 10 Orator P1 11 Data Large ESC P2 x P2 selects the character pitch possible format of P2 0 or missing Pitch is unchanged Native Command CPL P2 1 10 cpi P2 2 12 cpi P2 3 15 cpi...

Page 189: ...om All Character Set Number of codes P1 P2 256 Pn 0 0 F F ESC P1 Print Single Character from All Character Set P1 Number of Char Set or Code Page Pn 0 0 F F ESC T n1 n2 NUL NUL P1 P2 Code Page Switching n1 4 n2 0 P1 P2 for Code Page number most significant byte first P1 P2 1 181 CP 437 U S A 3 82 CP 850 Multilingual 3 90 CP 858 Multilingual Euro 3 92 CP 860 Portugal 3 95 CP 863 French 3 97 CP 865 ...

Page 190: ...erform Line Feed P1 P1 216 180 lpi non AGM P1 216 lpi AGM P1 0 0 F F P1 180 ESC K P1 P2 v1 vn Standard Density Graphics Mode P1 P2 256 number of data Pn 0 0 F F ESC L P1 P2 v1 vn Double Density Graphics Mode P1 P2 256 number of data Pn 0 0 F F ESC Y P1 P2 v1 vn Double Speed Density Graphics Mode P1 P2 256 number of data Pn 0 0 F F ESC Z P1 P2 v1 vn Quadruple Density Graphics Mode P1 P2 256 number ...

Page 191: ... density density density column columns dpi no AGM AGM 0 0 Standard Density K 8 816 60 72 60 0 1 Double Density L 8 1632 120 72 60 0 2 2xDensity 2xSpeed Y 8 1632 120 72 60 0 3 Quadruple Density Z 8 3264 240 72 60 0 8 Standard Density 24 816 60 180 180 0 9 Double Density 24 1632 120 180 180 0 B Triple Density 24 2448 180 180 180 0 C Hex Density 24 4896 360 180 180 consecutive horizontal dots cannot...

Page 192: ...ensity density column columns dpi no AGM AGM 0 0 Standard Density K 8 816 60 72 60 0 1 Double Density L 8 1632 120 72 60 0 2 2xDensity 2xSpeed Y 8 1632 120 72 60 0 3 Quadruple Density Z 8 3264 240 72 60 0 4 CRT I 8 1088 80 72 60 0 5 Plotter 8 979 72 72 0 6 CRT II 8 1224 90 72 60 0 B Double Density Plotter 8 1958 144 72 2 0 Standard Density 24 816 60 180 180 2 1 Double Density 24 1632 120 180 180 2...

Page 193: ...Spain P1 9 Japan P1 1 0 Norway P1 1 1 Denmark 2 P1 1 2 Spain 2 P1 1 3 Latin AM P1 1 4 Turkey P1 for IBM CODE PAGE P1 for CODE PAGE EE P1 1 CP 437 P1 1 CP 437 GK P1 2 CP 850 P1 2 CP 851 GK P1 3 CP 860 P1 3 CP 928 GK P1 4 CP 863 P1 4 CP 855 CYRI P1 5 CP 865 P1 5 CP 866 P1 6 CP 858 P1 6 CP 869 P1 7 CP 852 P1 for CODE PAGE EE2 P1 8 KAMENICKY P1 1 CP 771 P1 9 ISO LATIN 2 P1 2 CP 773 P1 1 0 MAZOVIA P1 3...

Page 194: ...ProPrinter AGM Emulation P2 4 EPSON Emulation ESC M RLF Reverse Line Feed ESC s EJF Eject Form ESC P1 P2 SP B GSM Graphic Size Modification P1 1 0 0 normal height P1 2 0 0 normal height P1 3 0 0 normal height P1 4 0 0 quadruple height P1 max 8 0 0 in steps of 100 P2 1 0 0 normal width P2 2 0 0 double width P2 3 0 0 triple width P2 4 0 0 quadruple width P2 max 8 0 0 in steps of 100 Graphic Size Mod...

Page 195: ...Vertical Position Absolute P1 0 or 1 Top of Form Top Margin P1 2 9999 Vertical Line ESC P1 e VPR Set Vertical Position Relative P1 0 or 1 moves the position one line P1 2 9999 Vertical Line ESC P1 g TBC Tabulation Clear P1 0 at active print pos all tabs and margin marker P1 3 all horizontal P1 4 all vertical tabs and margin marker ESC P1 w SNV Set National Version P1 1 15 national version dependin...

Page 196: ...hic Rendition P1 0 default no rendition or rendition reset P1 1 bold P1 3 italics P1 4 underline P1 9 crossed out or strike through printing P1 20 enlarged double width printing P1 21 double underline P1 22 bold reset P1 23 italics reset P1 24 underline reset P1 29 crossed out reset P1 30 black P1 31 orange P1 32 green P1 33 yellow P1 34 purple P1 35 magenta red P1 36 cyan blue P1 53 over lined P1...

Page 197: ...hin bars P5 Width of the thin gaps P6 Ratio width to thin bars gaps P7 Uni directional or bi directional printing 0 or not programmed means no changes 1 uni directional printing in LQ 2 bi directional printing in LQ 3 uni directional printing in NLQ 4 bi directional printing in NLQ Note A switch from uni directional to bi directional printing is only possible if the parameter UNI DIRECT CMD is set...

Page 198: ...cel Buffer E 3 1B Escape E 3 20 Space E 3 7F Delete E 3 1B 30 Set Line Space to E 4 1 8 1B 31 Set Line Space to E 4 7 72 1B 32 Start Variable Line Space E 4 1B 34 Set Top Of Form E 4 1B 36 Select Character Set 2 E 11 1B 37 Select CHaracter Set 1 E 11 1B 3A Select Elite 12 cpi E 7 1B 3B Set Left Margin at Current E 9 1B 3C Home Position of Printhead E 9 1B 45 Select Emphasized bold E 8 1B 46 Cancel...

Page 199: ...ip Over Perforation E 4 1 1B 50 00 1B 50 01 Cancel Select Proportional E 8 1B 51 23 or 1B 51 24 Deselect Printer E 3 1B 53 00 1B 53 01 Select Superscript Subscipt E 8 1B 55 00 1B 55 01 Cancel Select Unidirectional Printing E 8 1B 57 00 1B 57 01 Cancel Select Double Width E 9 1B 5E P Single Character from All Char Set E 11 1 1B 5F 00 1B 5F 01 Cancel Select Overline E 7 1B 2A P P P data Select Vario...

Page 200: ...it E 4 1 1B 5B 67 P P P data Select Various Graphics Modes IBM E 13 1 2 3 1B 5B P 20 58 Select Print Quality LQ NLQ E 9 1 1B 5B P 3B P 20 72 Select Macro and Change Emulation E 16 1 2 1B 5B P 3B P 20 42 Graphic Size Modification E 16 1 2 1B 5B P 3B P 77 Set National Version and Code Table E 15 1 2 1B 5B P 3B P 78 Select Font and Character Pitch E 10 1 2 1B 5B P 60 Set Horizontal Position Absolute ...

Page 201: ...101 117 133 149 165 181 197 213 229 245 6 6 22 38 54 70 86 102 118 134 150 166 182 198 214 230 246 7 7 23 39 55 71 87 103 119 135 151 167 183 199 215 231 247 8 8 24 40 56 72 88 104 120 136 152 168 184 200 216 232 248 9 9 25 41 57 73 89 105 121 137 153 269 185 201 217 233 249 A 10 26 42 58 74 90 106 122 138 154 170 186 202 218 234 250 B 11 27 43 59 75 91 107 123 139 155 171 187 203 219 235 251 C 12...

Page 202: ...ON LQ 2550 Printer Emulation commands supported in four Printer types Printer CI 4040 Printer CI 4050 Printer CI 4070 Printer CI 4080 Some commands or parameters may be different for a specific Printer type In those cases it will be indicated by the PINTER NAME to which pinter a command or parameter applies ...

Page 203: ...lation commands classified by Hex Code and a Hex Decimal conversion table The following conventions are used in the command listings Table 1 Conventions ESC Escape 1 B introduces an escape sequence P1 Numeric parameter or number of units that specify a distance or quantity pertaining to the escape sequence control function or control string Accepted values are 0 9999 may be preceded by or If the p...

Page 204: ...ble Width Printing By Line 0 F SI Condensed Printing 1 1 DC1 Select Printer 1 2 DC2 Select Pica 10 cpi 1 3 DC3 Deselct Printer 1 4 DC4 Cancel Double Width Printing By Line 1 8 CAN Cancel Buffer 1 B ESC Initiate Escape Sequence 2 0 SP Space 7 F DEL Delete Table B 3 Terminal Management Escape Sequence Mnemonic Function ESC Initialize Printer ESC Set Most Significant Bit to 0 ESC Set Most Significant...

Page 205: ...P16 0 1 F F ESC C P1 Set Form Length in Lines P1 0 1 F F ESC C NUL P1 Set Form Length in Inches P1 0 1 0 C ESC J P1 Perform Line Feed P1 0 0 F F P1 180 ESC N P1 Set Automatic Perforation Skip P1 is the number of lines from bottom of paper to skip P1 0 1 7 F ESC O Cancel Automatic Perforation Skip ESC b P1 P2 P16 NUL Set Vertical Tabs in Channel P1 P1 0 0 0 7 channel 0 7 P2 P16 line number P2 P16 0...

Page 206: ...ut Mode any parameter or P1 to P4 may be skipped see following alternative command sequences Insert Form ESC P1 s SPS Paper Source Native Command P1 0 Manual Feed P1 1 ASF Bin 1 P1 2 ASF Bin 2 P1 3 ASF Bin 3 P1 6 upper Tractor P1 7 Tractor Feed lower Tractor P1 8 ASF Bins 1 or 2 P1 9 ASF Bins 2 or 3 P1 1 0 ASF Bins 1 or 2 or 3 P1 1 5 upper and lower tractor ESC P2 s AGC PCC Print Gap Control Nativ...

Page 207: ...C P3 s Paper Exit Native Command P3 0 Paper Exit Stacker P3 1 Paper Exit Front Side confirmed by Start Stop key P3 2 Paper Exit Front Side not confirmed by Start Stop key controlled by application P3 3 Batch output rear side ESC P4 s Cut Mode On Off Native Command P4 0 Cut Mode Off P4 1 Cut Mode On P4 2 Cut on actual position cutting edge is approximate 4 mm above the base of the actual line ...

Page 208: ...80 for NLQ LQ P1 0 0 7 F ESC P1 Select Multiple Print Mode P1 selects Bit0 0 10 cpi Pica Bit0 1 12 cpi Elite Bit1 1 proportional Bit2 1 Condensed Bit3 1 Emphasized Bit4 1 Double Strike Bit5 1 Double Width Bit6 1 Italics Bit7 1 Underline ESC P1 P2 Set Absolute Horizontal Position P1 P2 256 P1 0 0 F F 1 60 P2 0 0 0 3 ESC P1 P2 Set Relative Horizontal Position Draft P1 P2 256 1 120 P1 0 0 F F P2 0 0 ...

Page 209: ...defined char in LQ 128 in draft or use a RAM card for up to 128 User Defined Characters in LQ Set maximum every second dot to 1 in a horizontal line User Defined Characters can be defined in four different print modes resolution vertical x horizontal Normal Size with Draft 24 x 15 Normal Size with LQ proport 24 x 37 Sub Superscript with Draft 16 x 15 Sub Superscript with LQ proport 16 x 37 The cha...

Page 210: ...re line selected by P4 P5 0 1 single continuous line P5 0 2 double continuous line P5 0 5 single broken line P5 0 6 double broken line ESC 4 Set Italics ESC 5 Cancel Italics ESC Select Unidirectional Mode one line ESC NUL P1 NUL Copy ROM Character Set to RAM P1 0 0 S ROMAN P1 0 1 L GOTHIC P1 0 2 COURIER P1 0 3 PRESTIGE P1 0 4 SCRIPT P1 0 5 OCR B P1 0 6 OCR A P1 0 7 ORATOR C P1 0 8 ORATOR ESC P1 Un...

Page 211: ...pi ESC P Select Pica 10 cpi ESC Q P1 Set Right Margin P1 0 3 F F ESC S P1 Select Superscript Subscript P1 0 0 or 3 0 select Superscript P1 0 1 or 3 1 select Subscript ESC T Cancel Superscript Subscript ESC U P1 Cancel Select Unidirectional Printing P1 0 0 or 3 0 cancel Unidirectional P1 0 1 or 3 1 select Unidirectional ESC W P1 Cancel Select Double Width P1 0 0 or 3 0 cancel Double Width P1 0 1 or...

Page 212: ...TIGE P1 0 4 SCRIPT P1 0 5 OCR B P1 0 6 OCR A P1 0 7 ORATOR C P1 0 8 ORATOR P1 1 1 DATA LARGE ESC l P1 Set Left Margin P1 0 0 F C ESC p P1 Cancel Select Proportional P1 0 0 or 3 0 cancel proportional P1 0 1 or 3 1 select proportional ESC q P1 Select Character Style P1 0 0 normal style P1 0 1 outline P1 0 2 shadow P1 0 3 outline shadow ESC r P1 Select Printing Colour P1 0 0 Black P1 0 1 Magenta P1 0...

Page 213: ...0 or 3 0 select Draft P1 0 1 or 3 1 select LQ or NLQ dep on set up ESC P1 P2 SP B GSM Graphic Size Modification Native Command P1 100 normal height P1 200 double height P1 300 triple height P1 400 quadruple height P1 max 800 in steps of 100 P2 100 normal width P2 200 double width P2 300 triple width P2 400 quadruple width P2 max 800 in steps of 100 Graphic Size Modification for DATA LARGE P1 100 n...

Page 214: ...command sequences ESC P1 x P1 selects the font possible format of P1 0 or missing Font is unchanged Native Command CPL P1 1 DATA P1 2 ROMAN P1 3 SAN SERIF P1 4 COURIER P1 5 PRESTIGE P1 6 SCRIPT P1 7 OCR B P1 8 OCR A P1 9 ORATOR C P1 10 ORATOR P1 11 DATA LARGE ESC P2 x P2 selects the character pitch possible format of P2 0 or missing Pitch is unchanged Native Command CPL P2 1 10 cpi P2 2 12 cpi P2 ...

Page 215: ...dot per column ESC Y P1 Reassign Graphics Mode Y 1 Double Density Speed 8 dot per col ESC Z P1 Reassign Graphics Mode Z 1 Quadruple Density 8 dot per column ESC K P2 P3 v1 vn Standard Density Graphics Mode 1 ESC L P2 P3 v1 vn Double Density Graphics Mode 1 ESC Y P2 P3 v1 vn Double Density Double Speed Graphics Mode 1 ESC Z P2 P3 v1 vn Quadruple Density Graphics Mode 1 for coding of P1 P2 P3 see ES...

Page 216: ...column of columns dpi 0 0 Standard Density K 8 816 60 0 1 Double Density L 8 1632 120 0 2 2xDensity 2xSpeed Y 8 1632 120 0 3 Quadruple Density Z 8 3264 240 0 4 CRT I 8 1088 80 0 6 CRT II 8 1224 90 2 0 Standard Density 24 816 60 2 1 Double Density 24 1632 120 2 6 CRT III 24 1224 90 2 7 Triple Density 24 2448 180 2 8 Hex Density 24 4896 360 consecutive horizontal dots cannot be printed Example box 8...

Page 217: ...28 159 dec ESC R P1 Select National Version P1 0 0 U S A P1 0 1 FRANCE P1 0 2 GERMANY P1 0 3 U K P1 0 4 DENMARK P1 0 5 SWEDEN P1 0 6 ITALY P1 0 7 SPAIN P1 0 8 JAPAN P1 0 9 NORWAY P1 0 A DENMARK 2 P1 0 B SPAIN 2 P1 0 C LATIN AM P1 0 D TURKEY P1 4 0 LEGAL ESC t P1 Select Character Table P1 0 0 Italics Character Table P1 0 1 Extended Graphics Character Table P1 0 2 User Defined Character Table ...

Page 218: ...ng Introducer CSI for ESC ESC control String Introducer for ESC ESC s EJF Eject Form ESC s IF Insert Form ESC P1 SP X SPQ Select Print Quality P1 0 LQ P1 1 NLQ ESC P1 P2 SP r SM Select Macro and Change Emulation P1 1 Macro 1 P1 2 Macro 2 P1 3 Macro 3 P1 4 Macro 4 P2 0 no change of emulation P2 1 EPSON Emulation P2 2 IBM ProPrinter Emulation P2 3 IBM ProPrinter AGM Emulation P2 4 EPSON Emulation ...

Page 219: ...n P1 9 Japan P1 1 0 Norway P1 1 1 Denmark 2 P1 1 2 Spain 2 P1 1 3 Latin AM P1 1 4 Turkey P1 1 5 Legal P1 for IBM CODE PAGE P1 for CODE PAGE EE P1 1 CP 437 P1 1 CP 437 GK P1 2 CP 850 P1 2 CP 851 GK P1 3 CP 860 P1 3 CP 928 GK P1 4 CP 863 P1 4 CP 855 CYRI P1 5 CP 865 P1 5 CP 866 P1 6 CP 858 P1 6 CP 869 P1 7 CP 852 P1 for CODE PAGE EE2 P1 8 KAMENICKY P1 1 CP 771 P1 9 ISO LATIN 2 P1 2 CP 773 P1 1 0 MAZ...

Page 220: ...thin bars P5 Width of the thin gaps P6 Ratio width to thin bars gaps P7 Uni directional or bi directional printing 0 or not programmed means no changes 1 uni directional printing in LQ 2 bi directional printing in LQ 3 uni directional printing in NLQ 4 bi directional printing in NLQ Note A switch from uni directional to bi directional printing is only possible if the parameter UNI DIRECT CMD is se...

Page 221: ...n in units bm ESC C P1 P2 P3 Set page length in defined unit Define page length in units P1 02 00 pl P2 P3 x 256 ESC V P1 P2 P3 Set absolute vertical print position Define absolute vertical print position in units P1 02 00 avpp P2 P3 x 256 avpp define print position from top margin in defined units ESC v P1 P2 P3 Set relative vertical print position Define relative vertical print position in units...

Page 222: ...ng P1 18 24 30 36 42 48 60 or 72 Selects fixed pitch equal to 360 m cpi pz P2 P3 x 256 pz Point size in 0 5 points 1 point equals 1 72 inch pz 0 No change in point size pz 16 20 21 24 28 32 36 40 42 44 48 52 56 60 64 ESC U P1 P2 Set unit P1 01 00 P2 10 20 30 40 50 60 3600 P2 10 Standard ESC c P1 P2 Set horizontal motion index HMI Define HMI Index Change pitch value in n 360 steps HMI P1 P2 x 256 H...

Page 223: ...ssigned by Pn is one of the four tables which will be selected by the ESC t command ESC t Pn Select character table Selects the character table to be used for printing from among the four character tables which are assigned by ESC t command Pn 0 0 or 3 0 Character Table 0 Pn 0 1 or 3 1 Character Table 1 Pn 0 2 or 3 2 Character Table 2 Re maps downloaded Characters from the positions 0 to 127 to th...

Page 224: ... Select graphics mode P1 01 00 P2 1 or 49 Graphics mode may be reset by ESC ESC P1 P2 P 3 P4 P5 P6 Print raster graphics P1 0 graphics mode non compressed P1 1 graphics mode compressed P2 10 20 vertical resolution in 3600 v DPI P3 10 20 horizontal resolution in 3600 h DPI P4 vertical dot count rows of dot graphics 1 P4 24 hzd horizont dot count columns of dot graphics hzd P5 P6 x 256 Combination P...

Page 225: ...7F Delete F 3 1B 0E or 0E Select Double Width for One Line F 3 7 1B 0F or 0F Select Condensed Mode F 3 7 1B 23 Cancel Most Significant Bit Control F 3 1B 30 Set Line Space to F 4 1 8 1B 32 Set Line Space to F 4 1 6 1B 34 Set Italics F 9 1B 35 Cancel Italics F 9 1B 36 Enlarge Print Code Area F 16 1B 37 Enable Upper Control Code Area F 16 1B 3C Select Unidirectional Mode one line F 9 1B 3D Set Most ...

Page 226: ...de F 7 1 1B 25 00 1B 25 01 Select Standard User Defined Char F 7 Set 1B 2B P Set line Space to F 4 1 P1 360 1B 2F P Select Variable Tab Channel F 4 1 1B 2D 01 1B 2D 00 Select Cancel Underline F 9 1B 33 P Set Line Space to F 4 1 P1 180 1B 41 P Set line Space to F 4 1 P1 60 1B 42 00 Clear Vertical Tabs F 4 1B 43 P Set Form Length in Lines F 4 1 1B 44 00 Clear Horizontal Tabs F 9 1B 4A P Perform Line...

Page 227: ...8 43 P P P Set Page Length in defined Unit F 20 1 2 3 1B 28 47 P P Select Graphics Mode F 23 1 2 1B 28 55 P P Set Unit F 21 1 2 1B 28 56 P P P Set absolute vertical Print Position F 20 1 2 3 1B 28 63 P P P P P Set Page Format F 20 1 2 3 4 5 1B 28 74 P P P P Assign Character Table F 22 1 2 3 4 1B 28 76 P P P Set relative vertical Print Position F 20 1 2 3 1B 28 5E P P Print Data as Character F 23 1...

Page 228: ...20 7A 6 7 1B 5B 3C 73 Eject Form F 17 1B 5B 3E 73 Insert Form F 17 1B 5B 3E P 3B P 3B P 3B P 73 Select Paper Source and Insert Form F 5 1 2 3 4 1B 5B 3F 30 68 Set Mode Barcode F 19 1B 5B 3F 30 6C Reset Mode Barcode F 19 1B 5B P 20 58 Select Print Quality F 17 1 1B 5B P 3B P 20 72 Select Makro and Change Emulation F 17 1 2 1B 5B P 3B P 20 42 Graphic Size Modification F 12 1 2 1B 5B P 3B P 77 Set Na...

Page 229: ... 117 133 149 165 181 197 213 229 245 6 6 22 38 54 70 86 102 118 134 150 166 182 198 214 230 246 7 7 23 39 55 71 87 103 119 135 151 167 183 199 215 231 247 8 8 24 40 56 72 88 104 120 136 152 168 184 200 216 232 248 9 9 25 41 57 73 89 105 121 137 153 269 185 201 217 233 249 A 10 26 42 58 74 90 106 122 138 154 170 186 202 218 234 250 B 11 27 43 59 75 91 107 123 139 155 171 187 203 219 235 251 C 12 28...

Page 230: ...e but before barcode printing The header has the following format ESC P P P P P P 8 z Note 8 Space 2 3 4 5 6 7 In step two the ESC sequence Set Mode Barcode SMBC starts the barcode printing ESC 0 h Finally the ESC sequence Reset Mode Barcode RMBC will stop printing ESC 0 l Note Between SMBC and RMBC are only printable characters tolerated no CR or LF 2 1 Barcode Header Format Function Parameter He...

Page 231: ...licable not applicable UPC A 110 210 not applicable not applicable Code 128 EAN 128 111 211 311 411 Postnet 112 not applicable not applicable not applicable KIX Code 113 not applicable not applicable not applicable P Height of barcode 3 default 0 64 cm 3 12 All characters in a line are automatically repeated according to the selected barcode height This is also true for plain text P 3 12 1 possibl...

Page 232: ...dec inch mm 4 0 30 48 2 144 0 35 1 31 49 3 144 0 53 2 32 50 4 144 0 70 3 33 51 5 144 0 88 4 34 52 6 144 1 05 5 35 53 7 144 1 23 6 36 54 8 144 1 41 7 37 55 9 144 1 58 for vertical Barcode P hex dec inch mm 4 0 30 48 2 180 0 28 1 31 49 3 180 0 42 2 32 50 4 180 0 56 3 33 51 5 180 0 70 4 34 52 6 180 0 85 5 35 53 7 180 0 99 6 36 54 8 180 1 12 7 37 55 9 180 1 27 P Width of the thin gaps default 0 35 mm ...

Page 233: ... printing standard 0 uni directional 7 values are 0 or not programmed means no changes 1 uni directional printing in LQ 2 bi directional printing in LQ 3 uni directional printing in NLQ 4 bi directional printing in NLQ Note A switch from uni directional to bi directional printing is only possible if the parameter UNI DIRECT CMD is set to YES via operator panel or ESC sequence Start Position of Bar...

Page 234: ...rcode indicates the actual print position Between Start Barcode and Stop Barcode are only printable characters tolerated no CR or LF Barcode Example for Code 39 Barcode Header ESC P P P P P P 8 z 2 3 4 5 6 7 ESC 201 8 1 1 1 8 z Start Barcode ESC 0 h Data C 8 O 8 D 8 E 8 8 8 3 9 Stop Barcode ESC 0 l Barcode Example for 2 of 5 Industrial Barcode Header ESC P P P P P P 8 z 2 3 4 5 6 7 ESC 202 8 1 1 1...

Page 235: ...ESC P P P P P P 8 z 2 3 4 5 6 7 ESC 203 8 1 1 1 8 z Start Barcode ESC 0 h Data 1 2 3 4 5 6 7 8 9 0 Stop Barcode ESC 0 l Barcode Example for Codabar Monarch Barcode Header ESC P P P P P P 8 z 2 3 4 5 6 7 ESC 204 8 1 1 1 8 z Start Barcode ESC 0 h Data a 0 1 2 3 4 5 6 7 8 9 t Stop Barcode ESC 0 l ...

Page 236: ...der ESC P P P P P P 8 z 2 3 4 5 6 7 ESC 205 8 1 8 z Start Barcode ESC 0 h Data 4 0 1 2 3 4 5 5 Stop Barcode ESC 0 l Barcode Example for EAN 8 ADD 2 Barcode Header ESC P P P P P P 8 z 2 3 4 5 6 7 ESC 205 8 1 8 z Start Barcode ESC 0 h Data 4 0 1 2 3 4 5 5 1 2 Stop Barcode ESC 0 l ...

Page 237: ... ESC P P P P P P 8 z 2 3 4 5 6 7 ESC 205 8 1 8 z Start Barcode ESC 0 h Data 4 0 1 2 3 4 5 5 8 6 1 0 4 Stop Barcode ESC 0 l Barcode Example for EAN 13 Barcode Header ESC P P P P P P 8 z 2 3 4 5 6 7 ESC 206 8 1 8 z Start Barcode ESC 0 h Data 4 1 2 3 4 5 6 7 8 9 0 1 8 Stop Barcode ESC 0 l ...

Page 238: ...P P P P 8 z 2 3 4 5 6 7 ESC 206 8 1 8 z Start Barcode ESC 0 h Data 4 1 2 3 4 5 6 7 8 9 0 1 8 1 2 Stop Barcode ESC 0 l Barcode Example for EAN 13 ADD 5 Barcode Header ESC P P P P P P 8 z 2 3 4 5 6 7 ESC 206 8 1 8 z Start Barcode ESC 0 h Data 4 1 2 3 4 5 6 7 8 9 0 1 8 8 6 1 0 4 Stop Barcode ESC 0 l ...

Page 239: ...ESC P P P P P P 8 z 2 3 4 5 6 7 ESC 207 8 1 1 8 z Start Barcode ESC 0 h Data a C O D E 8 9 3 W I e Stop Barcode ESC 0 l Barcode Example for MSI Mod 10 10 Barcode Header ESC P P P P P P 8 z 2 3 4 5 6 7 ESC 208 8 1 1 8 z Start Barcode ESC 0 h Data 1 2 3 4 5 6 7 4 1 Stop Barcode ESC 0 l ...

Page 240: ...de Header ESC P P P P P P 8 z 2 3 4 5 6 7 ESC 209 8 1 8 z Start Barcode ESC 0 h Data 0 1 2 3 4 5 6 5 Stop Barcode ESC 0 l Barcode Example for UPC E ADD 2 Barcode Header ESC P P P P P P 8 z 2 3 4 5 6 7 ESC 209 8 1 8 z Start Barcode ESC 0 h Data 0 1 2 3 4 5 6 5 1 2 Stop Barcode ESC 0 l ...

Page 241: ...e Header ESC P P P P P P 8 z 2 3 4 5 6 7 ESC 209 8 1 8 z Start Barcode ESC 0 h Data 0 1 2 3 4 5 6 5 8 6 1 0 4 Stop Barcode ESC 0 l Barcode Example for UPC A Barcode Header ESC P P P P P P 8 z 2 3 4 5 6 7 ESC 210 8 1 8 z Start Barcode ESC 0 h Data 0 1 2 3 4 5 6 7 8 9 0 5 Stop Barcode ESC 0 l ...

Page 242: ...e Header ESC P P P P P P 8 z 2 3 4 5 6 7 ESC 210 8 1 8 z Start Barcode ESC 0 h Data 0 1 2 3 4 5 6 7 8 9 0 5 1 2 Stop Barcode ESC 0 l Barcode Example for UPC A ADD 5 Barcode Header ESC P P P P P P 8 z 2 3 4 5 6 7 ESC 210 8 1 8 z Start Barcode ESC 0 h Data 0 1 2 3 4 5 6 7 8 9 0 5 8 6 1 0 4 Stop Barcode ESC 0 l ...

Page 243: ...z 2 3 4 5 6 7 ESC 211 8 1 1 8 z Start Barcode ESC 0 h Data C o d e 8 1 2 8 Stop Barcode ESC 0 l Barcode Example for Code 128 using FNC1 Coding C 1 Barcode Header ESC P P P P P P 8 z 2 3 4 5 6 7 ESC 211 8 1 1 8 z Start Barcode ESC 0 h Data C 1 0 0 3 4 0 1 2 3 4 5 1 2 3 4 5 6 7 8 9 5 Stop Barcode ESC 0 l ...

Page 244: ...ESC 0 h Data 1 2 3 4 5 6 7 8 9 0 1 Stop Barcode ESC 0 l Data CR LF LF Mark Pollan CR LF 101 Main St CR LF Anytown US 12345 6789 Mark Pollan 101 main St Anytown US 12345 6789 Barcode Example for KIX PTT Post Nederland Barcode Header ESC P P P P P P 8 z 2 3 4 5 6 7 ESC 113 8 z Start Barcode ESC 0 h Data 1 2 3 4 5 6 7 8 9 0 Stop Barcode ESC 0 l ...

Page 245: ...rcodes symbols on the same line Barcode Header ESC P P P P P P 8 z 2 3 4 5 6 7 ESC 201 7 0 0 1 8 z Start Barcode ESC 0 h Data C 8 O 8 D 8 E 8 8 8 3 9 Stop Barcode ESC 0 l Blank zone 8 8 8 Start Barcode ESC 0 h Data C 8 O 8 D 8 E 8 8 8 3 9 Stop Barcode ESC 0 l ...

Page 246: ...arcodes symbols separated by CR and LF Barcode Header ESC P P P P P P 8 z 2 3 4 5 6 7 ESC 201 7 0 0 1 8 z Start Barcode ESC 0 h Data C 8 O 8 D 8 E 8 8 8 3 9 Stop Barcode ESC 0 l Blank zone CR LF LF LF LF LF LF LF Start Barcode ESC 0 h Data C 8 O 8 D 8 E 8 8 8 3 9 Stop Barcode ESC 0 l ...

Page 247: ... symbols in landscape on the same line Barcode Header ESC P P P P P P 8 z 2 3 4 5 6 7 ESC 401 7 0 0 1 8 z Start Barcode ESC 0 h Data C 8 O 8 D 8 E 8 8 8 3 9 Stop Barcode ESC 0 l Blank zone 8 8 8 Start Barcode ESC 0 h Data C 8 O 8 D 8 E 8 8 8 3 9 Stop Barcode ESC 0 l ...

Page 248: ...ape separated by CR LF Barcode Header ESC P P P P P P 8 z 2 3 4 5 6 7 ESC 401 7 0 0 1 8 z Start Barcode ESC 0 h Data C 8 O 8 D 8 E 8 8 8 3 9 Stop Barcode ESC 0 l Blank zone CR LF LF LF LF LF LF LF LF LF LF LF LF Start Barcode ESC 0 h Data C 8 O 8 D 8 E 8 8 8 3 9 Stop Barcode ESC 0 l ...

Page 249: ...wing steps S Switch off the printer Press the MENU and START STOP keys simultane ously While holding down the two keys switch on the printer When the message MENU ACCESS is displayed release the keys Now you are able to change the menu access function If the new setting is supposed to be permanent don t forget the SAVE function ...

Reviews: