EPSON Stylus PHOTO 2100/2200
Revision B
ADJUSTMENT
Adjustments
206
5.2.6 CR Tooth Skip Prevention Mechanism Adjustment
Since this adjustment prevents a tooth skip between the CR motor and CR timing belt
and optimizes the timing belt tension, this adjustment must be made when the
following part is removed.
!
CR timing belt
The following explains the method of making this adjustment.
1.
After making sure that the CR timing belt is not twisted, install the CR timing belt
between the Driven pulley holder and CR motor.
2.
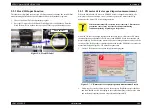
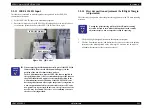
Insert a thickness gauge (0.3mm) between the Driven pulley holder and Belt
pulley plate to secure a gap.
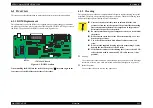
Figure 5-19. Thickness Gauge Setting
3.
With the gap secured, fix the screw in the Belt pulley plate.
5.2.7 PF Adjustment
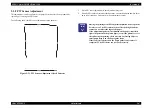
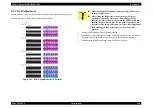
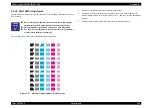
This adjustment is made to adjust the paper loading amount in the 360dpi print mode
where paper is loaded in the nozzle line width. The following shows the PF adjustment
check patterns.
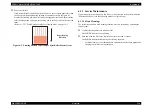
Figure 5-20. PF Adjustment Check Patterns
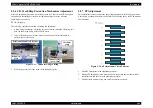
1.
Select PF adjustment in the adjustment program.
2.
Print the PF adjustment check patterns, choose the pattern that has the smallest
displacements, and enter it in the adjustment program.
3.
Print the check patterns again, and check the adjustment result.
Belt pulley
plate
Thickness gauge
spec. 0.3mm
Thickness
gauge
Printer mechanism rear left side
Screw
Summary of Contents for 2200 - Stylus Photo Color Inkjet Printer
Page 1: ...EPSONStylusPHOTO2100 2200 Color Inkjet Printer SEIJ01 016 SERVICE MANUAL ...
Page 8: ...C H A P T E R 1 PRODUCTIONDESCRIPTION ...
Page 39: ...C H A P T E R 2 OPERATINGPRINCIPLES ...
Page 69: ...C H A P T E R 3 TROUBLESHOOTING ...
Page 115: ...C H A P T E R 4 DISASSEMBLYANDASSEMBLY ...
Page 187: ...C H A P T E R 5 ADJUSTMENT ...
Page 214: ...C H A P T E R 6 MAINTENANCE ...
Page 226: ...C H A P T E R 7 APPENDIX ...
Page 254: ......
Page 255: ......
Page 256: ......
Page 257: ......
Page 258: ......


