
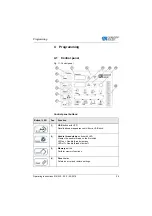

Operation
26
Operating Instructions 512/532 - 05.0 - 04/2018
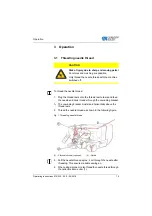
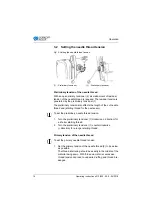
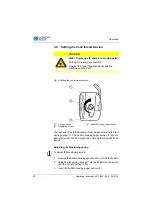
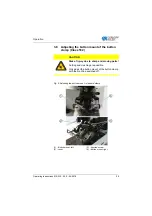
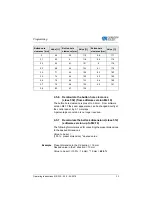
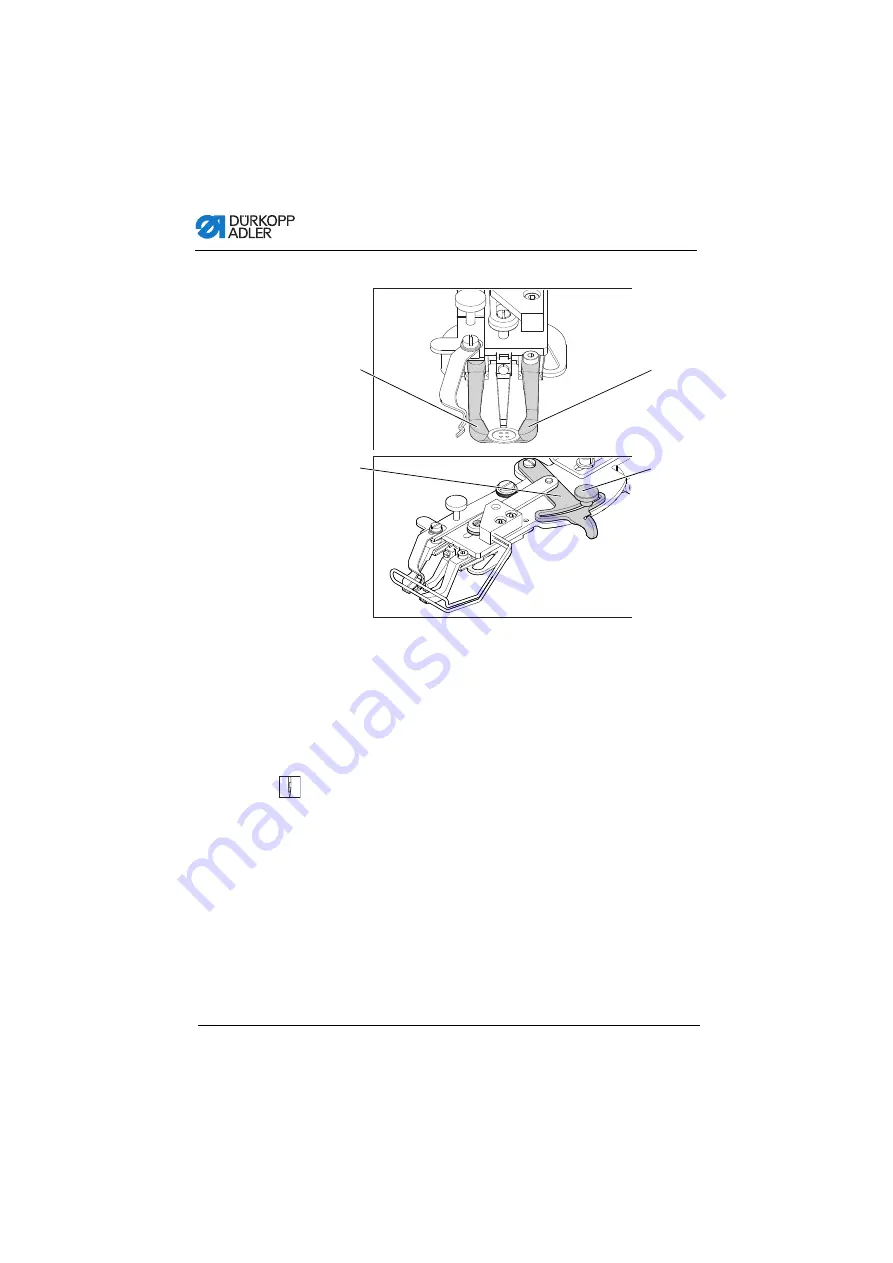
Fig. 9: Adjusting the button mount – optional clamp
The button should be able to slide lightly into the button mount
and be easy to align.
However, the button must be securely clamped so that it cannot
twist when the sewing material is inserted.
The lever (2) regulates the size of the opening in the button mount.
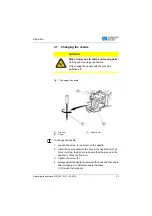
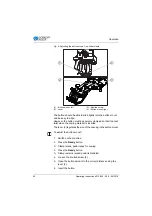
To adjust the button mount:
1.
Switch on the machine.
2.
Press the
Ready
button.
Clamp raises, pedal ready for sewing.
3.
Press the
Ready
button.
Clamp remains raised, pedal is disabled.
4.
Loosen the knurled screw (3).
5.
Open the button amount to the correct distance using the
lever (2).
6.
Insert the button.
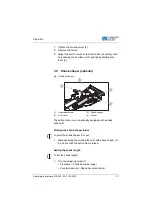
(1) - Button mount, left
(2) - Lever
(3) - Knurled screw
(4) - Button mount, right
②
③
④
①
Summary of Contents for 512/532
Page 1: ...Operating Instructions 512 532 ...
Page 6: ...Table of Contents 4 Operating Instructions 512 532 05 0 04 2018 ...
Page 16: ...Safety 14 Operating Instructions 512 532 05 0 04 2018 ...
Page 60: ...Programming 58 Operating Instructions 512 532 05 0 04 2018 ...
Page 70: ...Maintenance 68 Operating Instructions 512 532 05 0 04 2018 ...
Page 86: ...Decommissioning 84 Operating Instructions 512 532 05 0 04 2018 ...
Page 88: ...Disposal 86 Operating Instructions 512 532 05 0 04 2018 ...
Page 97: ...Appendix Operating Instructions 512 532 05 0 04 2018 95 11 Appendix ...
Page 98: ...Appendix 96 Operating Instructions 512 532 05 0 04 2018 ...
Page 99: ......