VigorIPPBX 2820 Series User’s Guide
231
5
5
.
.
8
8
.
.
2
2
S
S
c
c
h
h
e
e
d
d
u
u
l
l
e
e
The Vigor router has a built-in real time clock which can update itself manually or
automatically by means of Network Time Protocols (NTP). As a result, you can not only
schedule the router to dialup to the Internet at a specified time, but also restrict Internet
access to certain hours so that users can connect to the Internet only during certain hours, say,
business hours. The schedule is also applicable to other functions.
You have to set your time before set schedule. In
System Maintenance>>
Time and Date
menu, press
Inquire Time
button to set the Vigor router’s clock to current time of your PC.
The clock will reset once if you power down or reset the router. There is another way to set
up time. You can inquiry an NTP server (a time server) on the Internet to synchronize the
router’s clock. This method can only be applied when the WAN connection has been built
up.
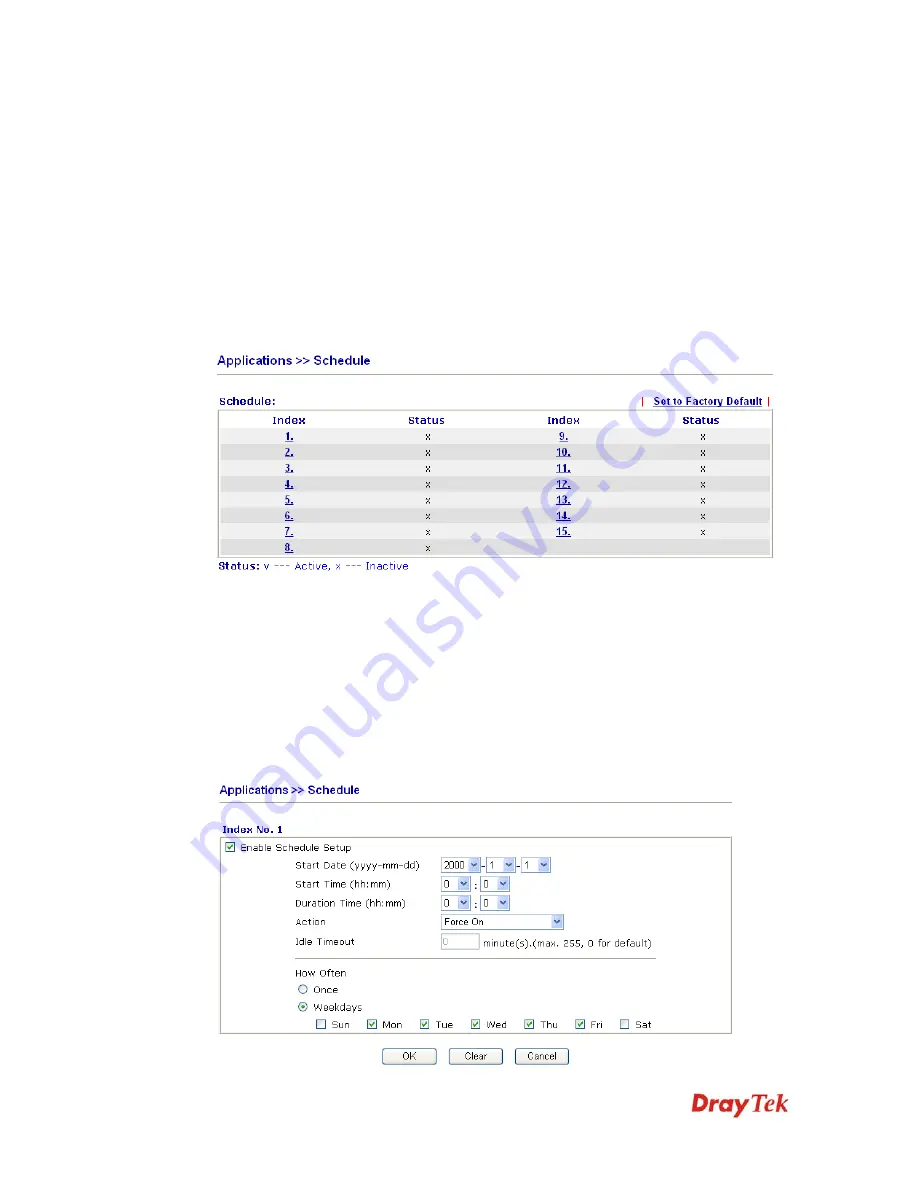
Set to Factory Default
Clear all profiles and recover to factory settings.
Index
Click the number below Index to access into the setting
page of schedule.
Status
Display if this schedule setting is active or inactive.
You can set up to 15 schedules. Then you can apply them to your
Internet Access
or
VPN
and Remote Access >> LAN to LAN
settings.
To add a schedule, please click any index, say Index No. 1. The detailed settings of the call
schedule with index 1 are shown below.
Summary of Contents for VigorIPPBX 2820 Series
Page 1: ......
Page 2: ......
Page 10: ......
Page 24: ...VigorIPPBX 2820 Series User s Guide 14 This page is left blank ...
Page 44: ...VigorIPPBX 2820 Series User s Guide 34 This page is left blank ...
Page 58: ...VigorIPPBX 2820 Series User s Guide 48 This page is left blank ...
Page 79: ...VigorIPPBX 2820 Series User s Guide 69 11 Now the firmware update is finished ...
Page 146: ...VigorIPPBX 2820 Series User s Guide 136 This page is left blank ...
Page 283: ...VigorIPPBX 2820 Series User s Guide 273 ...
Page 370: ...VigorIPPBX 2820 Series User s Guide 360 This page is left blank ...


