User’s Manual | 36
-
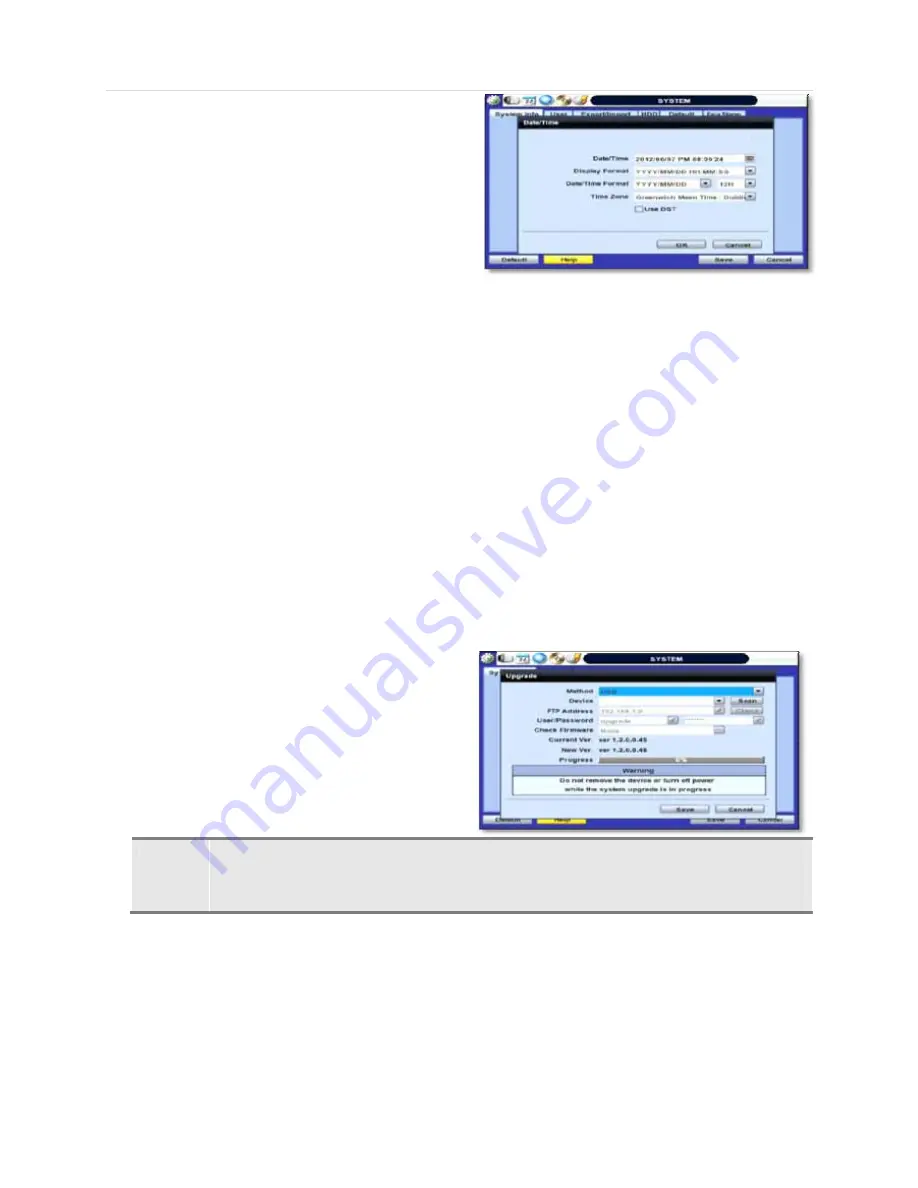
Date/ Time
- manually enter the DVR’s date and time,
time zone, and enable/ disabled DST.
Using the available options, manually adjust the date and
time from the calendar, select the display mode for the
time, and the date, and select the appropriate time zone.
If applicable, check the ‘USE DST’ box. See section 3.12
DST Setting for more information.
-
HDMI Resolution
- Select the DVR’s output resolution. DVRs support the following video resolutions: 800x600,
1024x768, 1280x1024, 1920x1080.
User must set the proper resolution according to the monitor resolution
-
Language
- Select the DVR’s display language from the availanle in the drop-down menu.
-
Remote ID
- Set the DVR’s remote ID. This ID should be the same as the IR Remote Control.
-
Firmware Version & system upgrade
- when a new version is available, use the easy upgrade menu to upgrade your
DVR to the latest version. To upgrade your system, follow one of the options below:
Upgrading system using USB memory stick:
1.
Insert the USB thumb-drive formatted by FAT32 in any USB port of DVR (compatible with USB 2.0)
2.
Once the system detects the thumb-drive, user can see its brand or model name in the “DEVICE” field after
pressing the “SCAN” button.
3.
Click “OK” to confirm.
Upgrading system using Digital Watchdog’s FTP server:
1.
Select FTP in the drop-down list and type a given IP address in the Host Address (Digital Watchdog’s FTP
Server IP Address:
208.179.32.42
). Username and password is “none” (Default).
*The FTP server address is subject to change without a prior notice.
2.
Click ‘Check’ button then DVR will detect the
latest Firmware version from the FTP server.
If there is a new firmware, DVR will ask you
whether you want to upgrade it or not.
3.
Click ‘OK’ to confirm it and then click ‘START’
to start upgrading.
C
AUTION
It is recommended to format the HDD after finishing the firmware upgrade because the data recorded
by previous firmware may cause malfunction of DVR due to different format.
It is highly recommended to check all functions and menus after a firmware upgrade for proper layout
and performance. If necessary, you can return system to its default settings.
-
Video Signal
- Displays the video out signal from the DVR.
-
DVR’s IP & MAC Addersses
- This information is necessary when connecting to the DVR via its web viewer or the Pivot
Client Software. See section 4.4 Network for more information and configuration options.
-
Keyboard setup
- Setup the DVR’s ID, baudrate and model to match the information of the keyboard you would like to
use. The Keyboard’s ID must match the ID set in the DVR.
Summary of Contents for Vmax960-16
Page 1: ......
Page 6: ...5 H 264 Digital Video Recorder ...
Page 7: ...User s Manual 6 Chapter 1 DVR USER MANUAL ...
Page 8: ...7 Chapter 1 DVR User Manual ...
Page 67: ...User s Manual 66 Chapter 2 CMS CLIENT SOFTWARE USER MANUAL ...
Page 68: ...67 Chapter 2 CMS Client Software User Manual ...
Page 93: ...92 H 264 Digital Video Recorder Chapter 3 ACS CLIENT SOFTWARE USER MANUAL ...
Page 94: ...93 Chapter 3 ACS Client Software User Manual ...
Page 110: ...109 Chapter 3 ACS Client Software User Manual ...
Page 111: ...User s Manual 110 Chapter 4 MAC ACS CLIENT SOFTWARE USER MANUAL ...
Page 112: ...111 Chapter 4 MAC ACS Client Software User Manual ...
Page 121: ...User s Manual 120 Chapter 5 FACESTAMP SOFTWARE USER MANUAL ...
Page 122: ...121 Chapter5 Facestamp Software User Manual ...
Page 128: ...127 Chapter5 Facestamp Software User Manual ...
Page 129: ...User s Manual 128 Chapter 6 MOBILE PHONE SOFTWARE USER MANUAL ...
Page 130: ...129 Chapter 6 Mobile Phone Software User Manual ...
Page 131: ...User s Manual 130 10 MOBILE PHONE SOFTWARE USER GUIDE 10 1 iPhone application software ...
Page 132: ...131 Chapter 6 Mobile Phone Software User Manual ...
Page 133: ...User s Manual 132 ...
Page 134: ...133 Chapter 6 Mobile Phone Software User Manual ...
Page 135: ...User s Manual 134 ...
Page 136: ...135 Chapter 6 Mobile Phone Software User Manual ...
Page 137: ...User s Manual 136 ...
Page 138: ...137 Chapter 6 Mobile Phone Software User Manual ...
Page 139: ...User s Manual 138 ...
Page 140: ...139 Chapter 6 Mobile Phone Software User Manual ...
Page 141: ...User s Manual 140 10 2 Android application software ...
Page 142: ...141 Chapter 6 Mobile Phone Software User Manual ...
Page 143: ...User s Manual 142 ...
Page 144: ...143 Chapter 6 Mobile Phone Software User Manual ...
Page 145: ...User s Manual 144 ...
Page 146: ...145 Chapter 6 Mobile Phone Software User Manual ...
Page 147: ...User s Manual 146 ...
Page 148: ...147 Chapter 6 Mobile Phone Software User Manual ...
Page 149: ...User s Manual 148 ...
Page 150: ...149 Chapter 6 Mobile Phone Software User Manual ...
Page 151: ...User s Manual 150 10 3 Using WAP 3G Connection ...
Page 152: ...151 Chapter 6 Mobile Phone Software User Manual ...


