Control|24 Guide
36
Pro Tools Configuration
Communication between Control|24 and
Pro Tools is configured from within the Ether-
net Controllers page of the Pro Tools Peripherals
dialog.
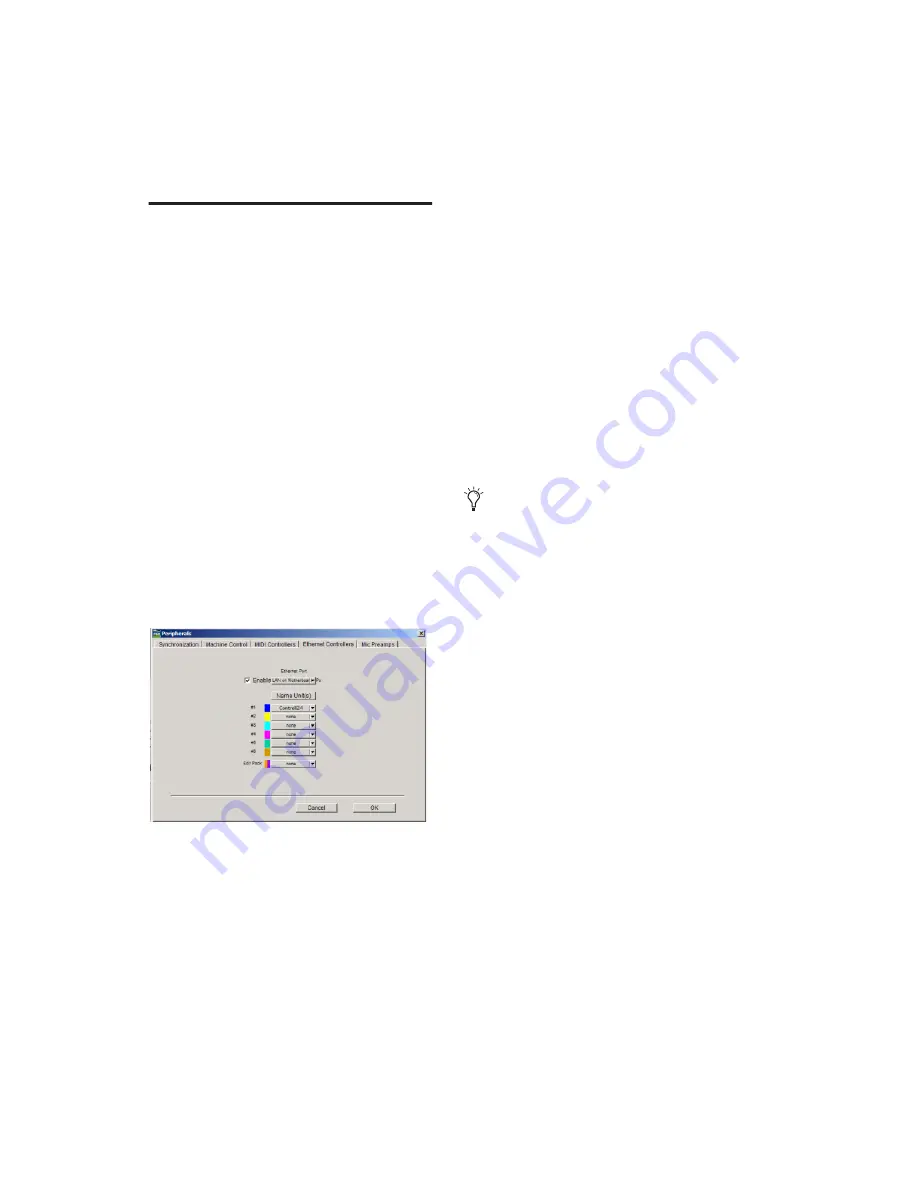
To configure Pro Tools for Control|24:
1
Choose Setup > Peripherals, and click Ethernet
Controllers.
2
If the computer has multiple Ethernet ports,
use the Ethernet port pop-up menu to select the
Ethernet port. Ports are identified by (computer)
name.
3
Click Enable.
4
Pro Tools scans the Ethernet connection for
any Ethernet Controllers connected to the sys-
tem.
5
Use the pop-up menu to select your Con-
trol|24 unit from the #1 row.
6
Click OK to close the Peripherals dialog and
save your configuration settings. (If Pro Tools
displays the firmware update dialog, see “Con-
trol|24 Firmware” on page 36.)
If Control|24 does not appear in the Ethernet
Controllers pop-up menu, check the following:
• Ethernet port status (Windows)
• Ethernet port settings and connections.
• If your computer and Control|24 are in-
stalled on a network, you might be con-
nected to a different zone or not bridged to
the correct zone. Bridges must be config-
ured as routers.
• Power cycle your Ethernet hub.
Once Control|24 has been enabled, choices are
stored and you will not have to re-open the Pe-
ripherals dialog again unless changes to the con-
figuration are necessary.
Control|24 Firmware
With each Pro Tools release, any new Con-
trol|24 firmware is included in the Control|24
personality file.
After enabling Control|24 in the Peripherals di-
alog, Pro Tools compares the firmware of the
connected unit to the version available in the
personality file. If you don’t have the latest firm-
ware, you will be prompted to update your Con-
trol|24 unit.
The firmware update is delivered from your
computer to Control|24 via the Ethernet con-
nection, and typically takes less than a minute.
During this process it is normal for Control|24
to go offline, and for the meters and other LEDs
to flash several times, before reconnecting auto-
matically with Pro Tools.
Ethernet Controllers page of the Peripherals dialog
You can change or confirm the name of your
unit at any time by choosing Utility >
Name. Your Control|24 name will appear
in the Channel Bar Strip, and instructions
will appear across the scribble strips for
changing the name.
Summary of Contents for Control 24
Page 1: ...Control 24 ...
Page 4: ......
Page 11: ...1 Part I Introduction ...
Page 12: ...2 ...
Page 20: ...Control 24 Guide 10 ...
Page 21: ...11 Part II Analog Connections ...
Page 22: ...12 ...
Page 42: ...Control 24 Guide 32 ...
Page 43: ...33 Part III Control 24 Basics ...
Page 44: ...34 ...
Page 62: ...Control 24 Guide 52 ...
Page 82: ...Control 24 Guide 72 ...
Page 94: ...Control 24 Guide 84 ...
Page 95: ...85 Part IV Applications ...
Page 96: ...86 ...
Page 110: ...Control 24 Guide 100 ...
Page 136: ...Control 24 Guide 126 ...
Page 140: ...Control 24 Guide 130 ...
Page 152: ...Control 24 Guide 142 ...


