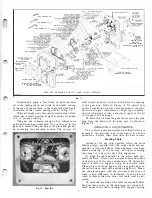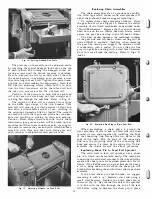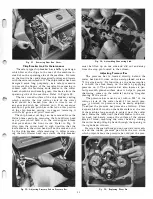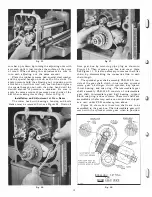
When a slight groove is cut in the planed surface
as shown in (t) FIgure 47, it is known as a pressure
bounce and indicates too great
a
pressure on the infeed
roll. To correct this, relieve the pressure on the infeed
roll by turning out pressure screw PLR-62, see Fig
ure 1 9.
When a piece of work is planed and the end cut
appears as in (3) Figure 47, it is known as a sniped
end. This indicates that the table is too loose and is
corrected by tightening the gibs on the table, refer to
Figure 15.
When the work shows feed roller marks as shown
in (4) Figure 47, the infeed roller pressure is too great.
Reduce the pressure on roller by turning out adjust
ment screws on top of right and left hand columns,
see Figure 1 9.
When the stock is put through the machine wrong,
that is against the grain, a chipped edge will result,
as shown in (5) Figure 47. Turn the wood around, (nd
for end, so that the cutter will cut with the grain and
you will get a nice, smooth, even cut.
When the material has a taper cut, that is from side
to side it indicates that the table is not parallel to the
cutter head, as shown in (6) Figure 47. In this case
all that is necessary is to adjust the table so that it is
parallel to the cutter head, refer to Figure 14.
Keep the table top clean and free of chips at all
times, so that no chips can get under the material
and cause gouges or scratches on under side of material.
ACCESSORIES
The sub-base, jointing attachment, and the grind
ing attachment are accessories which are available
and can be purchased as additional equipment.
No.
22- 1 02
Sub-Base Assembly
The sub-base assembly has been ruggedly designed
for mounting the Delta 1 3 x 5" thickness planer and
not only presents a machine of modern lines, but it can
also be kept in a neat condition. In addition, it pro
vides for mounting the machine at the correct work
ing height.
The overall dimensions of the sub-base are : 30"
wide, 16" deep, and 14" high. This unit is easily assem
bled as described under '"Assembly." Refer to Fig. 2.
No.
22- 1 06
Grinding Attachment
When the knife blades in the cutter head are dulled
beyond the point where jointing them will not sharpen
them properly to produce a smooth cut, or if large
nicks should appear on the edges of the knife blades
that cannot be removed easily by jointing them, or
if a new cutting angle on the knife blade edge is de
sired, we suggest grinding the knife blades. This oper
ation is easily accomplished with a knife grinding
attachment which will grind a new cutting edge on
the knife blades.
This attachment is easily mounted to the top of
the planer. It has an adjustable stud at the front to
obtain the correct height and angle of its cup type
grinding wheel.
The positive indexing mechanism included with
this attachment is easily installed on the cutter head
pUlley. This mechanism permits each knife blade of
the cutter head to be ground on the same angle and
held firmly in position during the grinding operation.
No.
22- 1 07
Jointing Attachment
When the knife blades in the cutter head show
small nicks on the surface of their edges, or if the
cutting circle of the cutter head is not true, we sug
gest jointing the knife blades. This operation is easily
accomplished with a jointing attachment which brings
them to a true cutting circle while the cutter head is
rotating at normal operating speed (4200 rpm) .
This attachment is easily mounted to the table of
the planer without removing any parts. A self-locking
micro-adjustment for raising the jointing stone to the
knife blades in the cutter head is conveniently mounted
on this attachment for taking successive light cuts.
No.
22- 1 1 5
Shaving Hood
The shaving hood is another one of the accessories
to the Delta planer. It is attractively designed and
can be attached to the planer very quickly and easily.
Remove two hexagon nuts from the top of the
planer, one on the top of each column, the one in
the rear when facing the machine. You will notice the
shaving hood has two ears with holes in them. These
will fit the two studs from which the two hexagon nuts
have been removed. After placing the shaving hood
over these two studs replace the two hexagon nuts and
tighten securely.
The shaving hood when in place will fit over the chip
breaker. Once in place it will not be necessary to
remove it except when the knife blades in the cutter
head are to be resharpened with the Delta Knife grind
ing attachment. It is made of sheet steel and welded.
It has a standard 6 inch diameter opening at the top
where it wiIl connect to the regular dust collecting
system in the factory or location where it wiIl be used.
The shaving hood will keep the machine and the
work free and clear of chips at all times, thus enabling
the operator to see the work much better. The location
of the shaving hood will not cut off any light or inter
fere with the work at all. It will also reduce to a
great extent the possibility of the operator getting
any dust particles in his eyes.
Occasionally chips may become wedged between the
table roller and the table, these chips must be removed
or they might scratch or mar the work as it goes thru
the machine. These rollers should roll freely at all
times to insure proper feeding of the work, on the
planer.
Summary of Contents for Milwaukee PM-1738
Page 1: ...13x5 INCH DELTA MILWAUKEE 7 7 1M rJ6fiUAKJ PM 1738 ...
Page 2: ......
Page 27: ......
Page 28: ......


