114
Installing System Components
11
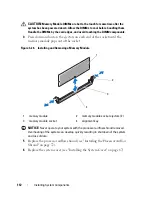
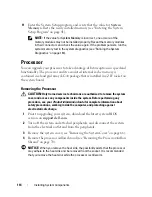
Enter the System Setup program, and verify that the value for
System
Memory
reflects the newly installed memory (see "Entering the System
Setup Program" on page 41).
NOTE:
If the value for
System Memory
is incorrect, one or more of the
memory modules may not be installed properly. Reseat the memory modules
in their connectors and check the value again. If the problem persists, run the
system memory test in the system diagnostics (see "Running the System
Diagnostics" on page 163).
Processor
You can upgrade your processor to take advantage of future options in speed and
functionality. The processor and its associated internal cache memory is
contained in a land grid array (LGA) package that is installed in a ZIF socket on
the system board.
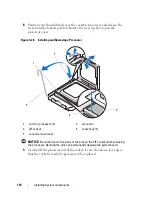
Removing the Processor
CAUTION:
Only trained service technicians are authorized to remove the system
cover and access any components inside the system. Before performing any
procedure, see your
Product Information Guide
for complete information about
safety precautions, working inside the computer, and protecting against
electrostatic discharge.
1
Prior to upgrading your system, download the latest system BIOS
version on
support.dell.com
.
2
Turn off the system and attached peripherals, and disconnect the system
from the electrical outlet and from the peripherals.
3
Remove the system cover (see "Removing the System Cover" on page 66).
4
Remove the processor airflow shroud (see "Removing the Processor Airflow
Shroud" on page 70).
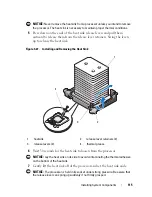
NOTICE:
When you remove the heat sink, the possibility exists that the processor
may adhere to the heat sink and be removed from the socket. It is recommended
that you remove the heat sink while the processor is still warm.
Summary of Contents for POWEREDGE T300
Page 10: ...10 Contents ...
Page 132: ...132 Installing System Components ...
Page 174: ...174 Jumpers and Connectors ...
Page 176: ...176 Getting Help ...
Page 188: ...188 Glossary ...

