


Configuring a Captive Portal
455
Customizing a Captive Portal
The procedures in this section customize the pages that the user sees when he
or she attempts to connect to (and log off of) a network through the captive
portal. These procedures configure the English version of the Default captive
portal.
To configure the switch:
1
From the
Captive Portal Configuration
page click the
(English)
tab.The
settings for the
Authentication Page
display, and the links to the Captive
Portal customization appear.
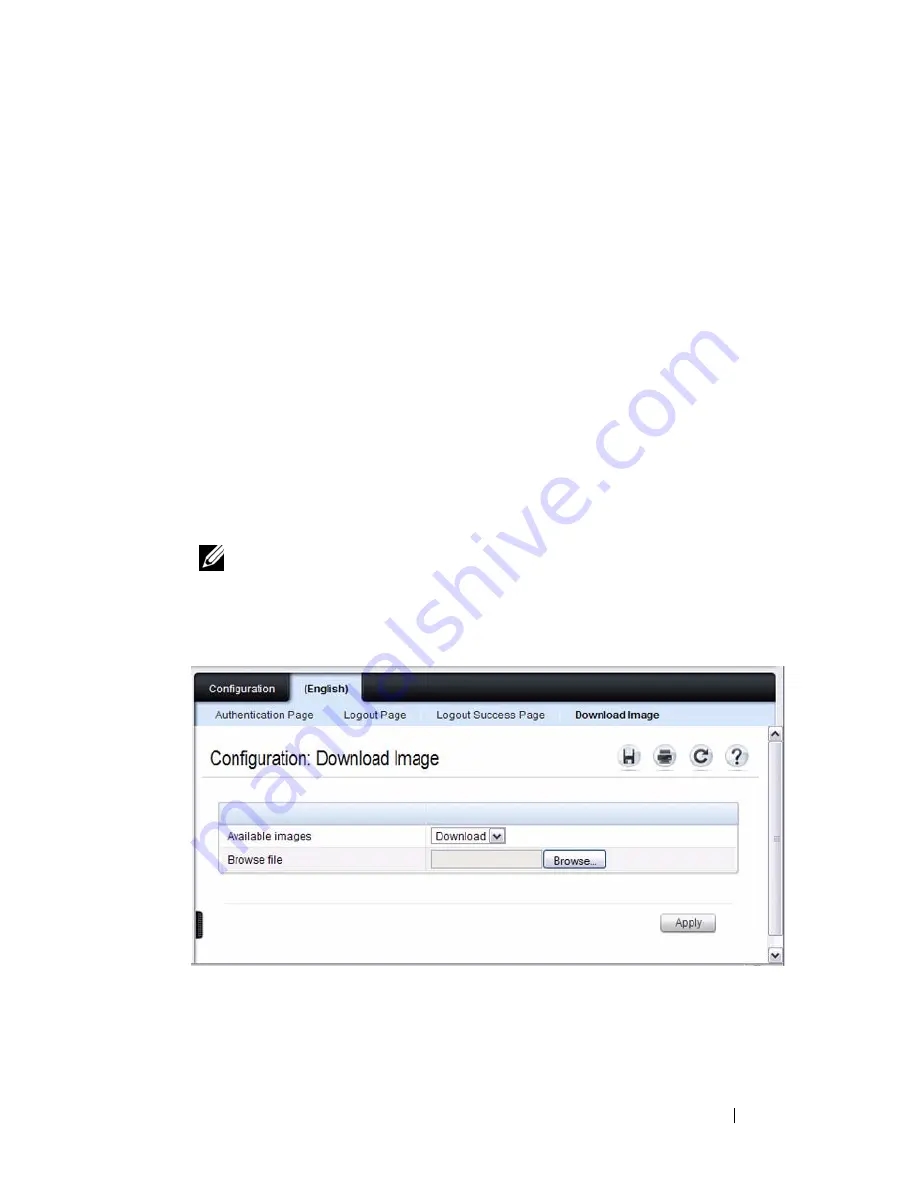
2
Click
Download Image
to download one or more custom images to the
switch. You can use a downloaded custom image for the branding logo
(default: Dell logo) on the Authentication Page and Logout Success page,
the account image (default: blue banner with keys) on the Authentication
Page, and the background image (default: blank) on the Logout Success
Page.
Figure 17-8. Captive Portal Authentication Page
3
Make sure Download is selected in the
Available Images
menu, and click
Browse
.
NOTE:
The image to download must be accessible from your local system.
The image should be 5 KB max, 200x200 pixels, GIF or JPG format.
Summary of Contents for PowerConnect 7024
Page 134: ...134 Setting Basic Network Information ...
Page 290: ...290 Managing General System Settings Figure 11 14 SNTP Servers Table ...
Page 348: ...348 Configuring SNMP ...
Page 430: ...430 Monitoring Switch Traffic ...
Page 444: ...444 Configuring iSCSI Optimization ...
Page 538: ...538 Configuring 802 1X and Port Based Security ...
Page 594: ...594 Configuring VLANs Figure 21 16 GVRP Port Parameters Table ...
Page 600: ...600 Configuring VLANs Figure 21 23 Double VLAN Port Parameter Table ...
Page 658: ...658 Configuring the Spanning Tree Protocol ...
Page 693: ...Configuring Port Based Traffic Control 693 Figure 24 3 Storm Control 5 Click Apply ...
Page 780: ...780 Configuring Connectivity Fault Management ...
Page 804: ...804 Snooping and Inspecting Traffic Figure 27 17 DAI Interface Configuration Summary ...
Page 818: ...818 Snooping and Inspecting Traffic ...
Page 836: ...836 Configuring Link Aggregation ...
Page 882: ...882 Configuring DHCP Server Settings ...
Page 916: ...916 Configuring L2 and L3 Relay Features Figure 33 3 DHCP Relay Interface Summary ...
Page 924: ...924 Configuring L2 and L3 Relay Features Figure 33 12 IP Helper Statistics ...
Page 930: ...930 Configuring L2 and L3 Relay Features ...
Page 1004: ...1004 Configuring OSPF and OSPFv3 ...
Page 1044: ...1044 Configuring VRRP ...
Page 1057: ...Configuring IPv6 Routing 1057 Figure 37 9 IPv6 Route Preferences ...
Page 1064: ...1064 Configuring IPv6 Routing ...
Page 1084: ...1084 Configuring DHCPv6 Server and Relay Settings ...
Page 1091: ...Configuring Differentiated Services 1091 Figure 39 5 DiffServ Class Criteria ...
Page 1114: ...1114 Configuring Differentiated Services ...
Page 1130: ...1130 Configuring Class of Service ...
Page 1136: ...1136 Configuring Auto VoIP ...
Page 1216: ...1216 Managing IPv4 and IPv6 Multicast ...


