66
Log the input’s activity in the System Log. Useful when inputs do not need to be logged, but are required for day-
to-day operation.
10 –
ACTIVE LEVEL
Level of the input signal that will bring the status input into an Active state. Can be set to high or low, so it is easy
to invert the logic should a wiring error have been made during site installation.
11 –
SIGNALLING ON – ALARM
Enables / disables alarming. When checked, any out-of-limit condition will automatically generate an alarm. When
unchecked, no alarm will be triggered when an out-of-limit condition occurs.
12 -
SIGNALLING ON – RETURN TO NORMAL
Enables / disables
Return To Normal
signalling. When checked, a notification will be generated when the input
changes back to its normal state after an out-of-limit alarm condition. When unchecked, no notification will be sent
when the initial alarm condition returns to normal.
13 –
REFRESH / READ
Refresh / read the screen content.
14 –
ACTIVITY MONITORING
Access the Activity Monitoring menu. See next section for details.
15 –
SAVE / WRITE
Save the screen content.
16 –
EXIT
Exit menu.
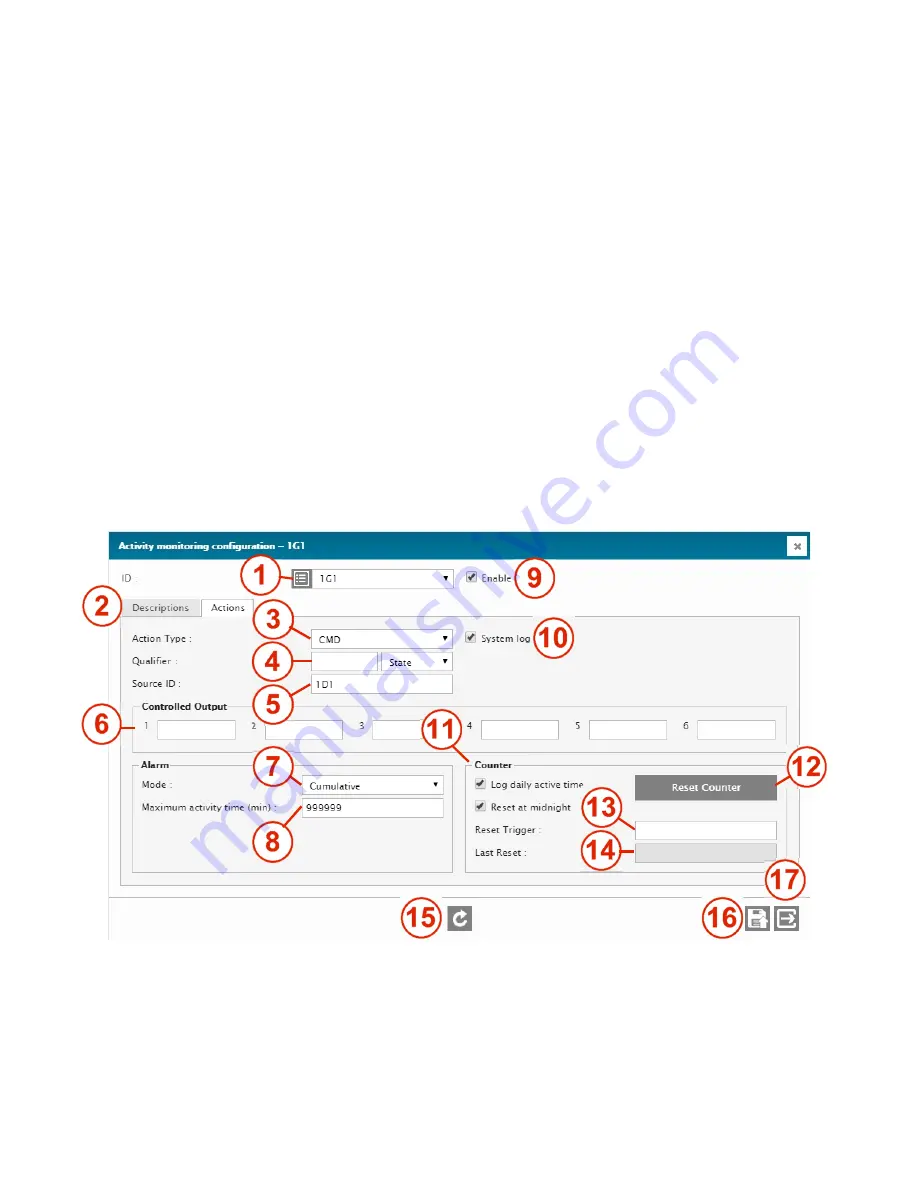
4.3.8. Activity Monitoring
This general menu is used to configured the monitoring of any input’s activity (Metering, Status, etc…) A counter starts
counting as soon as an input becomes active, and stop counting when it becomes inactive. It can be used to count and log
the cumulative on-time of generator, the time the temperature inside the site’s shelter exceeded a preset limit, etc.
1 –
ID
ID of the selected input. Select from the drop-down menu.
2 –
I/O DESCRIPTION RETRIEVAL
Click to retrieve and display the current normal description of that ID. Normally hidden to minimize data transfers
on low speed or high fee data connections.
3 –
ACTION TYPE


