xStack® DGS-3120 Series Managed Switch Web UI Reference Guide
18
The fields that can be configured are described below:
Parameter
Description
System Severity
Choose how the alerts are used from the drop-down menu. Select
Log
to send the alert of
the Severity Type configured to the Switch’s log for analysis. Choose
Trap
to send it to an
SNMP agent for analysis, or select
All
to send the chosen alert type to an SNMP agent and
the Switch’s log for analysis.
Severity Level
This drop-down menu allows you to select the level of messages that will be sent. The
options are
Emergency (0), Alert (1), Critical (2), Error (3), Warning (4), Notice (5),
Information (6)
and
Debug (7).
Click the
Apply
button to accept the changes made.
Time Range Settings
Time range is a time period that the respective function will take an effect on, such as ACL. For example, the
administrator can configure the time-based ACL to allow users to surf the Internet on every Saturday and every
Sunday, meanwhile to deny users to surf the Internet on weekdays.
The user may enter up to 64 time range entries on the Switch.
To view the following window, click
System
Configuration > Time Range Settings
, as show below:
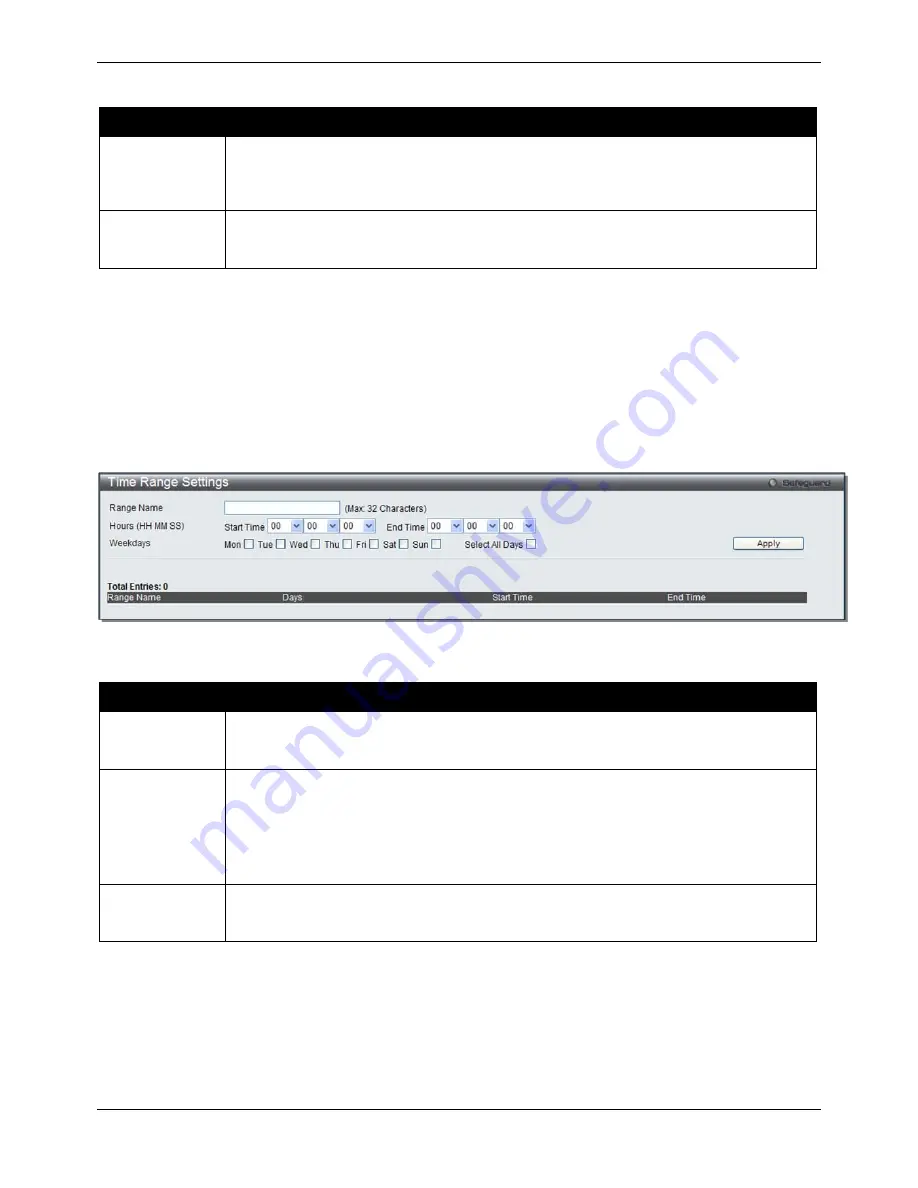
Figure 2–19 Time Range Settings window
The fields that can be configured are described below:
Parameter
Description
Range Name
Enter a name of no more than 32 alphanumeric characters that will be used to identify this
time range on the Switch. This range name will be used in the Access Profile
table to
identify the access profile and associated rule to be enabled during this time range.
Hours
This parameter is used to set the time in the day that this time range is to be enabled using
the following parameters:
Start Time
- Use this parameter to identify the starting time of the time range, in hours,
minutes and seconds, based on the 24-hour time system.
End Time
- Use this parameter to identify the ending time of the time range, in hours,
minutes and seconds, based on the 24-hour time system.
Weekdays
Use the check boxes to select the corresponding days of the week that this time range is to
be enabled. Tick the Select All Days check box to configure this time range for every day of
the week.
Click the
Apply
button to accept the changes made. Current configured entries will be displayed in the
Time
Range Information
table in the bottom half of the window shown above.
Port Group Settings (EI Mode Only)
This window is used to create port groups, and add or delete ports from the port groups.
To view the following window, click
System
Configuration > Port Group Settings
, as show below:
Summary of Contents for xStack DGS-3120-24TC
Page 1: ......


