13
4
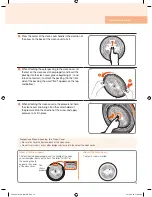
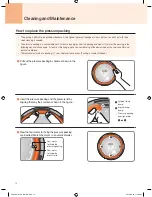
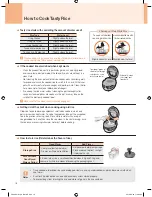
Press the center of the clean cover handle in the direction of
the arrow on the back of the clean cover to fix it.
5
When attaching the outer packing to the clean cover, let
the text on the clean cover show properly and insert the
packing into the clean cover groove beginning at
①
and
turn once toward
②
to attach the packing. (On the front
side of the packing, the word "front" appears on the top
and bottom.)
6
When attaching the clean cover to the pressure lid, hold
the clean cover knob, align it on the center holder of
the pressure lid in the direction of the arrow, and apply
pressure to fix it in place.
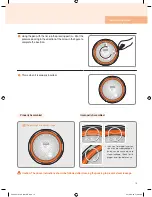
The text should appear properly, and the handle of the clean
cover should be shown on the front. The letter "FRONT" of
the packing should
appear in the center
of the clean cover.
The text is shown inverted.
[Front of the Clean Cover]
[Rear of the Clean Cover]
Text
shown
properly
Precautions When Attaching the Clean Cover
•
Be sure to check the front and back of the clean cover.
•
Do not insert screws or any other foreign substance into the hole of the clean cover.
Before Getting Started
FD06 SeZH+KR.indb 13
2018-06-25 �� 9:34:25
Summary of Contents for FD06 Series
Page 40: ...40 MEMO FD06 Series_US ZH KR indb 40 2018 06 25 9 35 49 ...
Page 41: ...41 Memo FD06 Series_US ZH KR indb 41 2018 06 25 9 35 49 ...
Page 42: ...42 MEMO FD06 Series_US ZH KR indb 42 2018 06 25 9 35 49 ...
Page 43: ...43 Memo FD06 Series_US ZH KR indb 43 2018 06 25 9 35 49 ...
Page 44: ...FD06 Series_US ZH KR indb 44 2018 06 25 9 35 50 ...
Page 83: ...83 备忘录 FD06 Series_US ZH KR indb 83 2018 06 25 9 40 29 ...
Page 84: ...FD06 Series_US ZH KR indb 84 2018 06 25 9 40 29 ...
Page 123: ...FD06 Series_US ZH KR indb 123 2018 06 25 9 45 09 ...
Page 124: ...FD06 Series_US ZH KR indb 124 2018 06 25 9 45 09 ...
Page 125: ...40 MÉMO FD06 Series_FR_171026 indd 40 2018 06 25 9 53 45 ...


