Part 1 – Introduction
14
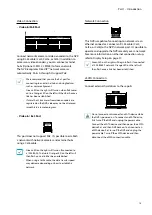
Rear Panel
1
3
5
7
9
11
13
15
10
12
14
16
2
8
6
4
!
@
#
1
2
3
4
5
6
0
7
8
9
1
Factory Reset Button
2
Video In / PoE Ports
3
Video In / Ext. Port
4
Network Port
5
eSATA Ports
6
Alarm Connection Ports
7
RS-485 Port
8
RS-232 Port
9
HDMI Out Port
0
VGA Out Port
!
Audio Ports
@
Power In Port
#
Vent
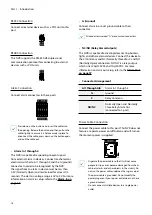
Rear Panel Connections
Monitor Connection
Connect to the
VGA OUT
or
HDMI
port.
Audio Connection
Connect the audio device to the
AUDIO IN
port and
speakers with a built-in amplifier to the
AUDIO OUT
port. Use the
AUDIO OUT
port to listen to audio from
network cameras.
Use the
AUDIO IN
port to establish two-way
communication with cameras.
• This NVR does not feature a built-in audio amplifier
unit and therefore requires the user to purchase a
speaker system with a built-in amplifier separately.
It's possible to connect an amplified audio source to
the NVR, but microphones that do not have a built-
in amplifier will not function properly if connected
to the NVR directly. If this is the case, connect the
microphone to the NVR via a pre-amp.
• Check your local laws and regulations on making
audio recordings.
• The
AUDIO IN
port is not currently supported.


