


Compaq Deskpro 2000
5-23
5.1.10.2 Microprocessor
To remove the microprocessor from the system board, complete the following steps:
1. Perform preparation procedures described in Section 5.1.3.
2. Remove the system unit cover (Section 5.1.6).
!
WARNING:
To reduce the risk of personal injury from hot surfaces, allow the internal
system components to cool before touching.
CAUTION:
When replacing a Pentium processor, you must release the heatsink
retaining clip before you pull the ZIF socket handle. This clip engages the processor
socket to hold the heatsink in place.
3. If this is a Pentium-based system board, remove the front bezel (Section 5.1.15.1) and the drive cage
(Section 5.1.20).
If this is a Pentium Pro-based system board, remove any outboard expansion boards that interfere
with the processor (Section 5.1.8).
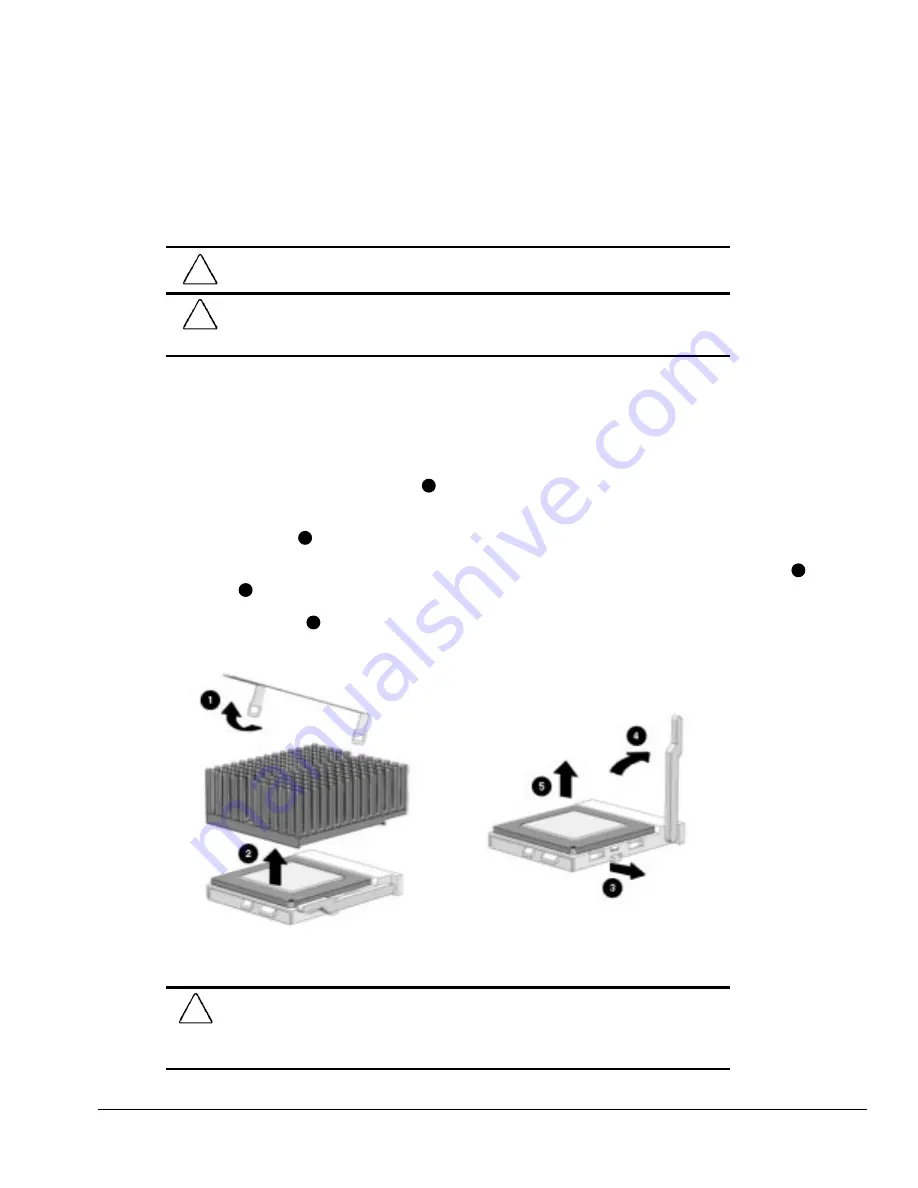
4. Remove the heatsink retaining clip
1
by pressing down on the clip’s extended tab until it releases
from the safety catch.
5. Lift the heatsink
2
off the processor.
6. Release the original processor from the socket by pulling the handle on the ZIF socket out
3
and
upward
4
.
7. Lift the processor
5
out of the socket.
Figure 5-20.
Removing the Microprocessor from the System Board
CAUTION:
When replacing the processor, be sure that the clipped corner of the
processor (location of Pin 1) is aligned with the triangular area of the ZIF socket (hinged
corner). Failure to do so could result in burning out both the processor and the system
board.
Summary of Contents for Deskpro 2000 Series
Page 1: ...MAINTENANCE SERVICE GUIDE COMPAQ DESKPRO 2000 SERIES OF PERSONAL COMPUTERS...
Page 2: ...243064 001 243211 001...
Page 4: ...CPS...
Page 32: ...1 20 Product Description Figure 1 6 Drive Positions on the Minitower Computer...
Page 34: ...1 22 Product Description Figure 1 7 Rear Panel Connectors...
Page 82: ...3 2 Illustrated Parts Catalog 3 1 System Unit Figure 3 2 System Unit Desktop...
Page 84: ...3 4 Illustrated Parts Catalog Figure 3 3 System Unit Minitower...
Page 86: ...3 6 Illustrated Parts Catalog 3 2 Mass Storage Devices Figure 3 4 Mass Storage Devices...
Page 88: ...3 8 Illustrated Parts Catalog 3 3 Cables Figure 3 5 Cables...
Page 96: ...3 16 Illustrated Parts Catalog 3 6 Monitors Figure 3 9 Monitors...


