


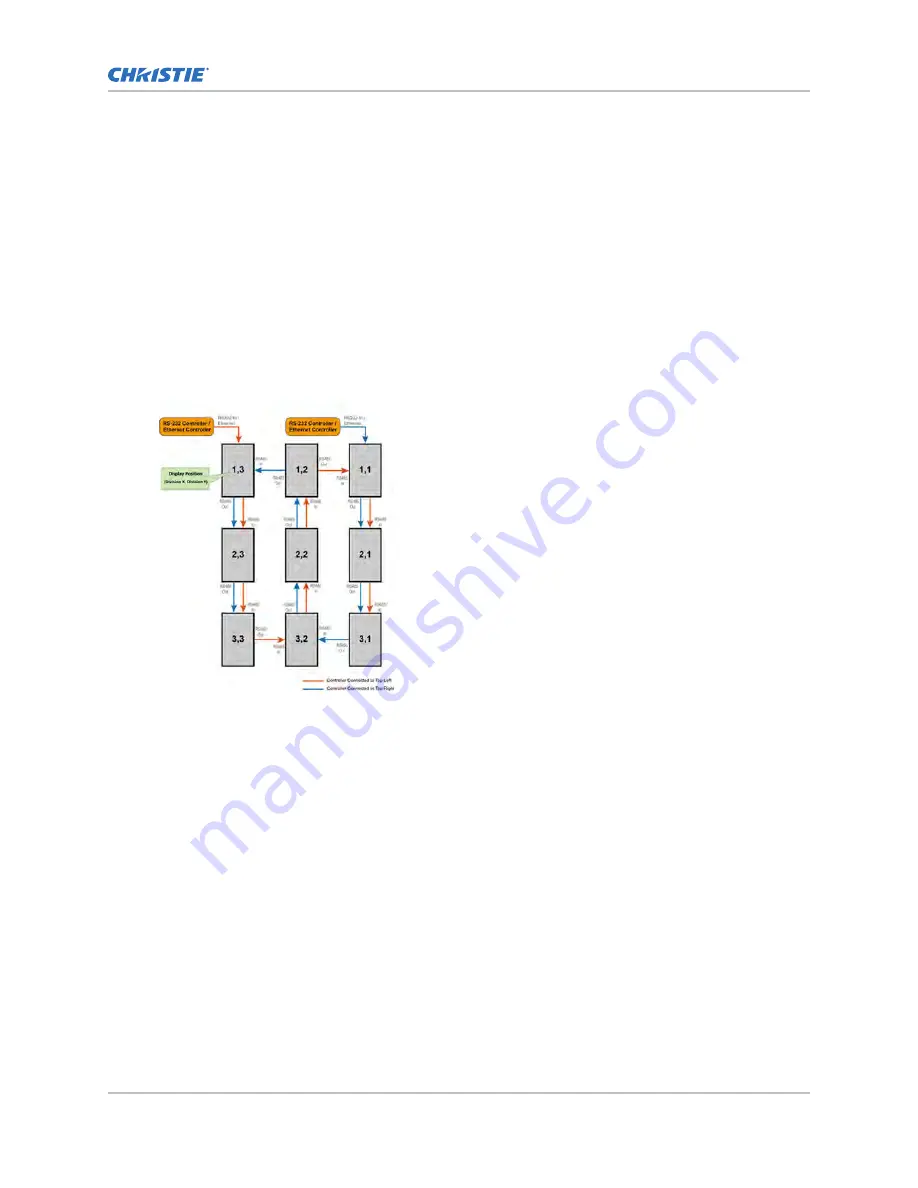
Connecting an RS232 or an Ethernet controller to a video
wall in portrait orientation
Complete the following steps to connect an RS232 or an Ethernet controller to a video wall in portrait
orientation.
It is not recommended that more than 25 display panels be daisy-chained together using the RS485
input and outputs. If you are working with a video wall that exceeds 25 display panels, consider
breaking the array in to groups of 25 display panels or less, and then use separate RS232 or Ethernet
connections to control each group.
When you create a video wall in portrait orientation, both the video source and the content must be
configured for use in a 9:16 format.
1. Connect the controller to the top-left or the top-right display panel.
2. Connect the remaining panels as illustrated.
Turning on the display panel
Learn how to turn the power on.
1. Turn on all source components.
2. Connect the power cord to the power receptacle on the side of the display panel.
3. Connect the other end of the power cord to a power source.
4. On the side of the display panel, turn on the main power switch.
When the display panel is in Standby mode, the power indicator turns orange.
5. To turn on the display panel, press the power button on the remote control or the keypad.
It might take a few minutes for the display panel to warm up. Once it is warmed up, an image
appears on the screen.
Installing a display panel
FHD553-XE-R and FHD553-XE-HR LCD Panels User Guide
27
020-001198-04 Rev. 1 (01-2019)
Copyright
©
2019 Christie Digital Systems USA, Inc. All rights reserved.


