Adjusting the image
Use the controls in the Image Settings Menu to calibrate each display input to achieve optimum
picture quality.
Changing the image preset
Learn how to change the image preset.
1. Press MENU on the remote control or keypad.
2. Select Image Settings > Scene.
3. Select one of four presets (Vivid, Cinema, Game or Sport) depending on the type of program
material you are viewing.
These presets automatically adjust the other image settings for optimal image quality.
4. Alternatively, select User to adjust Brightness, Contrast and other settings manually.
Modifying the brightness
Brightness and contrast controls are interactive.
A change to one may require a subtle change to the other in order to achieve the optimum setting.
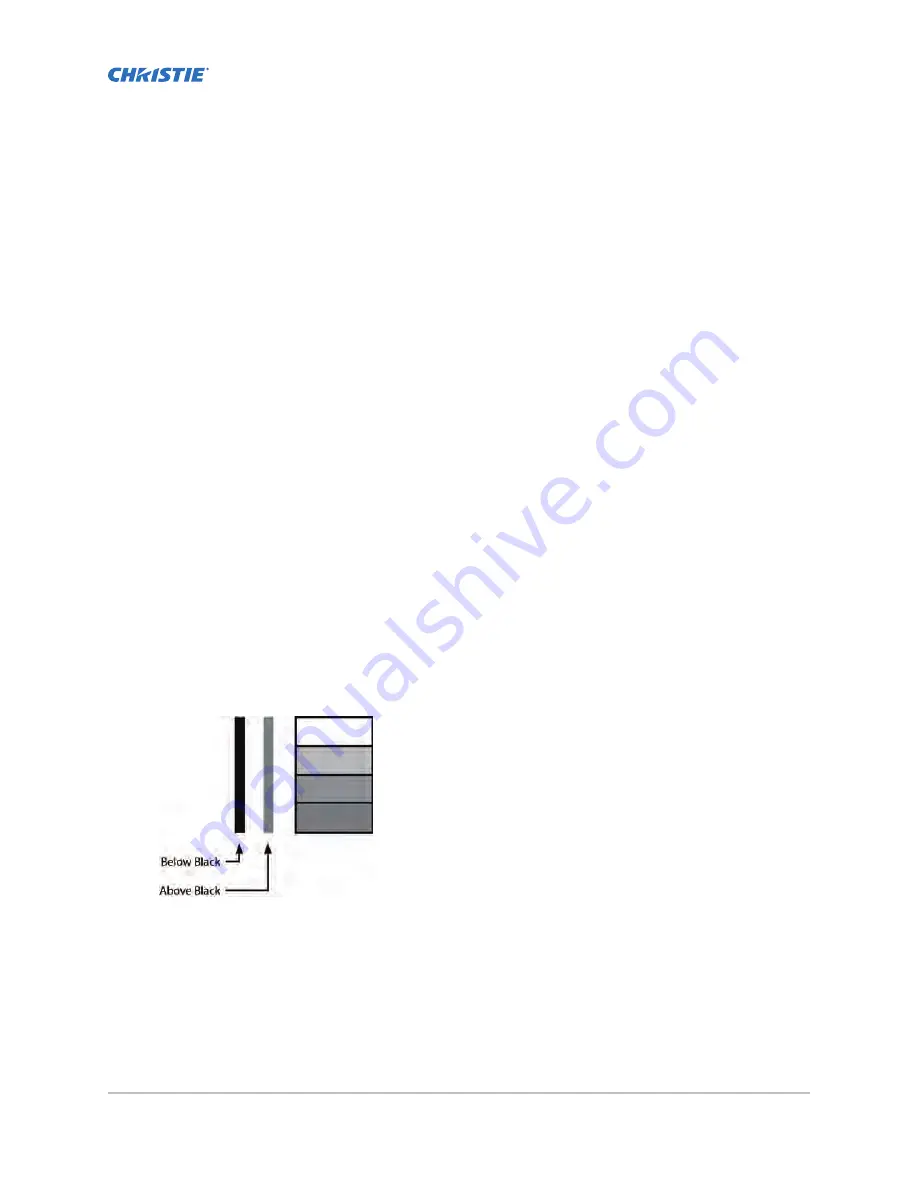
1. Display a PLUGE (Picture Line-Up Generation Equipment) test pattern.
PLUGE patterns vary but generally consist of some combination of black, white and gray areas
against a black background. The example below includes two vertical bars and four shaded
boxes.
2. Press MENU on the remote control or keypad.
3. Select Image Settings > Brightness.
4. Use the arrows to adjust the brightness until:
•
The darkest black bars disappear into the background.
•
The dark gray areas are barely visible.
•
The lighter gray areas are clearly visible.
FHD553-XE-R and FHD553-XE-HR LCD Panels User Guide
32
020-001198-04 Rev. 1 (01-2019)
Copyright
©
2019 Christie Digital Systems USA, Inc. All rights reserved.