36
2.1.4 Editing PLU (Menu code 1120)
( MENU
→
1. PLU
→
2. New/Edit )
◆
You can edit PLU as PLU creating and you can press the SAVE key at anytime to
save the current PLU data and if you want to exit without saving, press the ESC key.
2.1.5 Expand PLU (Menu code 1144)
( MENU
→
1. PLU
→
List )
◆
If you select “YES”, you will have 28 field of PLU.
But if you select “No”, you will have only 20 field of PLU
◆
To select “YES”, just press “1” key.
Or ito select “No”, just press”0” key on number keyboard.
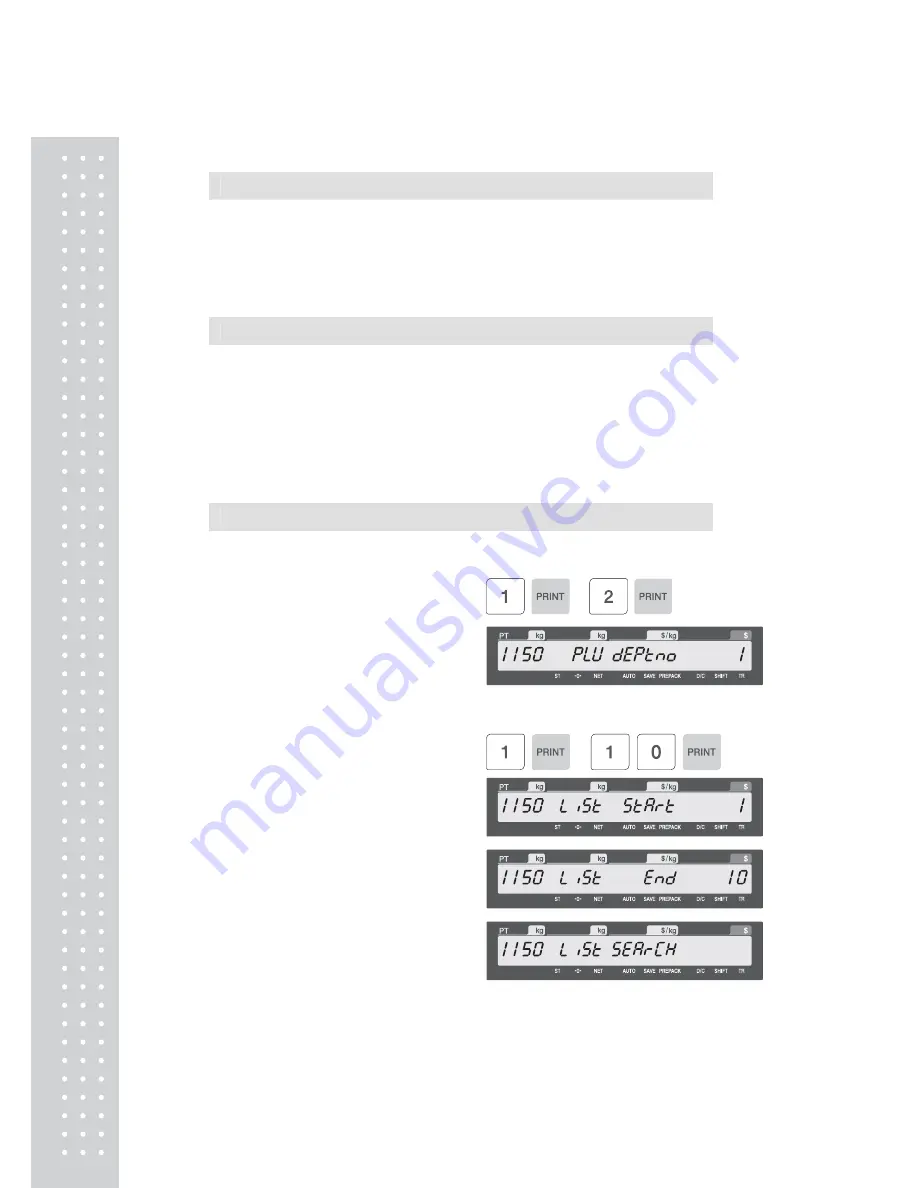
2.1.6 Listing PLU (Menu code 1150)
( MENU
→
1. PLU
→
5. List )
1. Enter Department No.
• Enter department number that you
wish to see
EX) Department No. 1
2. Enter PLU Range
EX) PLU 1~10 (start : 1, end : 10)
Scale print PLU labels in this range.
Summary of Contents for CL5000J Series
Page 1: ...2 앞표지 CL5000J ...
Page 5: ...6 1 GENERAL 1 1 PRECAUTIONS ...
Page 10: ...11 1 4 NAMEAND FUNCTIONS OVERALLVIEW StandardType PoleTypeP ...
Page 11: ...12 PoleTypeR HangingType ...
Page 12: ...13 DISPLAY StandardType B P PoleTypeR Max 6 15 kg Min 40 g e d 2 5 g KEYBOARD Standard ...
Page 13: ...14 Poletype Hangingtype ...
Page 14: ...15 1 5 Basic set up Howtoinstalltray H typemountingmethod 3suggested ...
Page 62: ...63 ...
Page 70: ...71 Enter new unit price Press PRINT key to print label ...
Page 83: ...84 1 2 3 4 5 6 7 8 9 10 11 12 ...
Page 84: ...85 13 14 15 16 17 18 19 20 21 22 23 24 ...
Page 85: ...86 25 26 27 28 29 30 TotalLabel ...
Page 86: ...87 4 2 Fixed Label Format Sample 1 Label sample 1 2 Label sample 2 ...
Page 90: ...91 4 5 Window Character Set Information ...
Page 91: ...92 MEMO ...
Page 92: ...93 MEMO ...
Page 93: ...94 MEMO ...
Page 94: ...95 ...
Page 95: ...96 뒷표지 ...


