Preparations
!
29
NOTES
•
About the LCD screen:
The screen is produced using extremely high-pre-
cision manufacturing techniques, with more than 99.99% of the pixels
operating to specification. Less than 0.01% of the pixels may occasion-
ally misfire or appear as black, red, blue or green dots. This has no
effect on the recorded image and does not constitute a malfunction.
LCD Backlight
When recording in bright places it may be difficult to use the LCD
screen. Turn on the LCD backlight to make it brighter.
With the camcorder on, hold
3
pressed down for more than 2
seconds.
Repeat this action to switch the LCD backlight between off (normal) and
on (bright).
NOTES
• The LCD backlight does not affect the brightness of the recordings.
• Using the bright setting will shorten the effective usage time of the bat-
tery pack.
• You can further adjust the brightness of the LCD screen with the
!
(
[LCD Brightness] setting, or dim it with the
!
(
[LCD
Screen Dimmer] setting to use in places where the light from the LCD
screen can be a nuisance.
180°
90°
Subject can monitor the LCD screen
180°
!"
#$
30
!
Preparations
Basic Operation of the Camcorder
Using the Touch Screen
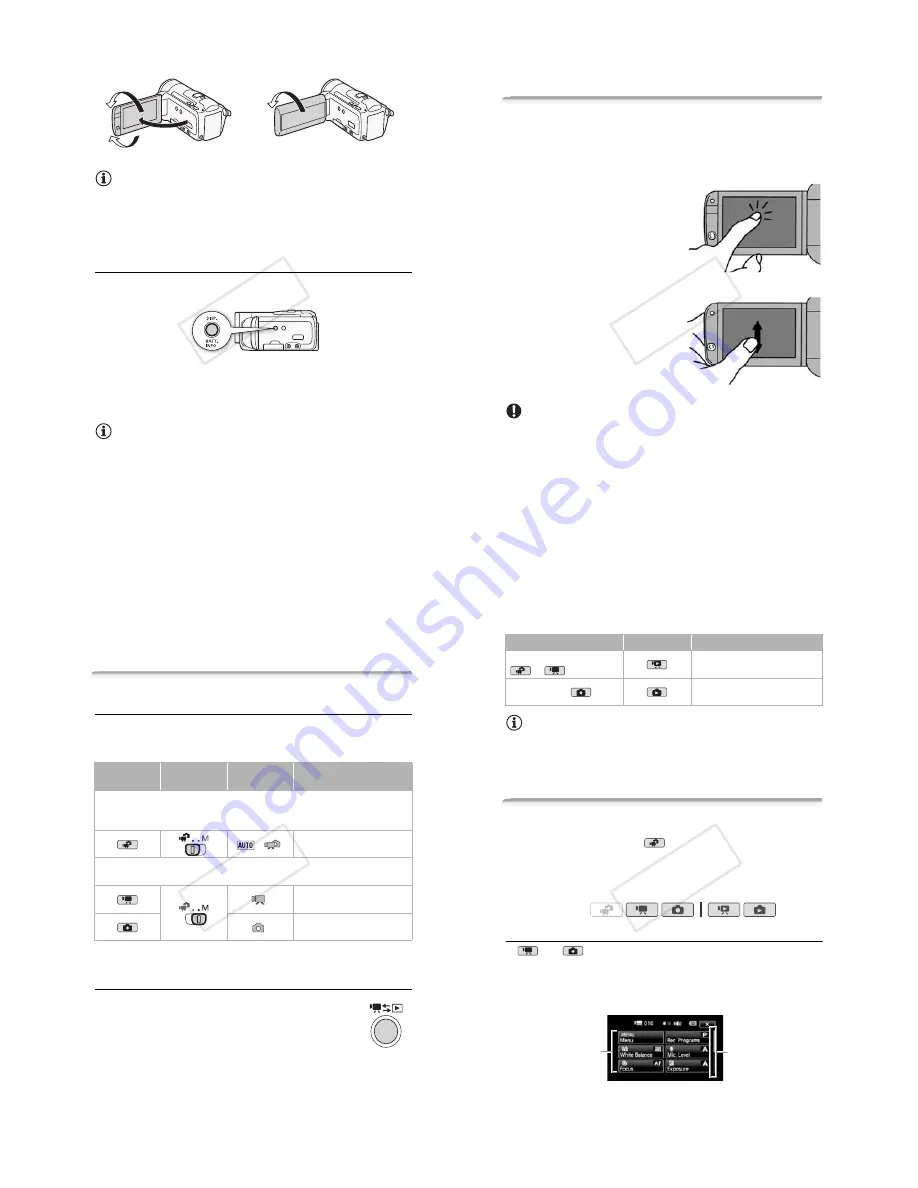
The control buttons and menu items that appear on the touch screen
change dynamically depending on the operating mode and the task
you are performing. With the intuitive touch screen interface you have
all the controls at your fingertips.
Touch
Touch a menu item to select it, or a
control button to perform the corre-
sponding action. For some functions,
such as Touch & Track (
"
68
) and face
detection (
"
66), you can touch a sub-
ject that appears on the touch screen to
select it and have the camcorder
choose the optimal settings.
Drag
Swipe your finger up and down or left
and right across the screen to scroll
menus, to browse through index screen
pages or to adjust slider controls (for
example, to adjust the volume).
IMPORTANT
• The camcorder uses a pressure-sensitive touch screen. Press firmly
when using touch operations.
• In the following cases, you may not be able to perform touch operations
correctly.
- Operating the touch screen with wet or gloved hands or using your
fingernails or other hard-tipped objects such as ballpoint pens.
- Applying excessive force or forcefully scratching the touch screen.
- Attaching commercially available screen protectors or adhesive film
onto the touch screen's surface.
!"
#$
Preparations
!
31
• For details about how to take care of the touch screen, refer to
Handling
Precautions
(
"
186),
Cleaning
(
"
191).
Operating Modes
Recording
When recording video or photos, the camcorder’s operating mode is
determined by the position of the mode switch and the onscreen con-
trol buttons.
* The mode icon displayed will change according to the optimal mode selected by the
Smart AUTO function (
"
43).
Playback
Press the camera/play button
4
to switch the cam-
corder between camera (recording) mode and playback
mode. The playback mode you switch into depends on the
initial recording mode.
You can press
4
when the camcorder is off to turn it
on directly in playback mode.
Operating
mode
Mode switch
Onscreen icon
Operation
Dual Shot
Record video and take photos easily, letting the camcorder take care of all the
settings – Great for beginners or if you just prefer not to bother with detailed camcorder
settings.
*
Easy recording of movies and
photos (
"
42).
Flexible recording
Use one of the dedicated recording modes to enjoy full access to the
menus and advanced functions and change the camcorder’s settings to your preference.
Touch [
5
] to record movies
(
"
58).
Touch [
6
] to record photos
(
"
104).
!"
#$
32
!
Preparations
NOTES
•
!
When switching to a playback mode, the memory selected
for playback will be the same currently used for recording.
• You can also press and hold
"
on the wireless controller for more
than 2 seconds to switch between recording and playback mode.
Using the Menus
Many of the camcorder’s functions can be adjusted from the FUNC.
panel and the setup menus. In
mode, however, menus cannot be
accessed and, except in a few cases, most menu settings will return to
their default values.
For details about the available menu options and settings, refer to the
appendix
Menu Options Lists
(
"
147).
The FUNC. Panel and Edit Panel
In
and
mode, the FUNC. panel shows a convenient over-
view of frequently used shooting functions. Touch [FUNC.] to access
the FUNC. panel and then touch the function you want to set or adjust.
You may need to drag your finger up and down along the scroll bar to
find the control button of the desired function.
Initial mode
Operating mode
Operation
Press
4
in
or
mode.
Playing back movies
([Original] index screen) (
"
49).
Press
4
in
mode.
Viewing photos
([Photos] index screen) (
"
100).
Operating modes:
Touch the control
button of the
desired function
Drag your finger up
and down along the
scroll bar to display
the rest of the panel
!"
#$


