9
Smart AUTO
(
"
43)
Smart AUTO automatically selects the best
scene mode for the scene you want to
shoot. You get spectacular recordings
every time without worrying about settings.
Video Snapshot
(
"
68)
Shoot or capture short scenes
and arrange them into a video
clip set to your favorite
background music.
Face Detection
(
"
66)
Image Stabilization
The camcorder automatically
detects people’s faces and
adjusts the focus and other
settings accordingly for beautiful
results.
Dynamic IS (
"
64)
compensates for camcorder
shake when you shoot video
while walking. Powered IS
(
"
65) will produce stable shots
when you zoom in on distant
subjects (full telephoto).
Just point the camcorder
and it will automatically
select the best settings for
your subject
!"
#$
10
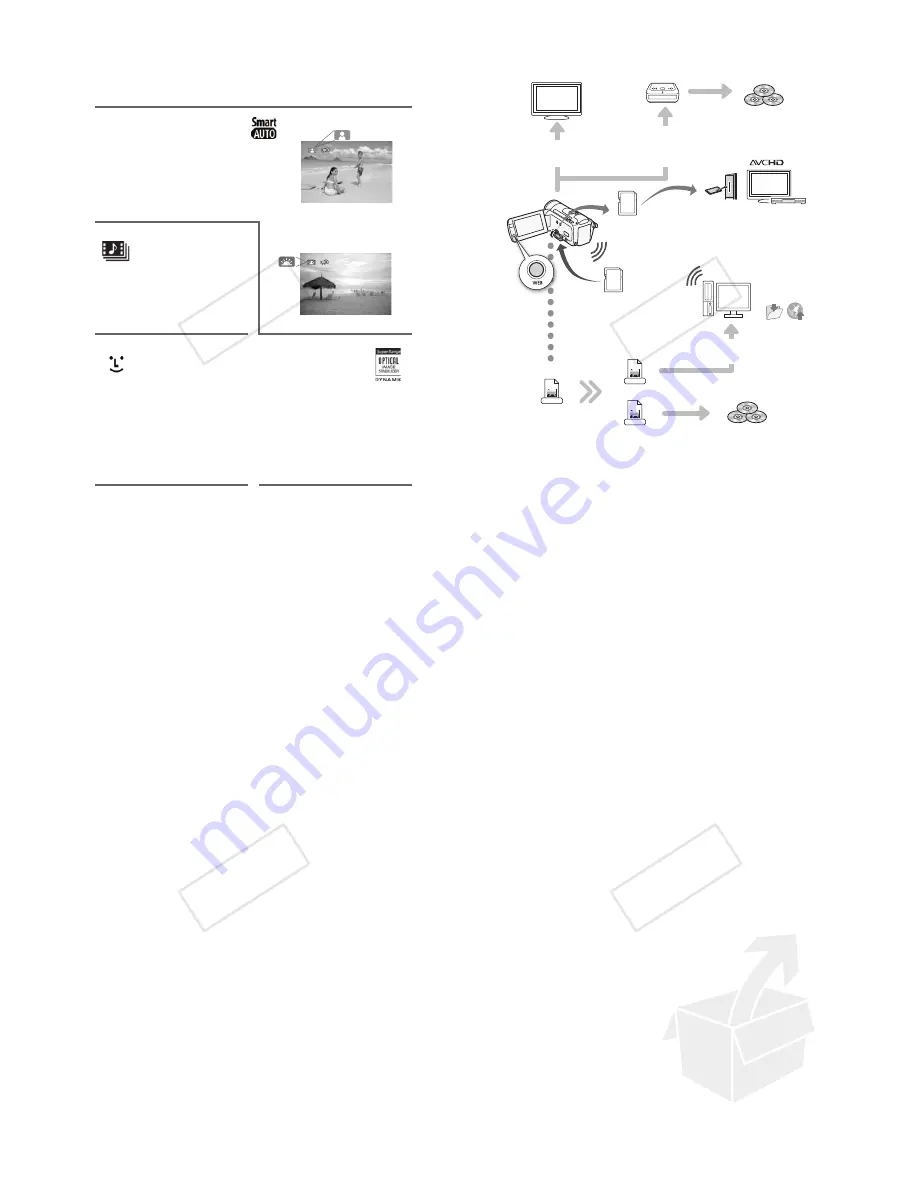
Enjoying your Recordings on Other Devices
Eye-Fi
SD
AVCHD
MPEG-2
SD-Video
Connect the camcorder
to an HDTV (
"
124)
Connect the camcorder to
the optional DW-100 DVD
Burner (
"
131, 135)
AVCHD discs
4
Photo DVDs
Play video directly
from your recorded
memory card
AVCHD-compatible HDTVs and
digital recorders with an SD
memory card slot
5
.
Use an Eye-Fi card (
"
145) to
wirelessly upload recordings to your
computer or a video sharing Web site.
Save or upload to
the Web.
Standard Definition
Convert your HD movies, in the
camcorder itself, to standard definition
files (
"
136, 142).
High Definition
Standard DVDs
Use the supplied software
ImageMixer 3 SE
(
"
128, 141).
4
AVCHD discs containing scenes recorded in MXP mode cannot be created with
the optional DW-100 DVD burner. Use the supplied software
ImageMixer 3 SE
to
back up such scenes.
5
Refer to the instruction manual of the device. Depending on the device used, cor-
rect playback may not be possible even if the device is AVCHD-compatible. In
such case, play back the recordings on the memory card using the camcorder.
!"
#$
11
!"
#$
12
!
Table of contents
"
Introduction
8
Exciting Features and New Functions
16
About this Manual
18
Getting to Know the Camcorder
18
Supplied Accessories and CD-ROMs
20
Names of Parts
"
Preparations
23
Getting Started
23
Charging the Battery Pack
26
Preparing the Accessories
28
Adjusting the Position and Brightness of the LCD Screen
30
Basic Operation of the Camcorder
30
Using the Touch Screen
31
Operating Modes
32
Using the Menus
35
First Time Settings
35
Setting the Date and Time
36
Changing the Language
36
Changing the Time Zone
37
Using a Memory Card
37
Memory Cards Compatible for Use with the Camcorder
38
Inserting and Removing a Memory Card
38
!
Selecting the Memory for the Recordings
39
!
Relay Recording of Movies
40
Initializing the Built-in Memory (
!
only) or
Memory Card
Table of contents
!"
#$


