Photos
!
113
Slideshow set to a music track
3 Touch the screen to display the playback controls, then touch [
&
]
to play back the slideshow set to the selected music track.
Slideshow not linked to the external audio
3 Touch the screen to display the playback controls, then touch [
&
]
to start the slideshow.
4 Start the music playback on the external player.
• Drag your finger left and right along the volume bar to adjust the
volume.
• Touch [
+
] to stop the slideshow. Hide the playback controls if
necessary.
To change the slideshow’s transition effects
Magnifying Photos during Playback
In single photo view, photos can be magnified up to 5 times.
7
will
appear for photos that cannot be enlarged.
1 Move the zoom lever toward
<
.
• The photo is magnified by 2 times and a
frame appears indicating the position of
the magnified area.
• To further enlarge the photo, move the
zoom lever toward
<
. To reduce the
magnification times, move it toward
;
.
[MENU]
(
(
(
[Slideshow Transition]
(
[Off], [Dissolve] or [Slide Image]
(
[
#
]
Operating modes:
!"
#$
114
!
Photos
2 Drag your finger across the photo to display the area you want to
see enlarged.
To cancel the magnification, move the zoom lever toward
;
until the
frame disappears.
Rotating Photos
You can rotate photos 90 degrees to change their orientation.
1 In single photo view, select the photo you want to rotate.
2 Touch the screen to display the playback controls.
3 Rotate the photo.
4 Drag your finger left/right to select another photo to rotate or
touch [
#
].
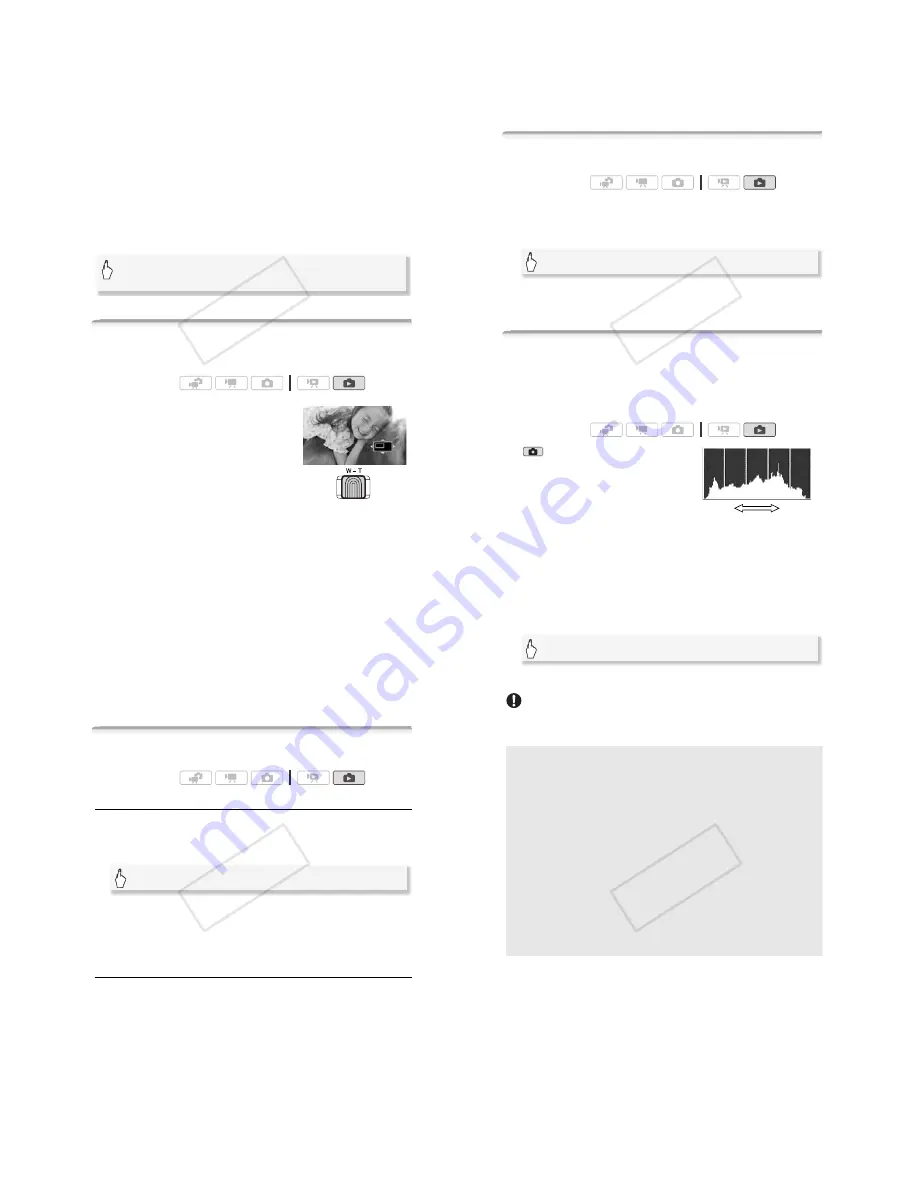
Histogram Display
In single photo view, you can display the histogram and the icons of all
the functions used at the time of recording (Exif information panel). The
histogram will be displayed also immediately after taking a photo.
Use the histogram as a reference to verify the correct exposure of the
photo.
* In
mode the histogram will be dis-
played while a photo is reviewed immedi-
ately after having taken the photo.
Touch the screen to display the
playback controls.
Operating modes:
[Edit]
(
[Rotate]
(
[
8
] (90
°
left) or [
9
] (90
°
right)
Operating modes:
*
Shadows
Pixel Coun
t
Highlights
!"
#$
Photos
!
115
The histogram and Exif information panel are displayed as well. Press
3
to hide the histogram and Exif information panel.
The area to the right of the histogram represents highlights and the left
side represents shadows. A photo whose histogram skews to the right
is relatively bright; while one whose histogram peaks to the left, is rela-
tively dark.
Protecting Photos
You can protect photos from accidental erasure.
Protecting Single Photos
1 In single photo view, select the photo you want to protect.
2 Touch the screen to display the playback controls.
3 Protect the photo.
•
0
appears and the photo cannot be deleted. Touch [
1
] again to
remove the protection.
4 Drag your finger left/right to select another photo to protect or
touch [
#
].
Protecting Photos from the Index Screen
1 Open the [Photos] index screen.
2 Touch [
%
] to open the photo selection screen.
3 Touch on the individual photos you want to protect.
• A checkmark
&
will appear on photos selected. Touch a selected
photo again to remove the checkmark.
• To select all the photos at once: Touch [Select All] instead of touching
individual photos. (Remove in advance any checkmarks from photos
you may have selected individually.)
4 Protect the photos.
Operating modes:
[Edit]
(
[Protect]
(
[
1
]
!"
#$
116
!
Photos
* Touch [Remove Protection] to remove the protection from the selected photos.
IMPORTANT
• Initializing the memory will permanently erase all recordings, including
protected photos.
-
r Functions You Can Use when Taking Photos
[Edit]
(
[Protect]
(
[Protect]*
(
[OK]
You can also use the following functions...
The following functions and features of the camcorder can be used
either for shooting video or for taking photos. The way to set and use
them was already explained in detail, so we refer you to the relevant
page in the “Video” section.
• Zoom (
"
46)
• Quick Start (
"
47)
• Recording programs (
"
60, 70)
• Face detection (
"
66)
• Touch & Track (
"
68)
• Digital effects (
"
69)
• Manual exposure adjustment (
"
73)
• Manual focus adjustment (
"
74)
• White balance (
"
76)
• Image effects (
"
77)
• Mini video light (
"
78)
• Self timer (
"
79)
!"
#$


