3.
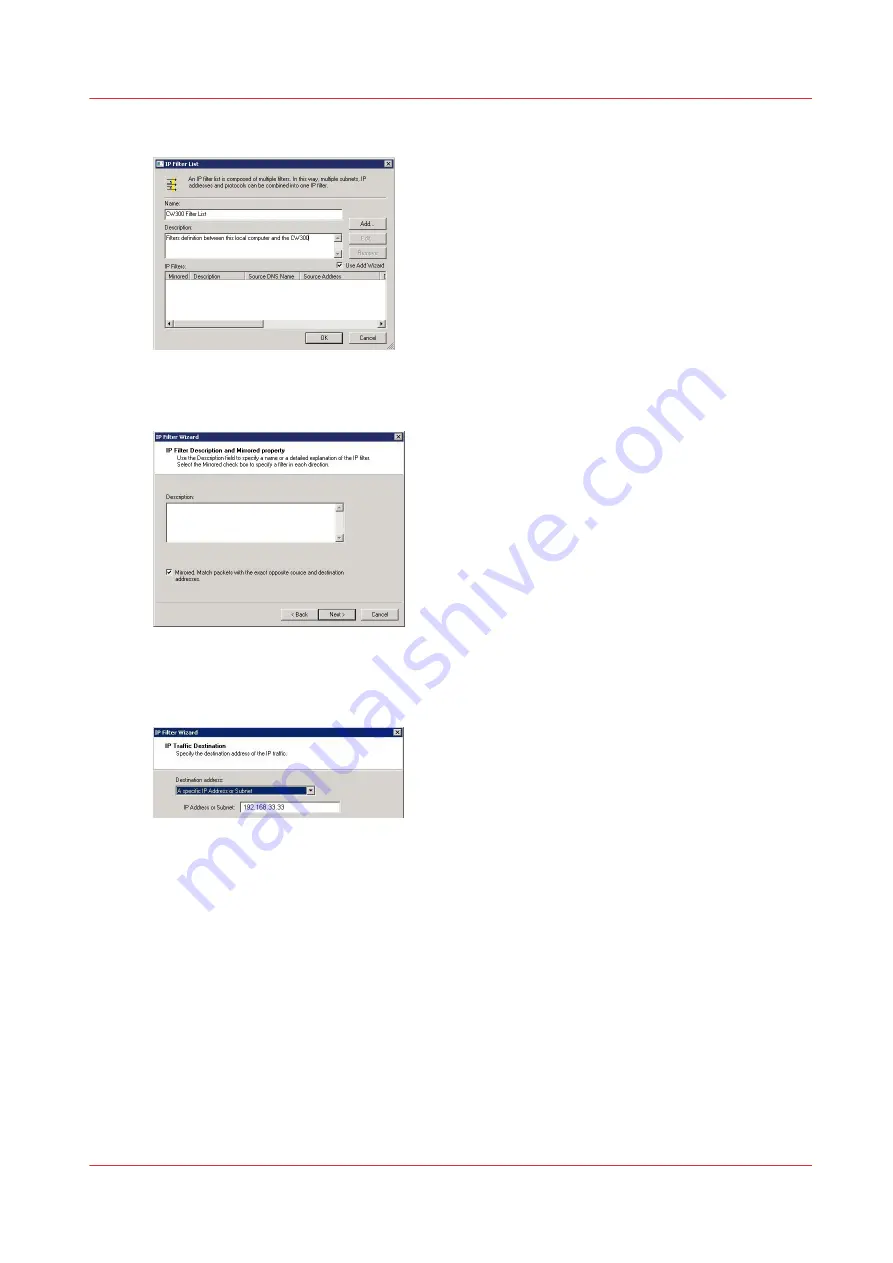
Enter a filter name and a description and click 'Add'
4.
Click 'Next' to open the wizard
5.
Check the 'Mirrored' checkbox and click 'Next'
6.
Select 'My IP address' as the 'Source address and click 'Next'
7.
Select 'A specific IP address or subnet' as 'Destination address' and enter the IP address of the
controller
8.
Select 'Any' as the 'IP Protocol Type' and click 'Next'
9.
Click 'Finish'
10.
In the 'IP filter list' window, click OK
The filter list is set
Create the filter list
Chapter 5 - Security on Océ ColorWave 550/600/650 (and Poster Printer)
259
Summary of Contents for Oce PlotWave 750
Page 1: ...Administration guide PlotWave ColorWave Systems Security information ...
Page 8: ...Contents 8 ...
Page 9: ...Chapter 1 Océ Security policy ...
Page 18: ...Overview of the security features available per Océ System 18 Chapter 1 Océ Security policy ...
Page 19: ...Chapter 2 Security on Océ PlotWave 300 350 PlotWave 750 PlotWave 900 and ColorWave 300 ...
Page 97: ...Chapter 3 Security on Océ PlotWave 500 and PlotWave 340 360 ...
Page 147: ...Chapter 4 Security on Océ PlotWave 345 365 and Océ PlotWave 450 550 ...
Page 235: ...Chapter 5 Security on Océ ColorWave 550 600 650 and Poster Printer ...
Page 299: ...Chapter 6 Security on Océ ColorWave 500 and Océ ColorWave 700 ...
Page 383: ...Chapter 7 Security on Océ ColorWave 810 Océ ColorWave 900 and Océ ColorWave 910 ...
Page 409: ......


