Purpose
Complete the IPsec configuration for a secure connection between the printer/copier system and
a workstation.
On the workstation, perform the 6 following actions:
Add the security snap in on page 256
Create the security policy on page 257
Create the filter list on page 258
Define the filter actions and security negotiation on page 260
Define the security rule on page 261
Assign the security policy on page 263
NOTE
The procedure below shows the configuration steps on Windows server 2008.
The procedure is similar on other Operating Systems (Windows Server 2003, Windows XP,
Windows Vista, Windows 7)
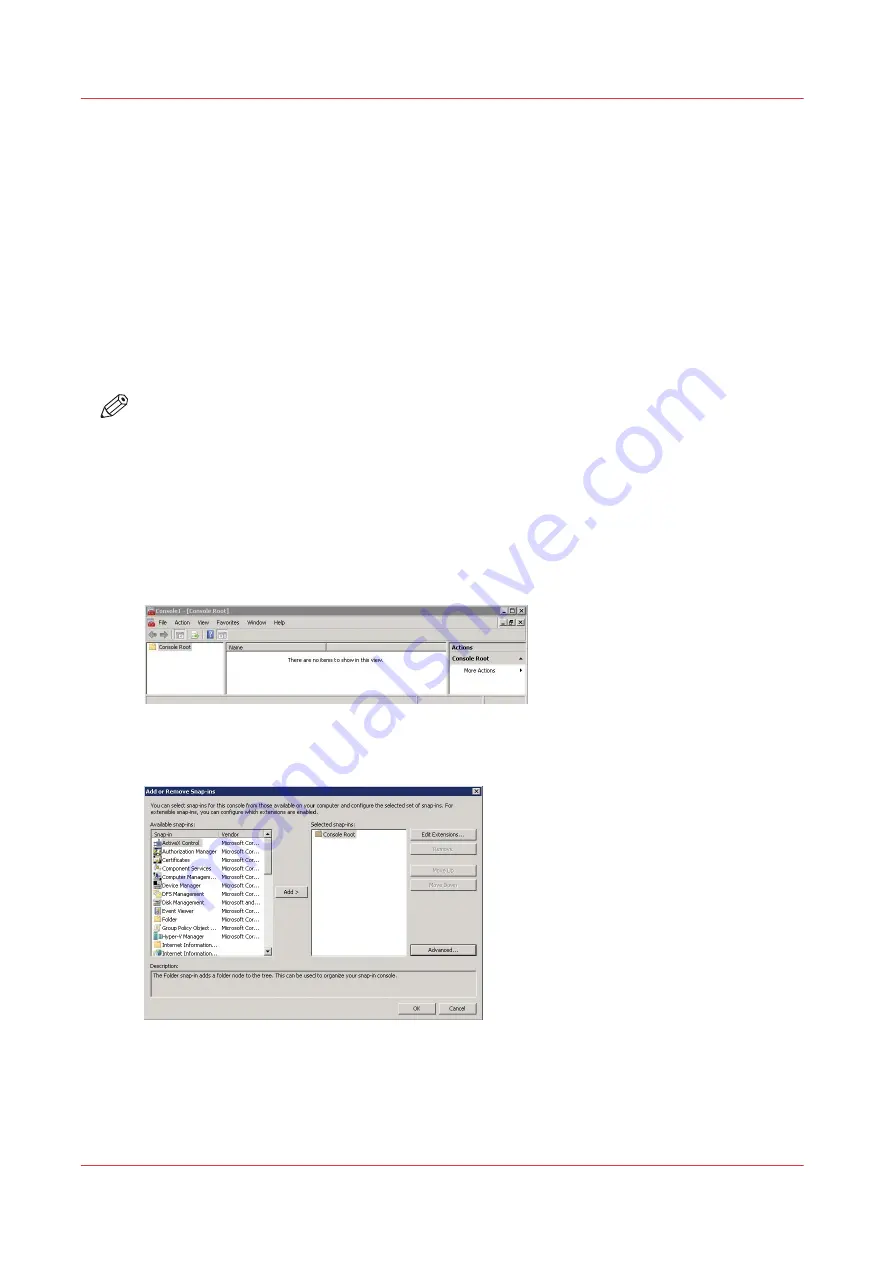
Add the security snap-in
Procedure
1.
In the 'Start' - 'Run' window, enter 'mmc' to open the management console
2.
In the top menu select 'File' - 'Add/Remove Snap-in'
3.
Select 'IP Security Policy Management' and click 'Add' to add it to the root console
4.
Keep 'Local computer' checked and click 'Finish'
The security snap-in is added, click 'OK'
Add the security snap-in
256
Chapter 5 - Security on Océ ColorWave 550/600/650 (and Poster Printer)
Summary of Contents for Oce PlotWave 750
Page 1: ...Administration guide PlotWave ColorWave Systems Security information ...
Page 8: ...Contents 8 ...
Page 9: ...Chapter 1 Océ Security policy ...
Page 18: ...Overview of the security features available per Océ System 18 Chapter 1 Océ Security policy ...
Page 19: ...Chapter 2 Security on Océ PlotWave 300 350 PlotWave 750 PlotWave 900 and ColorWave 300 ...
Page 97: ...Chapter 3 Security on Océ PlotWave 500 and PlotWave 340 360 ...
Page 147: ...Chapter 4 Security on Océ PlotWave 345 365 and Océ PlotWave 450 550 ...
Page 235: ...Chapter 5 Security on Océ ColorWave 550 600 650 and Poster Printer ...
Page 299: ...Chapter 6 Security on Océ ColorWave 500 and Océ ColorWave 700 ...
Page 383: ...Chapter 7 Security on Océ ColorWave 810 Océ ColorWave 900 and Océ ColorWave 910 ...
Page 409: ......


