


447
N
Cropping JPEG Images
Moving the Cropping Frame
Use <
9
> to move the frame over the image vertically or
horizontally. Move the cropping frame until it covers the desired
image area.
Correcting the Tilt
You can correct image tilt by ±10°. Press the <
B
> button, then
while checking the tilt against the grid, turn the <
5
> dial (in 0.1°
increments) or tap the left or right wedge (in 0.5° increments) on the
upper left of the screen to correct the tilt. After completing the tilt
correction, press <
0
>.
4
Check the image area to be
cropped.
Press the <
Q
> button.
X
The image area to be cropped will be
displayed.
To return to the original display, press
the <
Q
> button again.
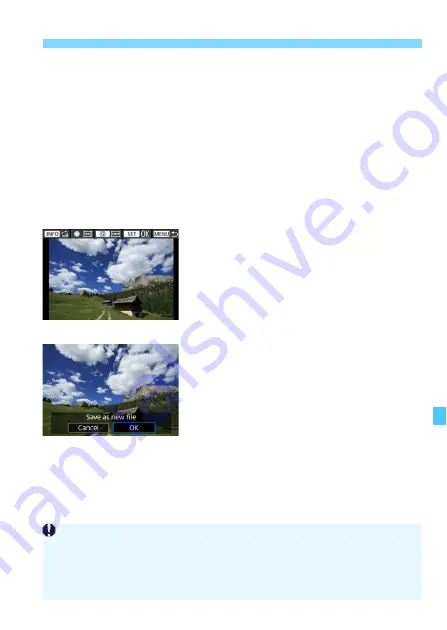
5
Save the image.
Press <
0
>, then select [
OK
] to save
the cropped image.
Check the destination folder and
image file number, then select [
OK
].
To crop another image, repeat steps 2
to 5.
The position and size of the cropping frame may change depending on
the angle set for tilt correction.
Once a cropped image is saved, it cannot be cropped again or resized.
AF point display information (p.397) and Dust Delete Data (p.452) will
not be appended to the cropped images.
Summary of Contents for EOS 6D Mark II
Page 216: ...216 ...
Page 232: ...232 ...
Page 288: ...288 ...
Page 384: ...384 ...
Page 385: ...385 ...
Page 386: ...386 ...
Page 436: ...436 ...
Page 448: ...448 ...
Page 525: ...525 ...
Page 583: ...583 ...
Page 586: ...586 ...
Page 587: ...587 ...
Page 588: ...588 ...
Page 589: ...589 ...
Page 590: ...590 ...
Page 591: ...591 ...
Page 592: ...592 ...


