3.
When the reference channel has been established, you’ll be asked to position
the peak of interest in the MCA View Control window. Put the cursor at the
calibration peak energy value. (For example 5.894 keV for
55
Fe). Then adjust
the amplifier gain until the peak centroid is at the cursor. Note that the
software simplifies this by automatically selecting/enabling the first SCA of
the selected channel, making the SCA window wide open, and causing the
RDY LED on the selected module to start blinking.
4.
When the normalization is complete, press Ok to return to the screen in
Figure and select another channel to normalize.
TCA Window Setup
When the gain normalization is complete, you can run the TCA Window Setup proce-
dure:
1.
Select TCA Window Setup form the 2016 Amp/TCA software main menu.
2.
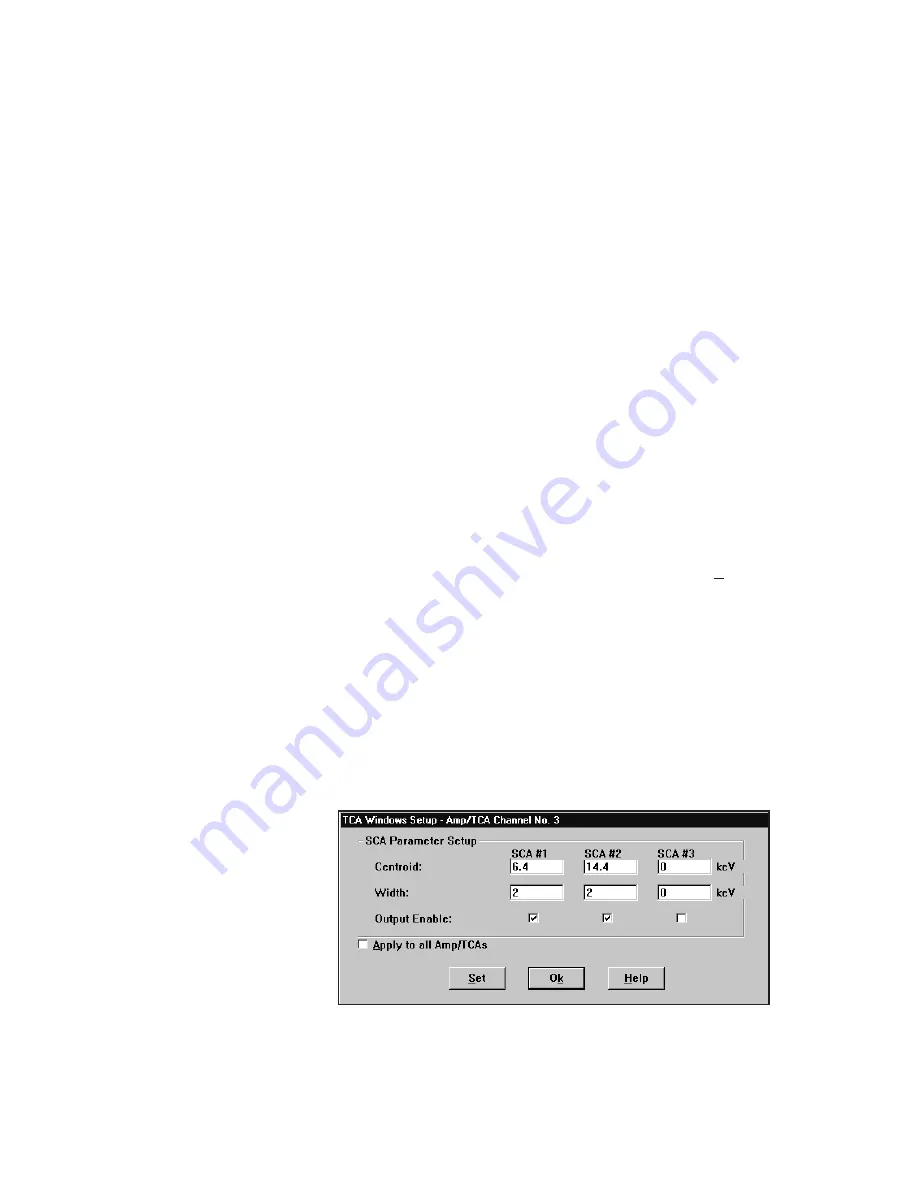
The TCA setup proceeds as before. When the screen in Figure 18 appears,
the window values can be entered for the energy regions of interest on a
channel by channel (or Apply to All) basis. Upon pressing the Set
pushbutton, the dialog will disappear and the value(s) will be written down to
the selected 2016 and MCA memory is cleared. If the Apply to All Amp
TCA’s check box was selected, the SCA parameter adjustments will be
applied to all channels (2016s).
Note that you can now review your selected settings and adjust them (both
centroid and width) until you are satisfied that the desired data is being
displayed. Continue to press the Set button while adjusting these values.
23
TCA Window Setup
Figure 18 Setting the SCA Parameters