


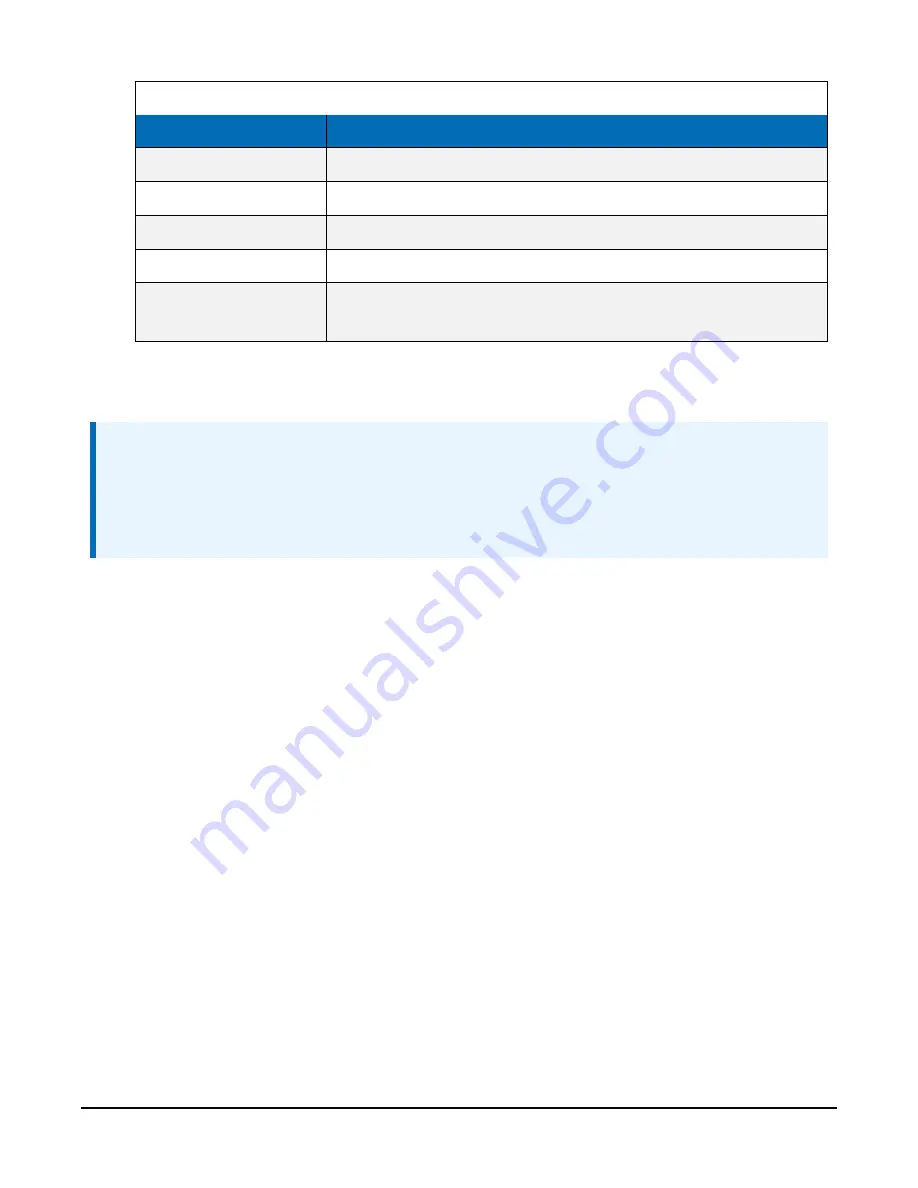
Table 7-3: Base radio settings
Name
Setting
Repeater Frequency
Leave at Use Gateway Frequency Key
Receive SubNet ID
Leave at 15 (matches RF451/RF452)
Transmit SubNet ID
Leave at 15 (matches RF451/RF452)
Network ID
Must match value given for RF451/RF452 (0 to 4095)
Radio ID
Leave at 0 (must be unique/different from RF451/RF452 radio ID,
which should be 1)
6. Click Apply.
7. Disconnect the USB cable from the CRVW3.
NOTE:
If devices have been previously tested or deployed, they may be assigned Network ID and
Frequency Key values that do not match the current network settings. Make sure the Network
ID and Frequency Key values match in all devices in the network and that the Radio ID is
unique for each device.
7.7.1.3 Using
Device Configuration Utility
to connect to the CRVW3–
RF451/RF452 over the radio
If no other CRVW3–RF451/RF452 devices are on the radio network (powered or in range),
Device
Configuration Utility
connects to the CRVW3 device that is powered and available using the
RF451/RF452/COM port on the computer as a transparent link. The
Device Configuration Utility
screens should behave the same as when there is a wired connection between the computer and
CRVW3. You should be able to view and set all the settings of the CRVW3 over the radio
connection.
1. Position the RF451/RF452 and computer at least 25 feet away from the CRVW3. The
CRVW3 should no longer be wired to any device.
2. In
Device Configuration Utility
select CRVW Series.
3. Select the communications port on the computer that is connected to the RF451/RF452
radio.
4. Click Connect.
5. Confirm that the RX/TX LED flashes red and green on both the CRVW3 and RF451/RF452.
CRVW3 3-Channel Vibrating-Wire Data Logger
32


