Section 7. Installation
160
Procedures for Common Wi-Fi Uses
If you need to:
Use the following procedures:
Connect an iOS or Android device directly to
your CR6-WIFI station in the field without
opening the enclosure
PROCEDURE: Create a Network — Set Up CR6-WIFI (p. 160)
PROCEDURE: Create a Network — Set Up iOS Device Wi-Fi (p. 160)
PROCEDURE: Connect CR6-WIFI with LoggerLink App (p. 167)
Connect a Window 8.1 PC directly to your
CR6-WIFI station in the field without opening
the enclosure
PROCEDURE: Create a Network — Set Up CR6-WIFI (p. 160)
PROCEDURE: Create a Network — Set Up Windows 8.1 PC Wi-Fi (p. 161)
PROCEDURE: Connect to CR6-WIFI with PC400 App (p. 172)
Connect an iOS or Android device to your
CR6-WIFI station over a Wi-Fi network
PROCEDURE: Join a Network — Set Up CR6-WIFI (p. 162)
PROCEDURE: Join a Network — Set Up iOS Device Wi-Fi (p. 166)
PROCEDURE: Connect CR6-WIFI with LoggerLink App (p. 167)
Connect a Window 8.1 PC to your CR6-WIFI
station over a Wi-Fi network
PROCEDURE: Join a Network — Set Up CR6-WIFI (p. 162)
PROCEDURE: Join a Network — Set Up Windows 8.1 PC Wi-Fi (p. 166)
PROCEDURE: Connect to CR6-WIFI with PC400 App (p. 172)
Install Antenna
The CR6-WIFI is shipped with (1) pn 16005 2.4 GHz 0 dBd Omnidirectional 1/2
Wave Whip Antenna. Connect this or another Wi-Fi antenna to the CR6 before
setting up the Wi-Fi option. This antenna may not be suitable for use inside a
Campbell Scientific enclosure because the enclosure will attenuate the signal and
the aluminum enclosure backplate will block much of the signal for about 180
degrees horizontally.
Only use antennas designated by Campbell Scientific for use with the CR6-WIFI
as other antennas may violate FCC approval.
Create a Network
The following procedures set up a CR6-WIFI to create (host) its own network and
connect an iOS device to that network. You can set up an Android device in a
similar way. This is a good way to connect to your CR6-WIFI for field work.
Connect a maximum of eight devices to a Wi-Fi network created by a CR6-WIFI.
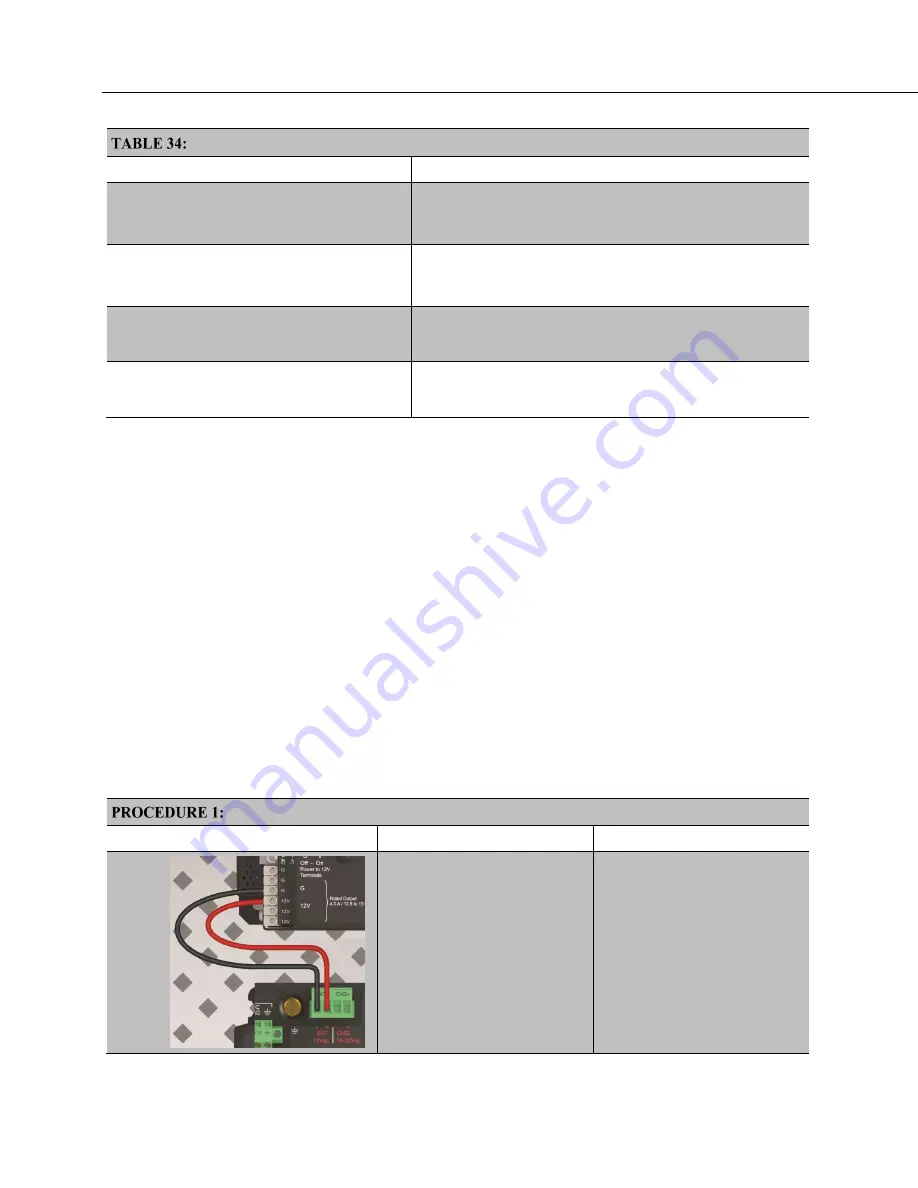
Create a Network — Set Up CR6-WIFI
Step
Description
Result
Connect power to the CR6-WIFI:
•
connect 12
Vdc
(p. 607)
at the
green
–BAT+
terminals,
•
or connect 16 to 32 Vdc at
the
–CHG+
terminals.
•
WIFI light at far right of
CR6-WIFI wiring panel
lights red, then it flashes
green.
•
The CR6-WIFI
automatically creates a
Wi-Fi network if its default
settings have not been
changed. That's it!
Summary of Contents for CR6 Series
Page 2: ......
Page 4: ......
Page 6: ......
Page 32: ......
Page 36: ......
Page 38: ......
Page 76: ...Section 5 Overview 76 FIGURE 20 Half Bridge Wiring Example Wind Vane Potentiometer ...
Page 80: ...Section 5 Overview 80 FIGURE 23 Pulse Input Wiring Example Anemometer ...
Page 136: ......
Page 454: ...Section 8 Operation 454 FIGURE 104 Narrow Sweep High Noise ...
Page 459: ...Section 8 Operation 459 FIGURE 106 Vibrating Wire Sensor Calibration Report ...
Page 535: ...Section 8 Operation 535 8 11 2 Data Display FIGURE 121 CR1000KD Displaying Data ...
Page 537: ...Section 8 Operation 537 FIGURE 123 CR1000KD Real Time Custom ...
Page 538: ...Section 8 Operation 538 8 11 2 3 Final Storage Data FIGURE 124 CR1000KD Final Storage Data ...
Page 539: ...Section 8 Operation 539 8 11 3 Run Stop Program FIGURE 125 CR1000KD Run Stop Program ...
Page 541: ...Section 8 Operation 541 FIGURE 127 CR1000KD File Edit ...
Page 546: ......
Page 552: ......
Page 610: ...Section 11 Glossary 610 FIGURE 137 Relationships of Accuracy Precision and Resolution ...
Page 612: ......
Page 648: ......
Page 650: ......
Page 688: ......
Page 689: ......


