


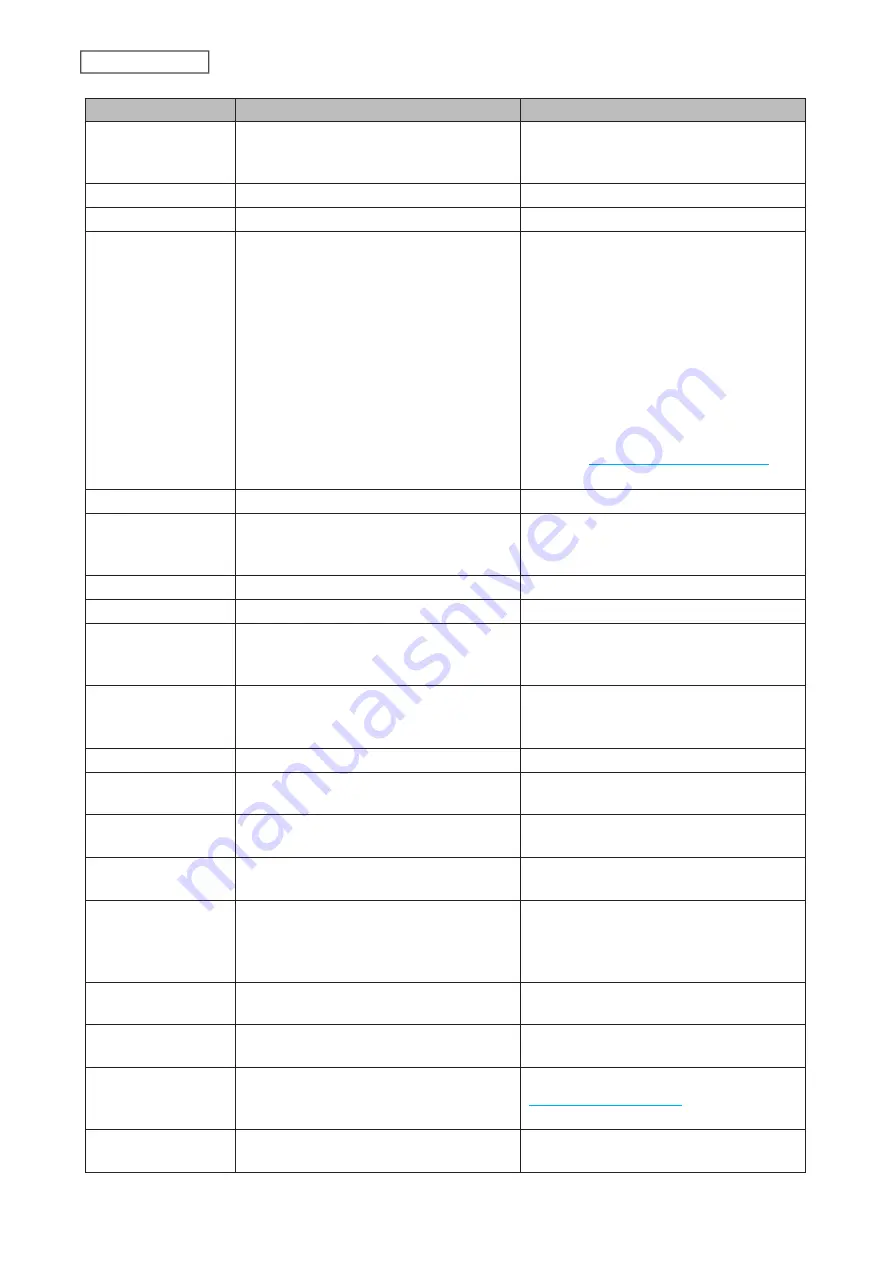
Code
Description
Corrective Action
I18
Recovering the RAID array.
Note:
Transfer speeds are slower during
the rebuilding process.
-
I19
Rewriting drives in the LinkStation with 0s.
-
I20
Formatting the drive.
-
I21
Checking the drive.
• If the code appears while running a
drive check, wait until the process
finishes.
• If the code appears right after the
LinkStation boots up, restart the
LinkStation after waiting 30 minutes.
If the code appears again, try the
appropriate corrective action below:
LS710D
: Contact Buffalo technical
support for assistance.
LS720D
: Replace the drive by referring
section in chapter 10.
I25
Updating the LinkStation firmware.
Do not turn off the LinkStation’s power.
I26
The initialization process has been started
by using Settings and all settings are being
initialized.
-
I27
Checking the USB drive.
-
I28
Formatting the USB drive.
-
I32
Appears after replacing the drive when the
RAID array needs to be rebuilt in Settings
or formatting is necessary.
From Settings, either recover the RAID
array or format the drive.
I37
The initialization process has been started
by using the USB initialization drive and
settings are being initialized.
-
I38
Settings initialization is finished.
-
I40
Beginning settings initialization. All data
on the drive in slot 1 will be deleted.
-
I41
Press the function button to start the
settings initialization process.
-
I42
Preparing to start the settings initialization
process.
-
I43
The LinkStation was started from the USB
initialization drive, but the settings cannot
be initialized from this USB initialization
drive.
-
I46
Data migration or conversion (RAID
migration) is in progress.
Do not turn off the LinkStation’s power.
I47
Data migration or conversion (RAID
migration) is in progress.
Do not turn off the LinkStation’s power.
I52
A new firmware version has been released.
Update the firmware by referring to the
section in chapter
9.
I71
The space is occupied so older logs were
removed.
Delete file access logs to free up space.
201
Chapter 11 Appendix
Summary of Contents for Link Station LS710D
Page 24: ...3 Click Create Folder 23 Chapter 2 File Sharing...
Page 31: ...2 Tap Create User 30 Chapter 2 File Sharing...
Page 34: ...3 Click Add Group 33 Chapter 2 File Sharing...
Page 73: ...5 Click Add 72 Chapter 4 Backup...
Page 79: ...3 Click Edit 4 Click Browse 5 Select the shared folder and click OK 78 Chapter 4 Backup...
Page 81: ...2 Click Time Machine 80 Chapter 4 Backup...
Page 82: ...3 Click Select Backup Disk 4 Select the shared folder then click Use Disk 81 Chapter 4 Backup...
Page 93: ...4 Click the Options tab 5 Click Edit 92 Chapter 5 Cloud Services and Remote Access...
Page 97: ...7 Enter the desired job name and click Next 96 Chapter 5 Cloud Services and Remote Access...
Page 98: ...8 Select Backup and click Next 97 Chapter 5 Cloud Services and Remote Access...
Page 100: ...10Specify the sync period and click Next 99 Chapter 5 Cloud Services and Remote Access...
Page 106: ...7 Enter the desired job name and click Next 105 Chapter 5 Cloud Services and Remote Access...
Page 107: ...8 Select Restore and click Next 106 Chapter 5 Cloud Services and Remote Access...
Page 112: ...6 Enter the desired job name and click Next 111 Chapter 5 Cloud Services and Remote Access...
Page 115: ...9 Specify the sync period and click Next 114 Chapter 5 Cloud Services and Remote Access...
Page 122: ...4 Click the Options tab 5 Click Edit 121 Chapter 5 Cloud Services and Remote Access...
Page 127: ...3 Tap NAS Setup 126 Chapter 5 Cloud Services and Remote Access...
Page 130: ...129 Chapter 5 Cloud Services and Remote Access...
Page 147: ...6 Select a file to move and click Action 7 Click Move 146 Chapter 6 Multimedia...
Page 152: ...7 Click Delete 8 Click Delete again 151 Chapter 6 Multimedia...


