


5
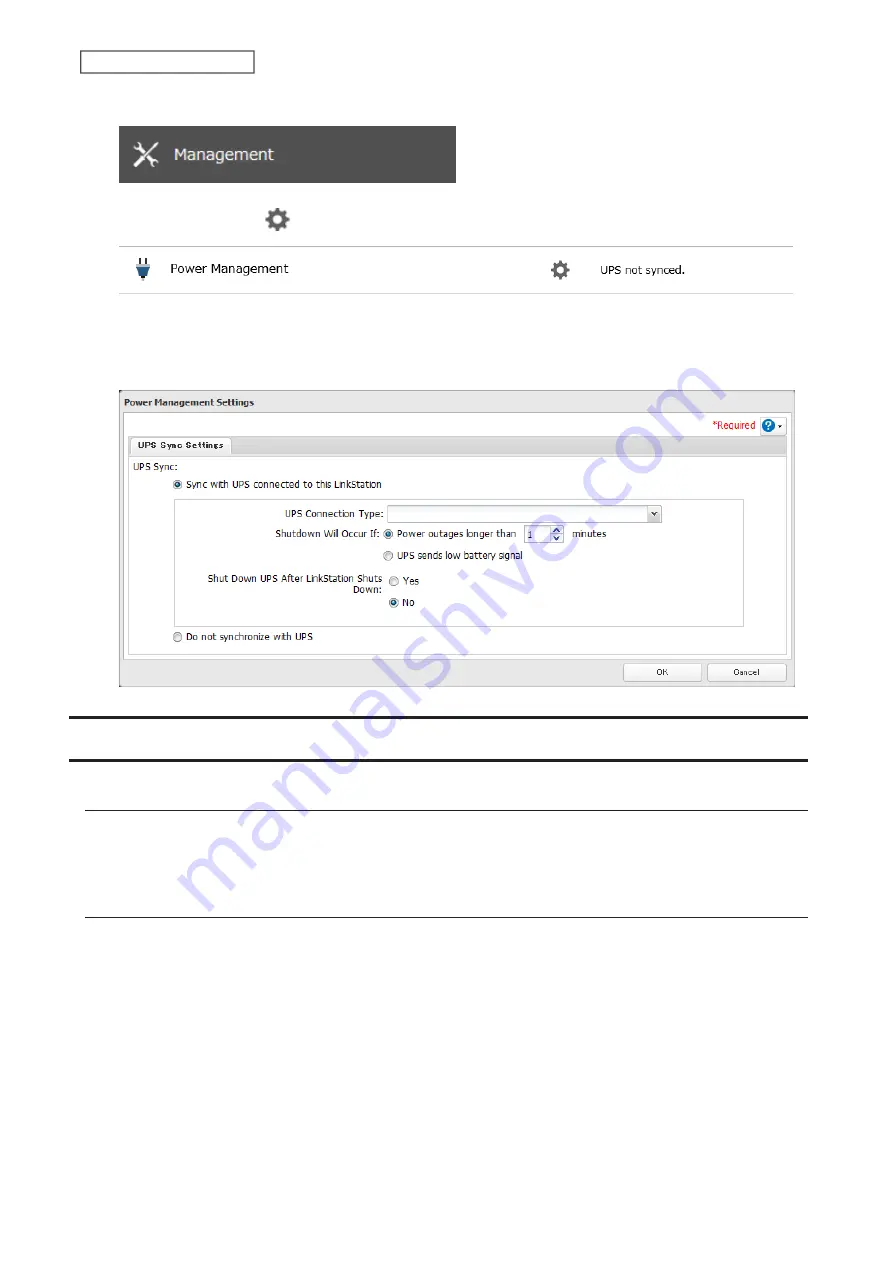
From Settings, click
Management
.
6
Click the settings icon (
) to the right of “Power Management”.
7
Click
Edit
.
8
Configure the desired settings, then click
OK
.
Encrypting Data Transmission
Encrypting Settings Data
All communication with Settings can use SSL encryption if you access the Settings page by changing “http://” to
“https://” in the browser address bar or click
Secure Connection
from the login window. Once you are logged in using
the HTTPS connection and wish to disable SSL encryption, click
Normal Connection
from the login window.
SSL
SSL (Secure Socket Layer) is a protocol that uses a public key encryption system to establish secure communication
channels between networked devices, allowing for encrypted Internet traffic and server identity verification.
The SSL protocol uses a pair of keys – one private, one public – to authenticate and manage secure connections. SSL
keys are used during setup screen operations.
SSL Key Formats/Extensions
The SSL keys may include the following encoding formats and extensions:
SSL Certificate (server.crt)
The server.crt is the server public key, and is generated by the LinkStation. A computer that receives the server.crt
uses it to encrypt data, and the LinkStation then uses the server.key file to decrypt the data.
171
Chapter 9 Advanced Features
Summary of Contents for Link Station LS710D
Page 24: ...3 Click Create Folder 23 Chapter 2 File Sharing...
Page 31: ...2 Tap Create User 30 Chapter 2 File Sharing...
Page 34: ...3 Click Add Group 33 Chapter 2 File Sharing...
Page 73: ...5 Click Add 72 Chapter 4 Backup...
Page 79: ...3 Click Edit 4 Click Browse 5 Select the shared folder and click OK 78 Chapter 4 Backup...
Page 81: ...2 Click Time Machine 80 Chapter 4 Backup...
Page 82: ...3 Click Select Backup Disk 4 Select the shared folder then click Use Disk 81 Chapter 4 Backup...
Page 93: ...4 Click the Options tab 5 Click Edit 92 Chapter 5 Cloud Services and Remote Access...
Page 97: ...7 Enter the desired job name and click Next 96 Chapter 5 Cloud Services and Remote Access...
Page 98: ...8 Select Backup and click Next 97 Chapter 5 Cloud Services and Remote Access...
Page 100: ...10Specify the sync period and click Next 99 Chapter 5 Cloud Services and Remote Access...
Page 106: ...7 Enter the desired job name and click Next 105 Chapter 5 Cloud Services and Remote Access...
Page 107: ...8 Select Restore and click Next 106 Chapter 5 Cloud Services and Remote Access...
Page 112: ...6 Enter the desired job name and click Next 111 Chapter 5 Cloud Services and Remote Access...
Page 115: ...9 Specify the sync period and click Next 114 Chapter 5 Cloud Services and Remote Access...
Page 122: ...4 Click the Options tab 5 Click Edit 121 Chapter 5 Cloud Services and Remote Access...
Page 127: ...3 Tap NAS Setup 126 Chapter 5 Cloud Services and Remote Access...
Page 130: ...129 Chapter 5 Cloud Services and Remote Access...
Page 147: ...6 Select a file to move and click Action 7 Click Move 146 Chapter 6 Multimedia...
Page 152: ...7 Click Delete 8 Click Delete again 151 Chapter 6 Multimedia...


