


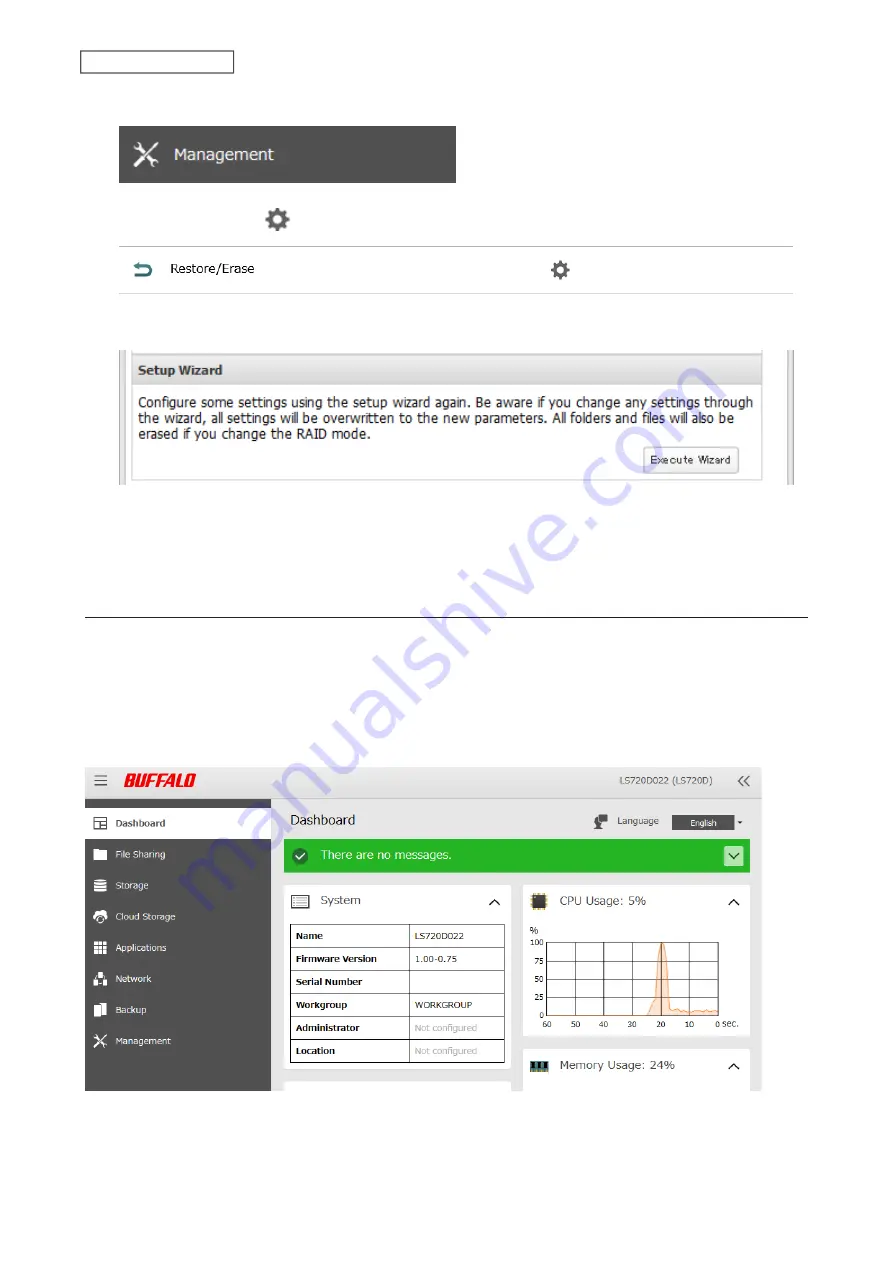
1
From Settings, click
Management
.
2
Click the settings icon (
) to the right of “Restore/Erase”.
3
Click
Execute Wizard
.
4
The “Confirm Operation” screen will open. Enter the confirmation number, then click
OK
.
5
Follow the procedure on the screen and finish the setup wizard.
Checking the Device Information from Dashboard
When opening the Settings interface, the Dashboard page will appear first. Dashboard will show the following
device information:
• Notices, such as information events and errors
• System information, such as hostname, firmware version, IP address, etc.
• Drive information, such as used space of internal drives or LVM volumes, etc.
• CPU and system memory usage
• Network information, such as IP address, link speed, sent and received rates, etc.
Notes:
• If the number of files on the LinkStation increases, it will also increase the memory usage of the LinkStation. This
memory usage will decrease after a certain period of time passes. To reduce the memory usage immediately, try
the following operations:
19
Chapter 1 Getting Started
Summary of Contents for Link Station LS710D
Page 24: ...3 Click Create Folder 23 Chapter 2 File Sharing...
Page 31: ...2 Tap Create User 30 Chapter 2 File Sharing...
Page 34: ...3 Click Add Group 33 Chapter 2 File Sharing...
Page 73: ...5 Click Add 72 Chapter 4 Backup...
Page 79: ...3 Click Edit 4 Click Browse 5 Select the shared folder and click OK 78 Chapter 4 Backup...
Page 81: ...2 Click Time Machine 80 Chapter 4 Backup...
Page 82: ...3 Click Select Backup Disk 4 Select the shared folder then click Use Disk 81 Chapter 4 Backup...
Page 93: ...4 Click the Options tab 5 Click Edit 92 Chapter 5 Cloud Services and Remote Access...
Page 97: ...7 Enter the desired job name and click Next 96 Chapter 5 Cloud Services and Remote Access...
Page 98: ...8 Select Backup and click Next 97 Chapter 5 Cloud Services and Remote Access...
Page 100: ...10Specify the sync period and click Next 99 Chapter 5 Cloud Services and Remote Access...
Page 106: ...7 Enter the desired job name and click Next 105 Chapter 5 Cloud Services and Remote Access...
Page 107: ...8 Select Restore and click Next 106 Chapter 5 Cloud Services and Remote Access...
Page 112: ...6 Enter the desired job name and click Next 111 Chapter 5 Cloud Services and Remote Access...
Page 115: ...9 Specify the sync period and click Next 114 Chapter 5 Cloud Services and Remote Access...
Page 122: ...4 Click the Options tab 5 Click Edit 121 Chapter 5 Cloud Services and Remote Access...
Page 127: ...3 Tap NAS Setup 126 Chapter 5 Cloud Services and Remote Access...
Page 130: ...129 Chapter 5 Cloud Services and Remote Access...
Page 147: ...6 Select a file to move and click Action 7 Click Move 146 Chapter 6 Multimedia...
Page 152: ...7 Click Delete 8 Click Delete again 151 Chapter 6 Multimedia...


