7. ADJUSTMENTS
S-7300A
118
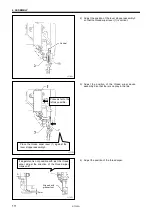
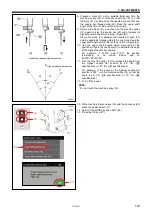
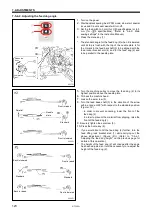
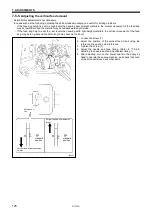
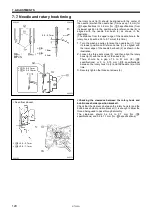
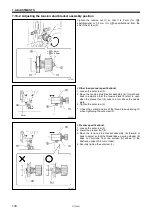
8. Prepare a block (21) with a suitable thickness. Turn the
machine pulley (12) to raise the needle bar (22) so that
the block (21) is clamped by the needle bar bush (23) and
the needle bar thread guide (24). Read the upper shaft
angle at this time (at the position in figure [A]).
9. Remove the block (21), and then turn the machine pulley
(12) again to raise the needle bar (22) until it passes its
highest position and starts to drop. (Figure [B])
Clamp the block (21) between the needle bar bush (23)
and the needle bar thread guide (24) once more. Read the
upper shaft angle at this time (at the position in figure [C]).
10. Use the upper shaft angles which were read at the
positions in figure [A] and figure [C] to calculate the angle
at the highest needle bar position.
For example, if A=320° and C=20°, the position
relationship is as shown below, and so
B=320°+60°/2=350°.
11. Turn the machine pulley (12) to increase the angle from
the highest needle bar position by 55° (for -[][]3
specifications) or 51° (for -[][]5 specifications).
*
For example, if the angle at the highest needle bar
position is 350°, turn the machine pulley (12) so that the
angle is 45° (for -[][]3 specifications) or 41° (for -[][]5
specifications).
12. Turn off the power.
NOTE:
Do not touch the machine pulley (12).
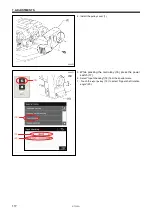
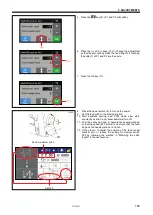
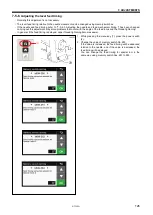
13. While touching the menu key (16) and the home key (25),
press the power switch (17).
14. Select "U-shaft REF position ADJ" (26).
15. Press the OK key (27).
0986D
0969D
(16)
(25)
(26)
(27)
Needle bar passes highest position
Highest needle bar position
[B]
[A]
[C]
B
A
C
30
°
30
°
60
°
320
°
20
°

