21
Ch. 2 Getting Started
Ge
tti
ng
S
tar
ted
Memory:
At least 32 MB
USB port
(installed as standard equipment)
CD-ROM drive
Installing the P-touch Editor 3.2 soft-
ware
The P-touch Editor 3.2 software includes a vari-
ety of more complex functions for printing bar-
codes and images, enabling you to design just
about any label that you can image. Install the
P-touch Editor 3.2 software onto a Macintosh as
described below.
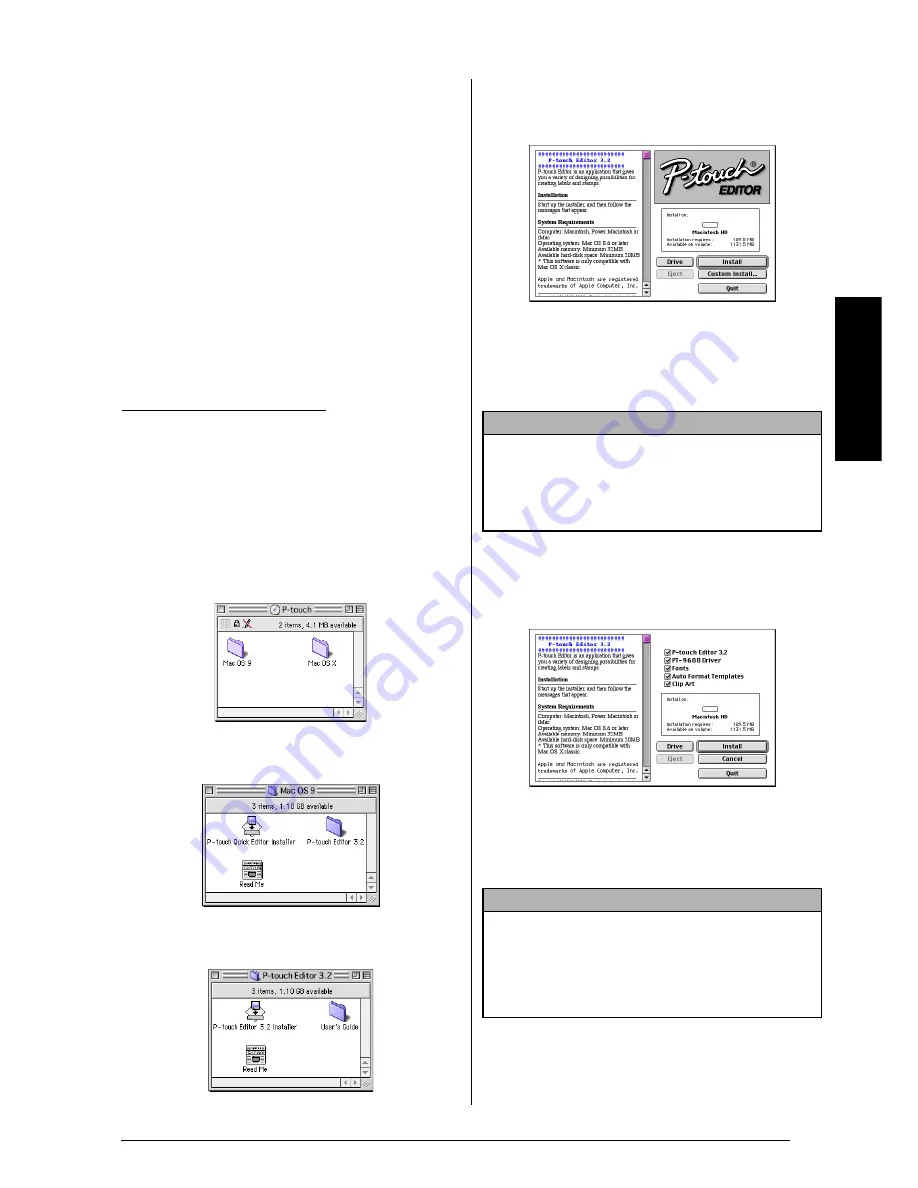
To install the P-touch Editor 3.2 software
1
With the P-touch and the Macintosh turned
off, connect the P-touch to the computer
using the enclosed USB interface cable as
described on page 9. Be sure to leave the
P-touch turned off.
2
Turn on the Macintosh.
3
Insert the enclosed CD-ROM into the com-
puter’s CD-ROM drive.
4
Double-click the Mac OS 9 folder to open
it.
5
Double-click the P-touch Editor 3.2 folder
to open it.
6
Double-click the P-touch Editor 3.2 Installer
icon in the folder that appears. The installer
starts up.
7
Select the installation method.
●
For a basic installation
Clicking the Install button immediately
starts installing all options.
●
For a custom installation
Clicking the Custom Install button dis-
plays a dialog box that allows you to
select which options to install.
Only the options with a check mark
beside them are installed. Select the
options that you wish to install, and then
click the Install button.
With a Mac OS before OS X:
NOTE
About 20 MB of available hard-disk space is
needed to begin installation. In order to install all
options, about 100 MB of available hard-disk space
is needed. If enough hard-disk space is available,
click the Install button.
NOTE
☞
In order to print from the P-touch 9600/3600,
“PT-9600/3600 Driver” must be selected for
installation.
☞
If certain options are not installed, some P-touch
Editor functions may not be available.
Summary of Contents for P-touch PT-3600
Page 12: ...vi ...
Page 13: ...1 Ch 1 Before You Start Before You Start Chapter 1 Before You Start ...
Page 17: ...5 Ch 2 Getting Started Getting Started Chapter 2 Getting Started ...
Page 54: ...42 Ch 2 Getting Started Getting Started ...
Page 55: ...43 Ch 3 Functions Functions Chapter 3 Functions ...
Page 91: ...79 Ch 4 Machine Adjustments Machine Adjustments Chapter 4 Machine Adjustments ...
Page 107: ...95 Appendix Appendix Appendix ...
Page 123: ...111 Appendix Appendix ...
Page 134: ......
Page 135: ...GUÍA DE USUARIO ...
Page 138: ...ii ...
Page 212: ...Printed in China LA8622001B ...


