19
Ch. 2 Getting Started
Ge
tti
ng
S
tar
ted
3
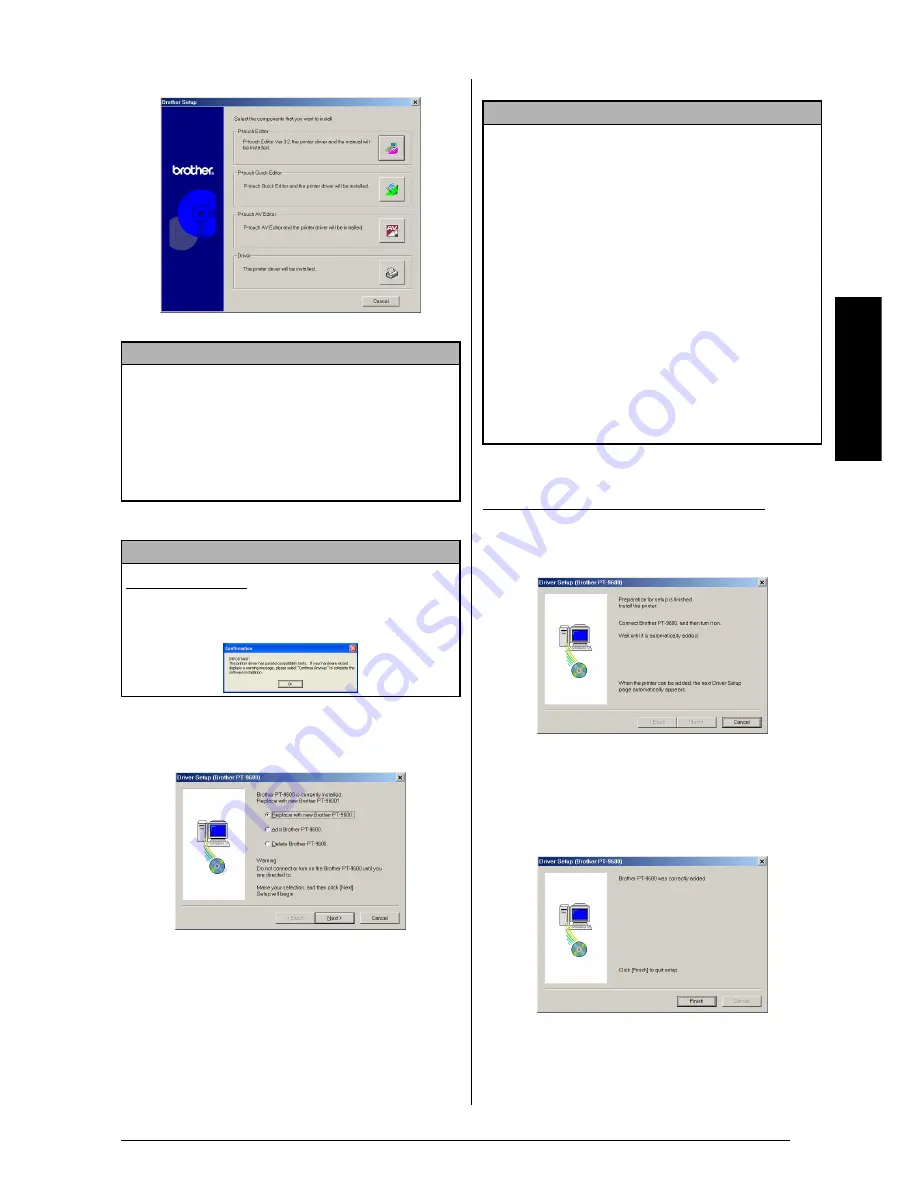
Click the lower button (Driver).
A Driver Setup dialog box appears, allow-
ing you to select whether to replace, add or
delete the PT-9600/3600 printer driver.
4
Select either “Replace with new Brother
PT-9600/3600.” or “Add Brother PT-9600/
3600.”, and then click the Next button.
5
A dialog box appears, instructing you to
connect the P-touch to the computer.
6
Connect the P-touch to the computer using
the enclosed USB interface cable as
described on page 9, and then turn on the
P-touch. A dialog box appears, indicating
that the printer driver has been installed.
NOTE
If the dialog box does not automatically appear,
double-click “My Computer” on the desktop, and
then double-click the CD-ROM drive containing
the CD-ROM. (For Windows
®
XP, click “My Com-
puter” in the Start menu, and then double-click the
CD-ROM drive containing the CD-ROM.) Next,
double-click “Setup.exe” to display the dialog box.
NOTE
Windows
®
XP only:
A message appears, informing you
that the printer driver has passed compatibility tests and
that the Continue Anyway button should be pressed if a
warning message appears. Click the OK button.
NOTE
☞
If “Replace with new Brother PT-9600/3600.” is
selected, the previously installed printer driver
is deleted, and replaced with a new one. Select
this option when upgrading the printer driver,
or when running Windows
®
2000 or XP and
changing to a P-touch 9600/3600 with a differ-
ent serial number.
☞
If “Add Brother PT-9600/3600.” is selected, a
new printer driver is added. With a USB con-
nection on Windows
®
98 or Me, only a port is
added without adding it as a new printer. Select
this option when connecting and using multiple
P-touch 9600/3600s with the same computer.
☞
To delete the printer driver
, follow the proce-
dure in
Uninstalling the printer driver
on
page 35.
With Windows
®
98, 98 SE, Me or 2000:
Summary of Contents for P-touch PT-3600
Page 12: ...vi ...
Page 13: ...1 Ch 1 Before You Start Before You Start Chapter 1 Before You Start ...
Page 17: ...5 Ch 2 Getting Started Getting Started Chapter 2 Getting Started ...
Page 54: ...42 Ch 2 Getting Started Getting Started ...
Page 55: ...43 Ch 3 Functions Functions Chapter 3 Functions ...
Page 91: ...79 Ch 4 Machine Adjustments Machine Adjustments Chapter 4 Machine Adjustments ...
Page 107: ...95 Appendix Appendix Appendix ...
Page 123: ...111 Appendix Appendix ...
Page 134: ......
Page 135: ...GUÍA DE USUARIO ...
Page 138: ...ii ...
Page 212: ...Printed in China LA8622001B ...


