8. ADJUSTMENT
BAS-311H
99
8-19. Belt tension adjustment
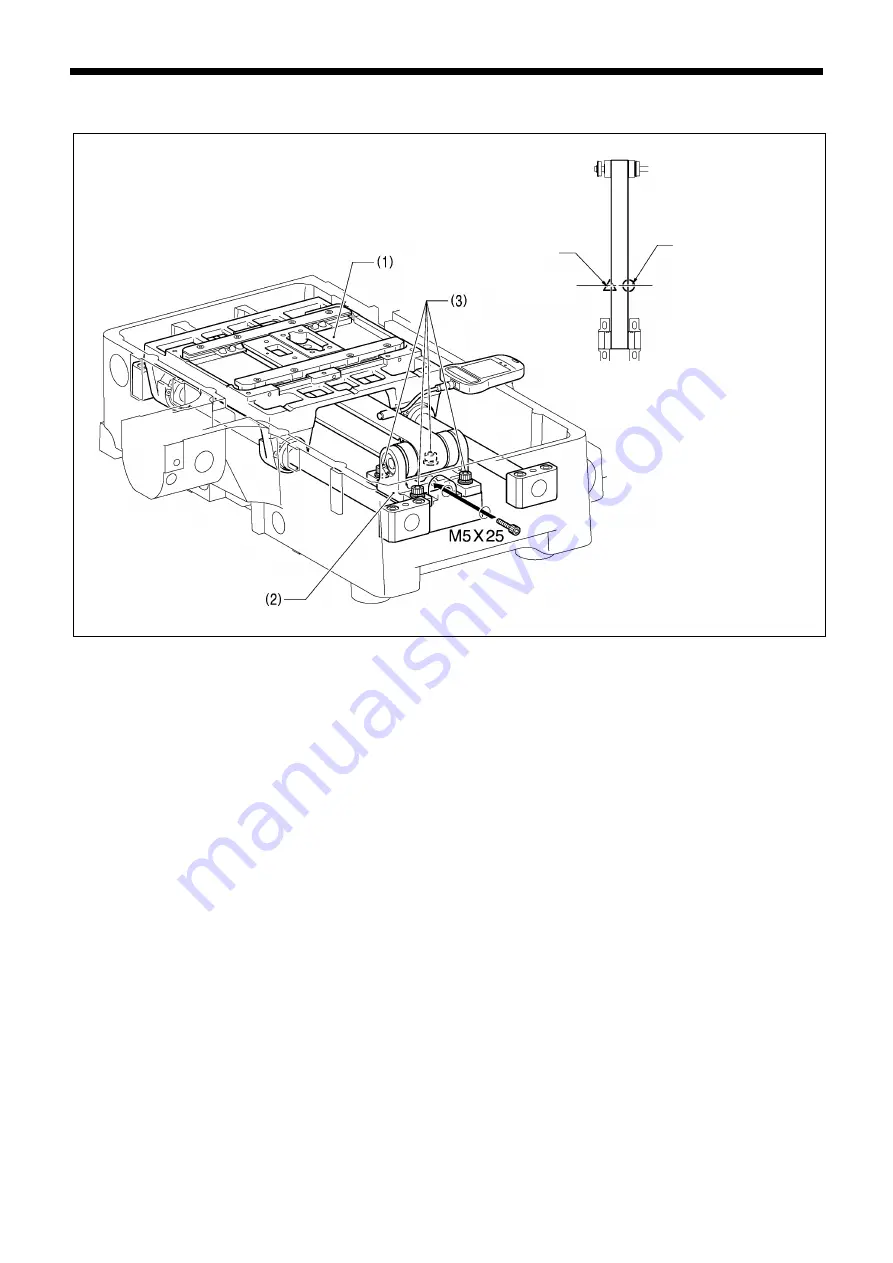
1. Move the X-feed bracket (1) at the left edge of the sewing area.
2. Loosen the four bolts (3) of the X-pulley bracket (2), and then provisionally tighten them.
3. Pass the M5 x 25 screw through the countersunk hole in the side of the bed and screw it into the tap hold in the X-pulley
bracket (2). Then pull the X-pulley bracket (2) to increase the tension.
4. Tighten the four bolts (3), and then remove the M5
×
25 screw.
5. Use a tension gauge to measure the belt tension at the middle of the lower shaft while referring to "Measurement position"
in the illustration.
*
Check that the value for the belt tension is within the following value ranges. If it is not within this range, repeat steps 3 to 5.
[For a new belt: 530 – 570N; For a reused belt: 420 – 570N.]
*
The belt tension gauge should be set to measure a unit weight of 4 g/mm
・
m , a belt width of 30 mm and a span length of
310 mm.
*
It is recommended that you use the Yunitta U-505 tension gauge.
Microphone position
Finger pressing position
Middle of lower shaft
[Measurement position]
3319B


