20
5.
Running OSD menu
5.1.
Using menu
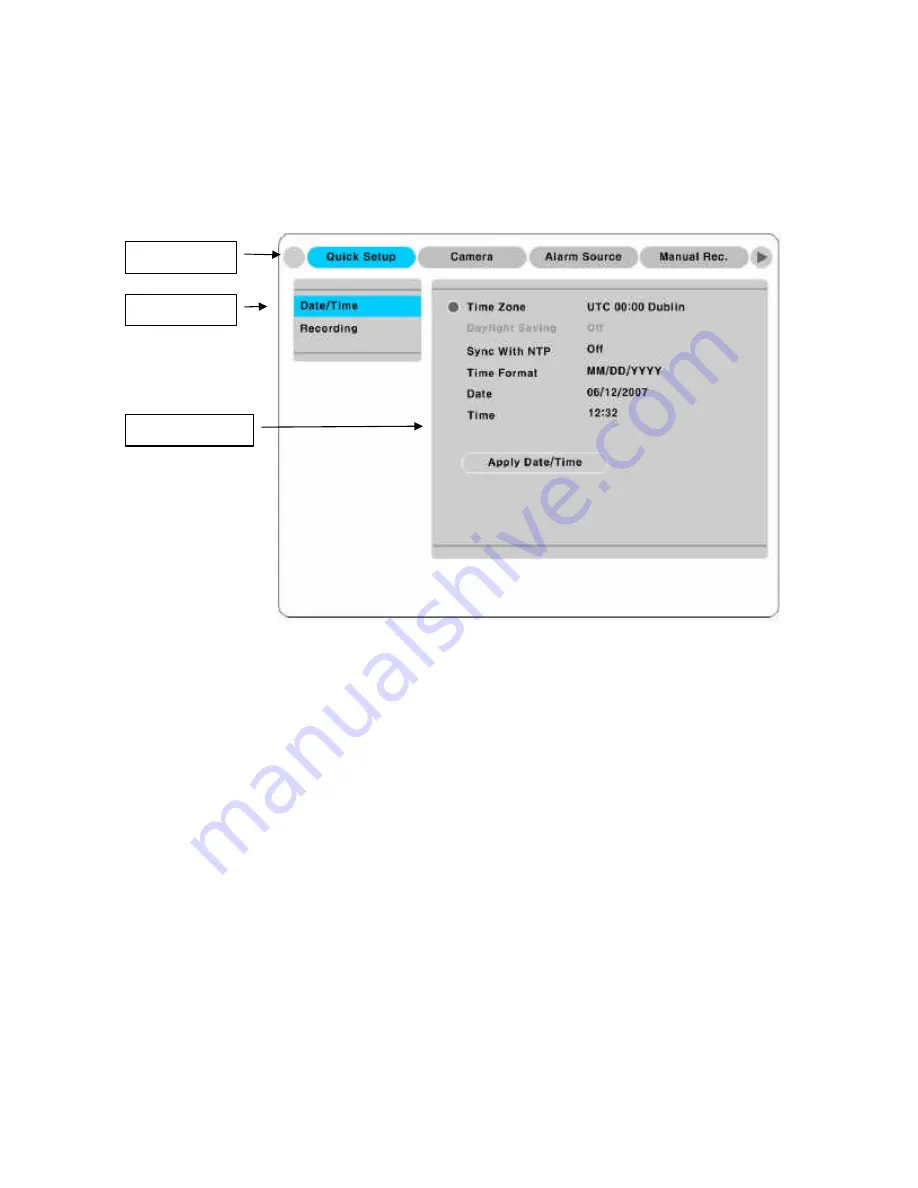
Press the [MENU] in keypad of front to open the OSD Configuration Menu
(1)
Main Menu
: The selected tab is shown in blue and the related sub-menu will be shown below the
tab. To movo to the previous/next Main Menu tab, use the [
?
/
?
] arrow buttons. To move to a sub-menu,
press the [
?
]/[? ] arrow buttons.
(2)
Sub-menu
: The selected sub-menu is shown in blue and the relaed setting will be shown the right of
the sub-menu. Use the [? /? ] arrow buttons to move within the sub-menu list. To move to the setting
page, press [
?
] button. To exit the setting page, press the [EXIT] button.
(3)
Setting Page
: The selected sub-menu is shown as a circle on the left side of the name and gray color
for setting value. To move within each page, use the [
?
/
?
] or [? /? ] arrow butons. Press the [
?
] button to
change the value of a setting. When setting value is a word, a dialogue box to edit the word will open.
When setting value is a number, it should be set with using [
?
/
?
] or [? /? ] arrow buttons. After the value
is set, press the [EXIT] button. To exit the Setting page, press the [EXIT] button.
5.2.
Dialogue box to edit a word
There are two methods to input a word..
?
Main Menu
?
Sub-menu
?
Setting Page
Summary of Contents for BL-32960M
Page 1: ...DVR Installation User s Guide BL 1680A BL 32960M v 1 4...
Page 24: ...24 7 eDVR configuration 7 1 Basic configuration 7 2 Advanced configuration...
Page 25: ...25 7 3 External storage Back up configuration 7 4 Internet Intranet configuration...
Page 35: ...35 Note Wire Handling on page 27...
Page 136: ...136 Save Settings Save present set value to USB device...
Page 181: ...181 18 3 16 Input Set sensor type user wants NC Normal Close NO Normal Open Off 18 3 17 Relay...
Page 195: ...195 APPENDIX APPENDIX APPENDIX...
Page 197: ...197...
Page 201: ...201...
Page 205: ...205 13 Install HDD RACK 14 Clise the case and drive a screw...
Page 223: ...223...


