background image

724-746-5500   |   blackbox.com 

724-746-5500   |   blackbox.com 

Page 39

KVIP1000A

Chapter 6: Troubleshooting

Before you do, make a record of the history of the problem. We will be able to provide more efficient and accurate assistance if 
you have a complete description, including:

• The nature and duration of the problem;

• When the problem occurs;

• The components involved in the problem;

• Any particular application that, when used, appears to create the problem or make it worse; and

• The results of any testing you’ve already done.

6.6 Shipping and Packaging

If you need to transport or ship your ServReach KVMGate:

• Package it carefully. We recommend that you use the original container.

•  If you are returning the unit, include everything you received with it. Before you ship a unit back to Black Box for repair or 

return, contact us to get a Return Authorization (RA) number.

Summary of Contents for ServReach KVM Gate KVIP1000A

Page 1: ...ependent of the operating system ServReach KVMGate KVIP1000A Order toll free in the U S Call 877 877 BBOX outside U S call 724 746 5500 FREE technical support 24 hours a day 7 days a week Call 724 746 5500 or fax 724 746 0746 Mailing address Black Box Corporation 1000 Park Drive Lawrence PA 15055 1018 Web site www blackbox com E mail info blackbox com Customer Support Information ...

Page 2: ...ce when the equipment is operated in a commercial environment Operation of this equipment in a residential area is likely to cause interference in which case the user at his own expense will be required to take whatever measures may be necessary to correct the interference Changes or modifications not expressly approved by the party responsible for compliance could void the user s authority to ope...

Page 3: ...impidan el flujo de aire por los orificios de ventilación 10 El equipo eléctrico deber ser situado fuera del alcance de fuentes de calor como radiadores registros de calor estufas u otros aparatos incluyendo amplificadores que producen calor 11 El aparato eléctrico deberá ser connectado a una fuente de poder sólo del tipo descrito en el instructivo de operación o como se indique en el aparato 12 P...

Page 4: ...emarks of Microsoft Corporation Novell is a registered trademark of Novell Inc Sun and Solaris are trademarks of Sun Microsystems Inc UNIX is a registered trademark of X Open Company Any other trademarks mentioned in this manual are acknowledged to be the property of the trademark owners We re here to help If you have any questions about your application or our products contact Black Box Tech Supp...

Page 5: ...ministration User Settings 17 4 3 4 Administration Switch Configuration 19 4 3 5 Administration Serial Settings 20 4 3 6 Security Settings 22 4 3 7 Security SSL Certificates 23 4 3 8 Maintenance Firmware Upgrade 24 4 3 9 Maintenance Restore Factory Settings 24 4 3 10 Saving Changes and Logging Out 25 5 Operation 26 5 1 Starting a Remote Session 26 5 2 Taking Over a Busy Remote Session 27 5 3 The T...

Page 6: ... Disconnecting the Remote Session 35 6 Troubleshooting 36 6 1 Safe Mode 36 6 2 Restoring Factory Defaults 37 6 3 Restoring the Device Firmware 38 6 4 Restoring Remote Session Disconnect 38 6 5 Calling Black Box 38 6 6 Shipping and Packaging 39 Appendix Video Resolution and Refresh Rates 40 ...

Page 7: ...nded resolution should be higher than on Target Server Video and Mouse Synchronization Both auto and manual modes Connectors 1 3 prong power receptacle 1 USB Type B female 1 RJ 45 serial RS 232 1 RJ 45 100 100 Mbps autosensing Ethernet LAN Console Monitor 1 HD15 female Keyboard and mouse 2 6 pin mini DIN female Computer Monitor 1 HD15 female Keyboard and mouse 2 6 pin mini DIN female Power 100 240...

Page 8: ...h all major operating systems Supports many hardware and software configurations for the remote client and the target server computers as well as the KVM switch in use Web based access Browser access to a target server from any location via a secure standard IP connection SNMP SNMP traps for monitoring KVMGate events and operation Multi user view mode Allows simultaneous users to view remote sessi...

Page 9: ...Gate Table 2 1 describes its components 1 2 3 Figure 2 1 KVMGate front panel Table 2 1 Front panel components Number LED Button Function 1 Power Power indicator 2 Remote Lights when a remote session is active 3 Local When you press this button KVMGate disconnects the client computer s link to the target server so you can use the local mouse and keyboard ...

Page 10: ...ake control 6 USB Type A connector Connect a USB flash key for system updates 7 LED Reserved for future use 8 LED Reserved for future use 9 RJ 45 connector Connects to serial RS 232 10 RJ 45 connector Links to LAN 11 6 pin mini DIN connector Connects to console s keyboard 12 6 pin mini DIN connector Connects to console s mouse 13 HD15 connector Links to console s monitor 14 6 pin mini DIN connecto...

Page 11: ...for safe operation is not compromised Leave a gap of at least 2 5 cm on each side of the KVMGate Mechanical loading Mount the equipment in the rack in such a way that a hazardous condition is not caused by uneven mechanical loading Circuit overloading When connecting the equipment to the supply circuit consider the effect that overloading of circuits might have on overcurrent protection and supply...

Page 12: ...t of the KVMGate 2 Connect the other end of the 3 in 1 CPU cable to the KVM ports of the target server KVM switch 3 To operate the KVM switches and servers locally connect a keyboard mouse and monitor to the KVMGate s local console connectors 4 Connect a network cable to the LAN port and to an Ethernet port on your network switch 5 Connect to the power supply using the power cord provided Figures ...

Page 13: ...724 746 5500 blackbox com Page 13 KVIP1000A Chapter 3 Installation User over IP KVM switch LAN WAN 3 in 1 CPU cable Computer rack ServReach KVMGate Figure 3 3 KVMGate connections to a KVM switch ...

Page 14: ...disable DHCP Static IP Addresses for a Number of Units If you want to connect more than one KVMGate to the same network and there is no DHCP server or you if want to use static IP addresses do the following Connect the KVMGate units one at a time and change the static IP address of each unit before connecting the next unit 4 2 Logging Into the Web Interface To complete the initial setup via the We...

Page 15: ...work Administrator for the network settings Device name Type the name for the KVMGate The default device name consists of the letter D followed by the 6 digit device number D N found on the silver label on the underside of the KVMGate box TCP Port Choose a single TCP port to use for the KVMGate Older versions of firmware allows you to select three TCP ports which must be consecutive NOTE Firewall ...

Page 16: ...ol of servers and network devices power and user administration in the data center environment ServReach KVManager combines out of band KVM via KVMGate with modern IT standards and requirements It is the most comprehensive remote server maintenance solution available in the market today Enable Centralized Management Check this option to allow KVMGate unit to be remotely managed by the ServReach KV...

Page 17: ...he following appears Figure 4 4 User settings On this page an Administrator creates and edits users There are three levels of user access Administrator User Administrator An Administrator has unrestricted access to all windows and settings and can take over any active session An Administrator can change the name and password of all users User A User has no access to the Web configuration interface...

Page 18: ...ct the permission type from the Permission box 3 Click on the Apply button and the user appears in the list of users Editing a user To edit a user 1 Select the user from the list 2 Click on the Edit button You can now change all the parameters user name permission and password 3 Click on the Apply button and to save the changes Deleting a user To delete a user 1 Select the user from the list 2 Cli...

Page 19: ...s in the Server Name section 3 Change the name of the connected servers by selecting the server and typing a new name Click on the Apply button to save changes NOTE Server names left as UNUSED cannot be accessed Install switch definition file If the KVM switch type is not listed in the manufacturer model drop down lists contact Black Box to request an updated Switch Definition file with the desire...

Page 20: ...Configuration screen when PODs are attached to the servers 4 3 5 Administration Serial Settings Where you have a serial device connected to the system you must configure the RS 232 settings To do so From the menu click Serial Settings and the Serial Settings screen appears see Figure 4 7 ...

Page 21: ...gure 4 7 Serial settings Where relevant type in a device name and choose the correct device parameters Show Check Show to make the device appear in the list of servers devices that can be accessed If there is no device connected to the particular serial port uncheck Show ...

Page 22: ...time lock or a total block Password Policy You have the option of a standard or high security password level The table below shows the parameters of the two options Table 4 1 Passwords Standard Security Password High Security Password 6 characters or more 8 characters or more must include at least 1 digit and 1 upper case letter and 1 special character as follows _ Must not include the user name M...

Page 23: ...Certificates From the menu select SSL Certificate and the SSL Certificate page appears see Figure 4 9 Figure 4 9 The SSL certificate page You can replace the current KVMGate s SSL certificate Certificate File Browse to locate the cer file Private File Browse to locate the private key file ...

Page 24: ...page see Section 4 3 1 all firmware upgrades are done via ServReach KVManager b Depending on the type of firmware upgrade the following settings may be erased user settings KVM switch settings mouse and video adjustments and RS 232 settings For more information refer to the firmware release notes The network settings remain intact 4 3 9 Maintenance Restore Factory Settings You can restore the KVMG...

Page 25: ...lick on the Restore button 4 3 10 Saving Changes and Logging Out To save any configuration changes and restart the KVMGate click on the Save Restart button To exit the configuration menu and close the session click on the Logout button Only one Administrator can log into the configuration area at a time If there s no activity for 30 minutes the session is timed out ...

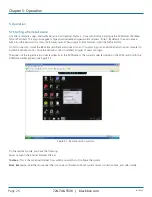
Page 26: ...Black Box certificate and ActiveX control You must login as an Administrator to your computer to install the ActiveX control Once the ActiveX control is installed all types of users can login The screen of the target server connected directly to the KVMGate or the currently selected server on the KVM switch with the KVMGate toolbar appears see Figure 5 1 Figure 5 1 Remote session window On the rem...

Page 27: ...uble click the KVMGate System tray Icon Press F9 To display the Toolbar repeat the above actions To minimize the Toolbar simply press the thumb tack and move your mouse off of the menu 5 4 Switching to a Different Server Device To connect to a different server device 1 From the Toolbar click or right click A list of connected servers devices appears 2 Click the desired server or serial device The ...

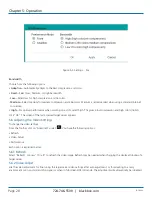
Page 28: ...n and high colors 16 bit Click OK The screen of the last accessed target server appears 5 6 Adjusting the Video Settings To change the video settings From the Toolbar click on Advanced under You have the following options Refresh Video Adjust Performance Each option is explained below 5 6 1 Refresh Select Refresh or press Ctrl R to refresh the video image Refresh may be needed when changing the di...

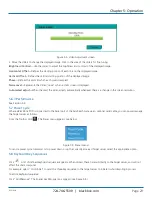
Page 29: ...henever there is a change in the screen resolution 5 6 3 Performance See Section 5 5 5 7 Power Cycle Where a Black Box POD is connected to the Serial port of the ServReach Gate via an optional serial cable you can power manage the Target server as follows From the Toolbar click The Power menu appears see below Figure 7 9 Power menu To send a power cycle command or to power down or up the currently...

Page 30: ...lick Add Predefined A list of sequences appears 2 Select the desired sequence and click OK The sequence appears in the Special Key Manager box 3 Click OK The sequence appears in the Keyboard Key sequence list To record a key sequence 1 From the Special Key Manager box press Record New The Add Special Key box appears see Figure 5 6 ...

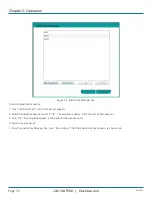
Page 31: ...l box 3 Click Start Recording 4 Press the desired keys The keys appear in the area provided 5 Click Stop Recording 6 Click OK To edit a key sequence 1 From the Special Key Manager box select the desired key 2 Click Edit 3 Click Start Recording 4 Press the desired keys The keys appear in the area provided 5 Click Stop Recording 6 Click OK ...

Page 32: ...than the client computer Calibrating automatically discovers the mouse speed of the target server and aligns the two pointers To perform the calibration when the target server operating system is Windows NT 4 2000 or 98 From the Toolbar click Calibrate KVMGate saves this alignment so calibration is only needed once per target server If the video noise level is above zero calibration may not work G...

Page 33: ...server s Mouse Properties window Mice synchronization examples a For Windows XP go to the Mouse settings on the target server and uncheck Enhance pointer precision b For Windows NT4 if Mouse Properties were ever changed for the target server even if they have been returned to their original state uncheck default Click OK The mouse pointers should be synchronized USB The USB option in mouse setting...

Page 34: ...Gate For example if the local mouse is a non Microsoft two button mouse select Standard Mouse and uncheck Microsoft Mouse Max Rate this defines the maximum mouse report rate For Sun Solaris the default value is 20 to support older Sun versions 5 10 Black Box Logo Menu Features Right click the Black Box logo and a menu appears From this menu you can access the connected devices You also have the fo...

Page 35: ...mode 1 Make sure that the client computer has the same screen resolution as the target server 2 Press F11 The Internet Explorer window disappears leaving the Internet Explorer menu bar at the top 3 Right click the Internet Explorer menu bar and check Auto Hide The Internet Explorer menu bar disappears You are in full screen mode To exit full screen mode Press F11 Or place the mouse at the top of t...

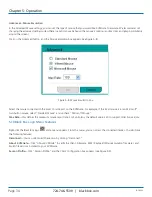
Page 36: ...ress and hold down the Local button on the front of the unit for 3 4 seconds while powering up the KVMGate The device boots up in safe mode 2 Wait until the unit finishes booting 3 You need to know the IP address of the KVMGate The IP address depends on whether there is a DHCP server on the network If there is the DHCP server assigns an IP address to the KVMGate If there is no DHCP server the unit...

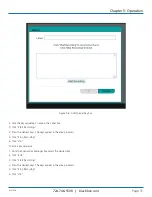
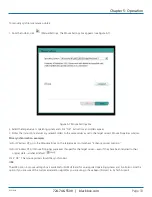
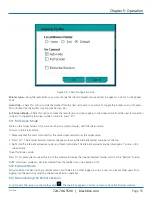
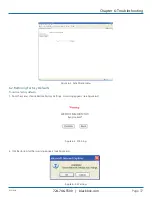
Page 37: ...oting Figure 6 2 Safe Mode menu 6 2 Restoring Factory Defaults To restore factory defaults 1 From the menu choose Restore Factory Settings A warning appears see Figure 6 3 Figure 6 3 Warning 2 Click Restore A further warning appears see Figure 6 4 Figure 6 4 Warning ...

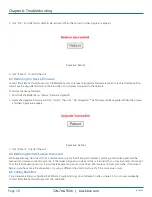
Page 38: ...pgraded When the process is finished Figure 6 6 appears Figure 6 6 Reboot 3 Click Reboot to restart the unit 6 4 Restoring Remote Session Disconnect When experiencing disconnects from a remote session verify that the target computer is sending a valid video signal and the keyboard and mouse connections are live If the target computer is in sleep mode or is turned off you may encounter disconnects ...

Page 39: ...omponents involved in the problem Any particular application that when used appears to create the problem or make it worse and The results of any testing you ve already done 6 6 Shipping and Packaging If you need to transport or ship your ServReach KVMGate Package it carefully We recommend that you use the original container If you are returning the unit include everything you received with it Bef...

Page 40: ...Rates Appendix Video Resolution and Refresh Rates Hz 56 60 65 66 70 72 73 75 76 85 86 640 x 480 x x x x x x 720 x 400 x x 800 x 600 x x x x x x 1024 x 768 x x x x x x x 1152 x 864 x 1152 x 900 x x 1280 x 720 x 1280 x 768 x x 1280 x 960 x x 1280 x 1024 x x x x x 1600 x 1200 x x x x x ...

Page 41: ...724 746 5500 blackbox com Page 41 KVIP1000A NOTES ...

Page 42: ...724 746 5500 blackbox com Page 42 KVIP1000A NOTES ...

Page 43: ...724 746 5500 blackbox com Page 43 KVIP1000A NOTES ...

Page 44: ...cabinets and racks and power and surge protection products to media converters and Ethernet switches all supported by free live 24 7 Tech support available in 20 seconds or less Copyright 2010 All rights reserved Black Box Tech Support FREE Live 24 7 Tech support the way it should be Great tech support is just 20 seconds away at 724 746 5500 or blackbox com KVIP1000A rev 1 ...

Reviews: