30
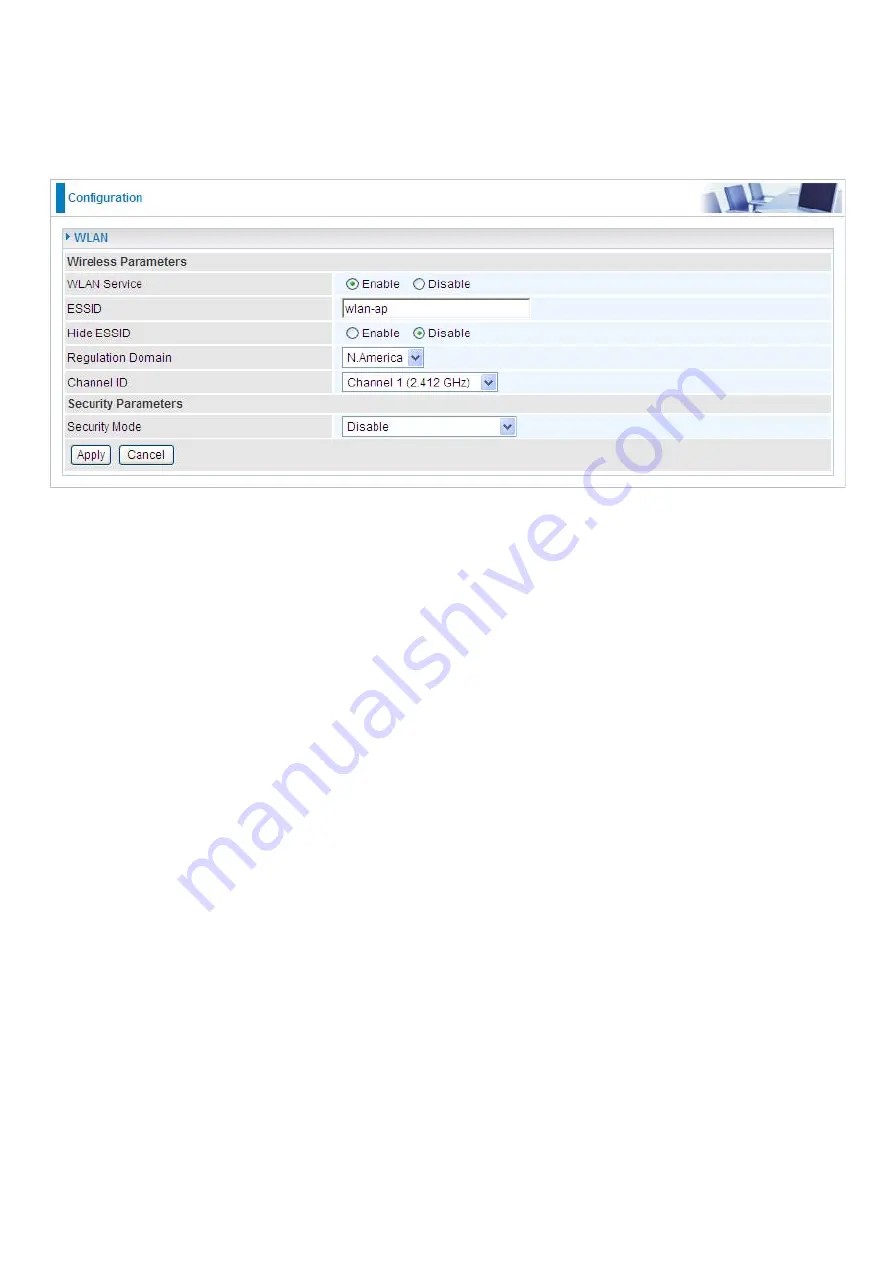
WLAN
WLAN Service:
Default setting is set to
Enable
.
ESSID:
The ESSID is the unique name of a wireless access point (AP) to be distinguished from
another. For security propose, change to
a unique ID name to the AP which is already built-in to the
router’s wireless interface. It is case sensitive and must not excess 32 characters. Make sure your
wireless clients have exactly the ESSID as the device, in order to get connected to your network.
Note:
ESSID is case sensitive and must not excess 32 characters.
Hide ESSID:
It is function in which transmits its ESSID to the air so that when wireless client searches
for a network, router can then be discovered and recognized. Default setting is
Disable.
~
Enable:
Select Enable if you do not want broadcast your ESSID. When select Enable, the ESSID
will be hided in stead of broadcasting, thus when wireless client searches for this AP, failure occurs.
This ESSID(AP) will be invisible to you. In this case, if you want to join this wireless network, enter the
exactly ESSID manually and some security settings.
~
Disable:
When Disable is selected, the router will broadcast the ESSID to allow anybody with a
wireless client to be able to identify the Access Point (AP) of your router. Select the specific ESSID
scanned, with some security settings, you will join this wireless network.
Regulation Domain:
There are seven Regulation Domains for you to choose from, including
North
America (N.America)
,
Europe
,
France
, etc. The Channel ID will be different based on this setting.
Channel ID:
Select the ID channel that you would like to use.
Security Mode:
You can disable or enable with WPA or WEP for protecting wireless network. The
default mode of wireless security is
Disable
.
Summary of Contents for BiPAC 6200WZL R2
Page 11: ...7 Applications of 6200WZL R2...
Page 12: ...8 Chapter 2 Product Overview Important note for using this router...
Page 95: ...91 3 Choose the directory which you want to delete then click Delete to romove this directory...
Page 96: ...92 Samba Server...
Page 102: ...98 Step 3 To continue click Next Step 4 Select network printer and apply Next button...
Page 104: ...100 Step 7 Click Finish to complete the add printer...
Page 124: ...120 Enter the necessary message and press Reload Delete...


