8‐5
4. Trace
4-1. Perimeter trace
*Be sure the Frame Limit parameters in the MC (Machine Condition) are correctly set
before using this feature.
*The 4-corner trace takes into consideration any of the Program parameters that may have
been altered.
The Pantograph make a 4 corner trace of the design to ensure proper placement of the
Pantograph. This feature is only available in Drive mode and SHOULD be done before
sewing.
1. Press the
Drive Key
and open the Drive Mode Screen.
2. Press the
A-key below the
icon.
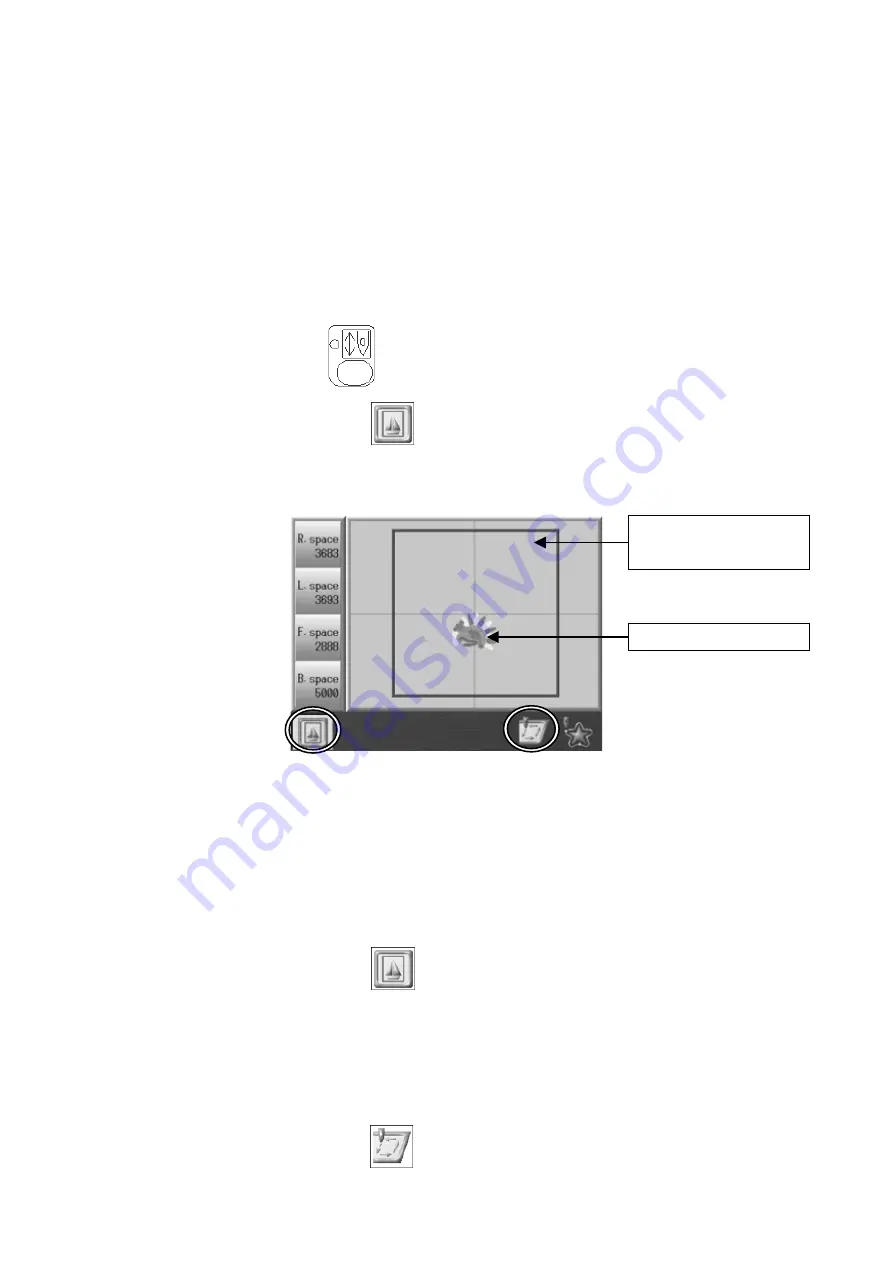
3. The Trace screen appears.
Following information are shown on this page:
R.space: Distance from the design to the right end of the frame
L.space: Distance from the design to the left end of the frame
F.space: Distance from the design to the front end of the frame
B.space: Distance from the design to the back end of the frame
Press the A-key below the
icon again to go back to the Drive Mode screen.
4. The design moves as the Pantograph moves with the Jog keys.
The borderline is normally shown in Blue. However, as the design gets closer to the line,
it turns to yellow, then red.
5. Press the
F-key below the
icon to start the Perimeter trace.
The bordered line of
the area can be sewn.
The design to be sewn
Summary of Contents for BEXS
Page 1: ...B E X S Instruction Manual ...
Page 12: ...1 7 Warning Labels Contents Hook Warning Label Belt Warning Label ...
Page 18: ...3 2 1 Appearance and Components ...
Page 19: ...3 3 ...
Page 186: ...Embroidery Machine BEXR BEXS BEXY series Mechanical Guide ...
Page 194: ...1 6 X Series Mechanical Guide ...
Page 196: ...1 8 X Series Mechanical Guide ...
Page 199: ...X Series Mechanical Guide 1 11 ...
Page 201: ...X Series Mechanical Guide 1 13 ...
Page 233: ...13 1 Trade Marks WindowsTM is the trademark of the Microsoft Inc ...


