


R5911443 /02
UDM
120
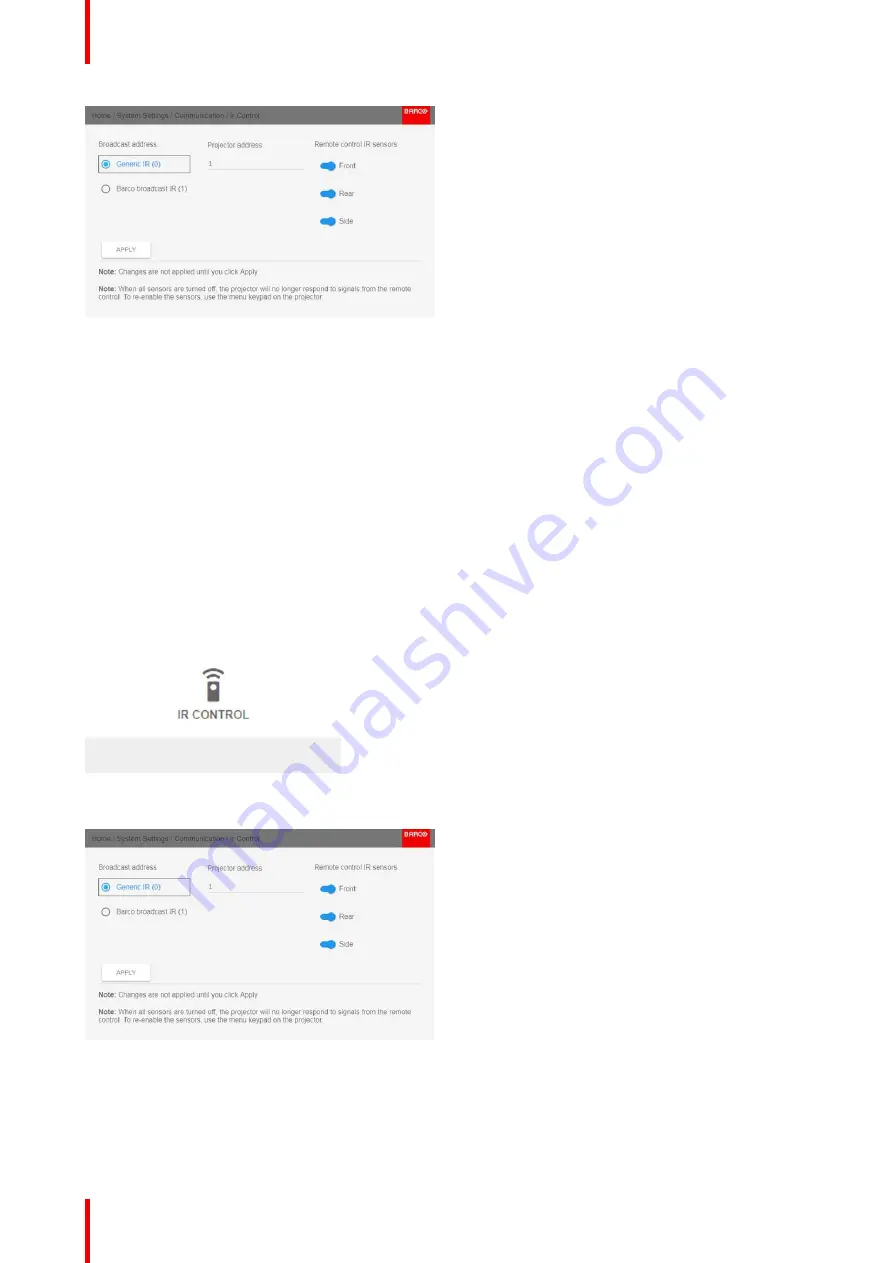
Image 10-12: IR control menu
2.
Select the current projector address and enter a new address.
3.
Select
APPLY
and click
OK
to apply the changes.
From now on the projector will only listen to this new address and to its broadcast address.
10.2.3 IR sensors
What can be done?
Each IR sensor can be individually disabled or enabled.
When all sensors are turned off, the projector will no longer respond to signals from the remote control. To re-
enable the sensors, use the menu keypad on the projector.
How to disable
1.
In the main menu, select
System Settings
→
Communication
→
IR Control
.
Image 10-13: Communication menu, IR control
The IR control menu is displayed.
Image 10-14: IR control menu
2.
To disable an IR sensor, select the slider and drag to the left.
A blue slider means an active IR sensor.
A gray slider means an inactive IR sensor.
Summary of Contents for UDM Series
Page 1: ...ENABLING BRIGHT OUTCOMES User manual UDM...
Page 22: ...R5911443 02 UDM 22 Safety information...
Page 48: ...R5911443 02 UDM 48 Input Communication...
Page 53: ...R5911443 02 UDM 53 4 To turn the test pattern off return to the previous menu GUI Introduction...
Page 54: ...R5911443 02 UDM 54 GUI Introduction...
Page 60: ...R5911443 02 UDM 60 GUI Source...
Page 112: ...R5911443 02 UDM 112 GUI Profiles...
Page 156: ...R5911443 02 UDM 156 Specifications...
Page 166: ...R5911443 02 UDM 166 Video timing tables...
Page 172: ...R5911443 02 UDM 172 DMX chart...
Page 176: ...R5911443 02 UDM 176 WiFi GSM compliance information...
Page 182: ...R5911443 02 UDM 182 Environmental information...


