


R5911443 /02
UDM
110
Image 9-2
Image 9-3: Press OK
3.
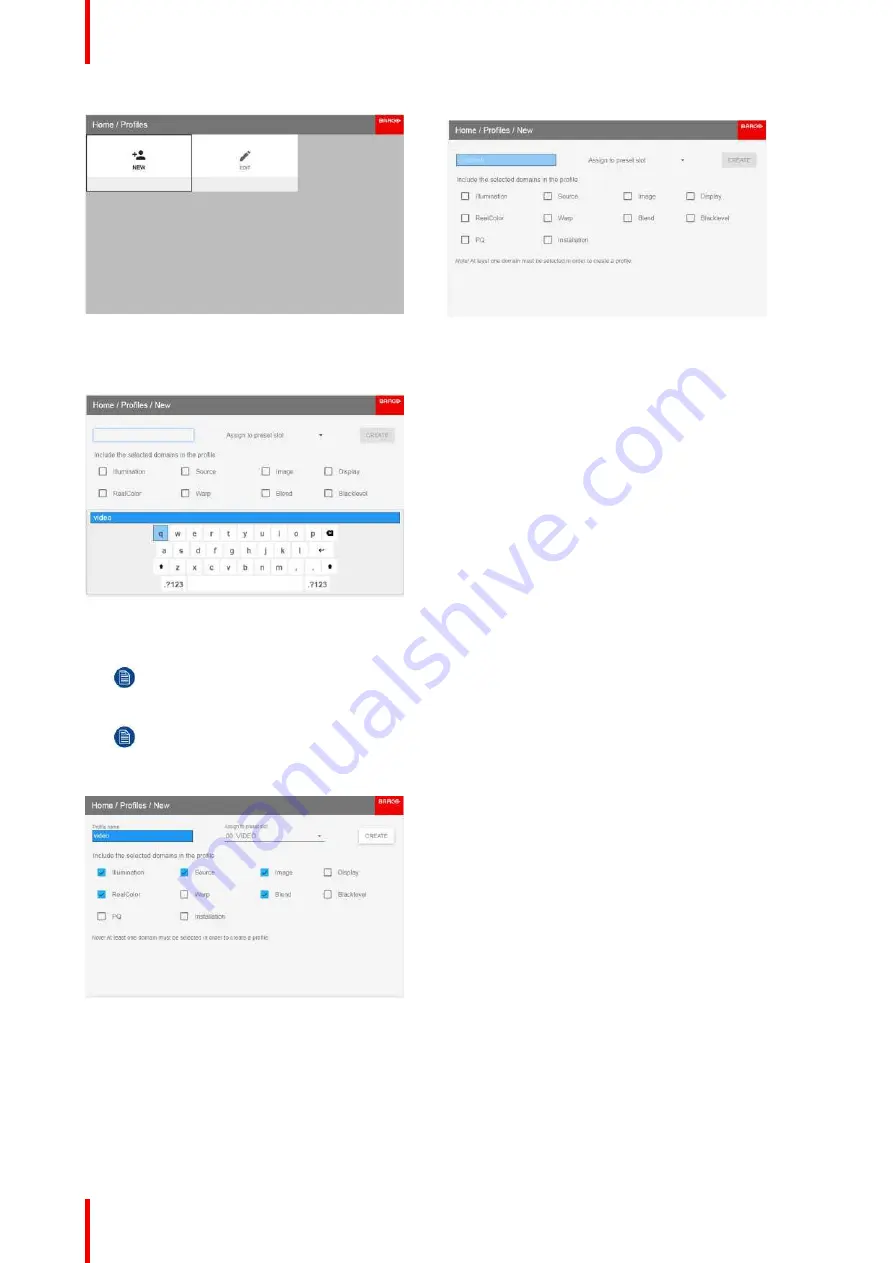
Enter a suitable name for this profile via the pop up keyboard (arrow keys and OK (
✓
) to select). End the name
entry by selecting the
“
return
”
key on the pop up keyboard.
Image 9-4: Enter a name for the profile
4.
Select the
“
Assign to preset slot
”
. A drop down menu will show up, select the preferred value.
Note:
The function
“
Assign to preset slot
”
enables a shortcut to the actual profile from the remote
control. If assigned preset slot are set to 1, this profile can be recalled by pressing the key MACRO
and then 01 on the remote control. It is not a requirement to use this function, just an option.
Note:
The maximum number of profile presets is 30.
5.
Select the domains in the menu that shall be stored in the profile.
Image 9-5: Select domains
6.
Select
“
create
”
and confirm by the OK button.
The profile
“
video
”
are now created and saved.
7.
Repeat step 1 to 6 for creating of more profiles.
Summary of Contents for UDM Series
Page 1: ...ENABLING BRIGHT OUTCOMES User manual UDM...
Page 22: ...R5911443 02 UDM 22 Safety information...
Page 48: ...R5911443 02 UDM 48 Input Communication...
Page 53: ...R5911443 02 UDM 53 4 To turn the test pattern off return to the previous menu GUI Introduction...
Page 54: ...R5911443 02 UDM 54 GUI Introduction...
Page 60: ...R5911443 02 UDM 60 GUI Source...
Page 112: ...R5911443 02 UDM 112 GUI Profiles...
Page 156: ...R5911443 02 UDM 156 Specifications...
Page 166: ...R5911443 02 UDM 166 Video timing tables...
Page 172: ...R5911443 02 UDM 172 DMX chart...
Page 176: ...R5911443 02 UDM 176 WiFi GSM compliance information...
Page 182: ...R5911443 02 UDM 182 Environmental information...


