Installing drivers and software
57
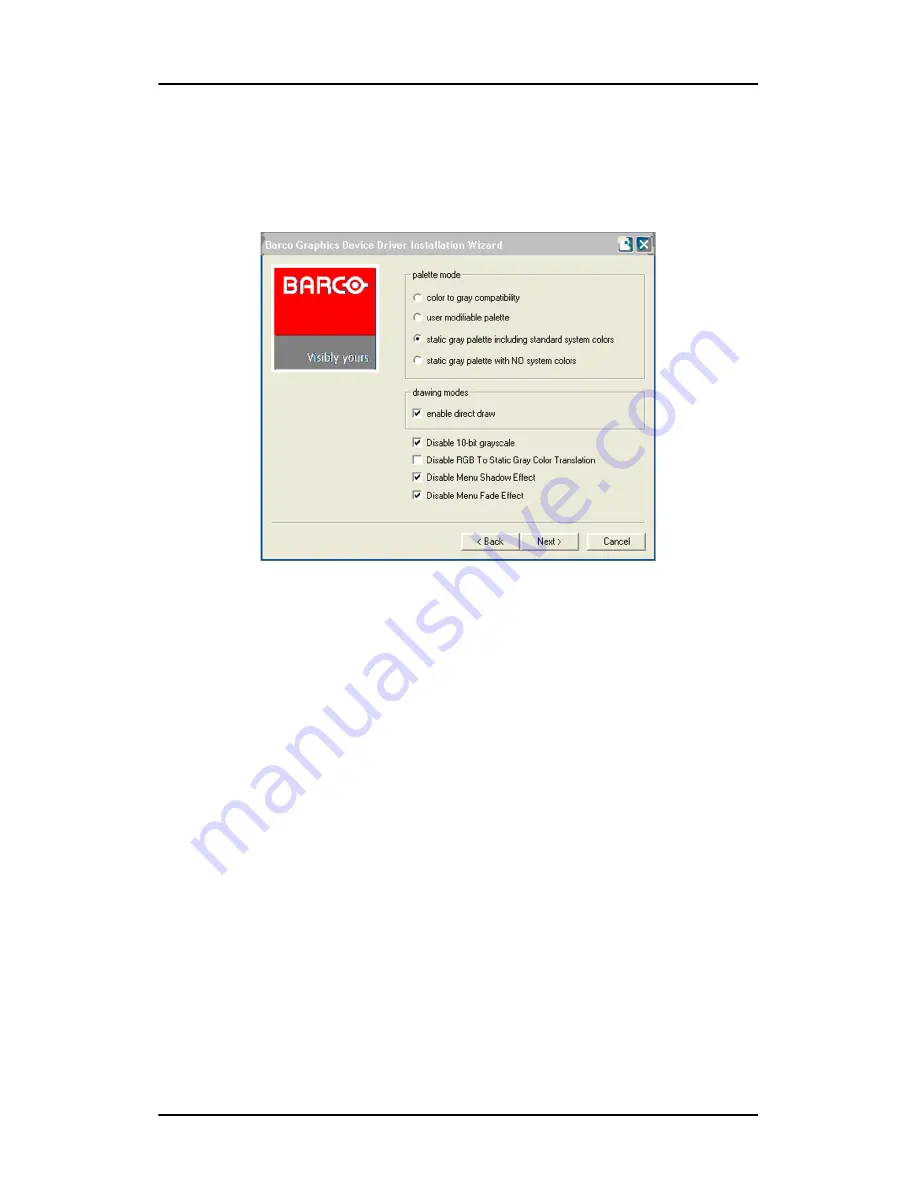
settings required for your viewing application, you may select
them now and then click
Next
. You may change these settings
later by using the Barco pages of the
Windows Display Control
Panel
.
Figure 28:
Please refer to your application manuals for information on the
correct Palette and Drawing modes to select.
6.
When the driver setup is complete, click the
Finish
button.
The Barco Product Installation Wizard will now guide you through
the installation of MediCal QAWeb, BarcoMed SelfExam, and the
Barco on-line documentation.
7.
When the Setup complete message appears, select
Reboot
System Now
and click
Finish
.
Automated display configuration
Once the drivers, software and documentation have been installed and
your system has been rebooted, the
Barco Monitor Plug and Play
Software
should automatically detect your Barco displays and attach
them to the desktop with the correct resolution. If the
Barco Monitor
Plug and Play Software
fails to detect your Barco displays or fails to
Summary of Contents for Coronis MDCC 2121
Page 1: ...MDCC 2121 MDCC 3120 MDCG 2121 MDCG 3120 MDCG 3121 MDCG 5121 Getting started guide...
Page 2: ...This page intentionally left blank 2 This page intentionally left blank...
Page 4: ...This page intentionally left blank 4 This page intentionally left blank...
Page 7: ...7 Preface...
Page 17: ...17 Introduction...
Page 24: ...Display parts controls and connectors This page intentionally left blank 24...
Page 25: ...25 Display controller installation...
Page 33: ...33 Display installation...
Page 43: ...Connecting the signal cables 43 Figure 22 External DC power supply...
Page 46: ...Cable routing 46 Figure 25 Installation complete...
Page 49: ...49 Display controller software installation...
Page 60: ...Installing drivers and software This page intentionally left blank 60...
Page 61: ...61 Where to get more information...
Page 63: ...Where to get more information 63...
Page 64: ...Where to get more information This page intentionally left blank 64...
Page 65: ...65 Troubleshooting...
Page 70: ...General tips This page intentionally left blank 70...
Page 71: ...71 Warranty Statement...
Page 74: ...Warranty Statement 74...
Page 75: ...B410578 00 January 2007...


